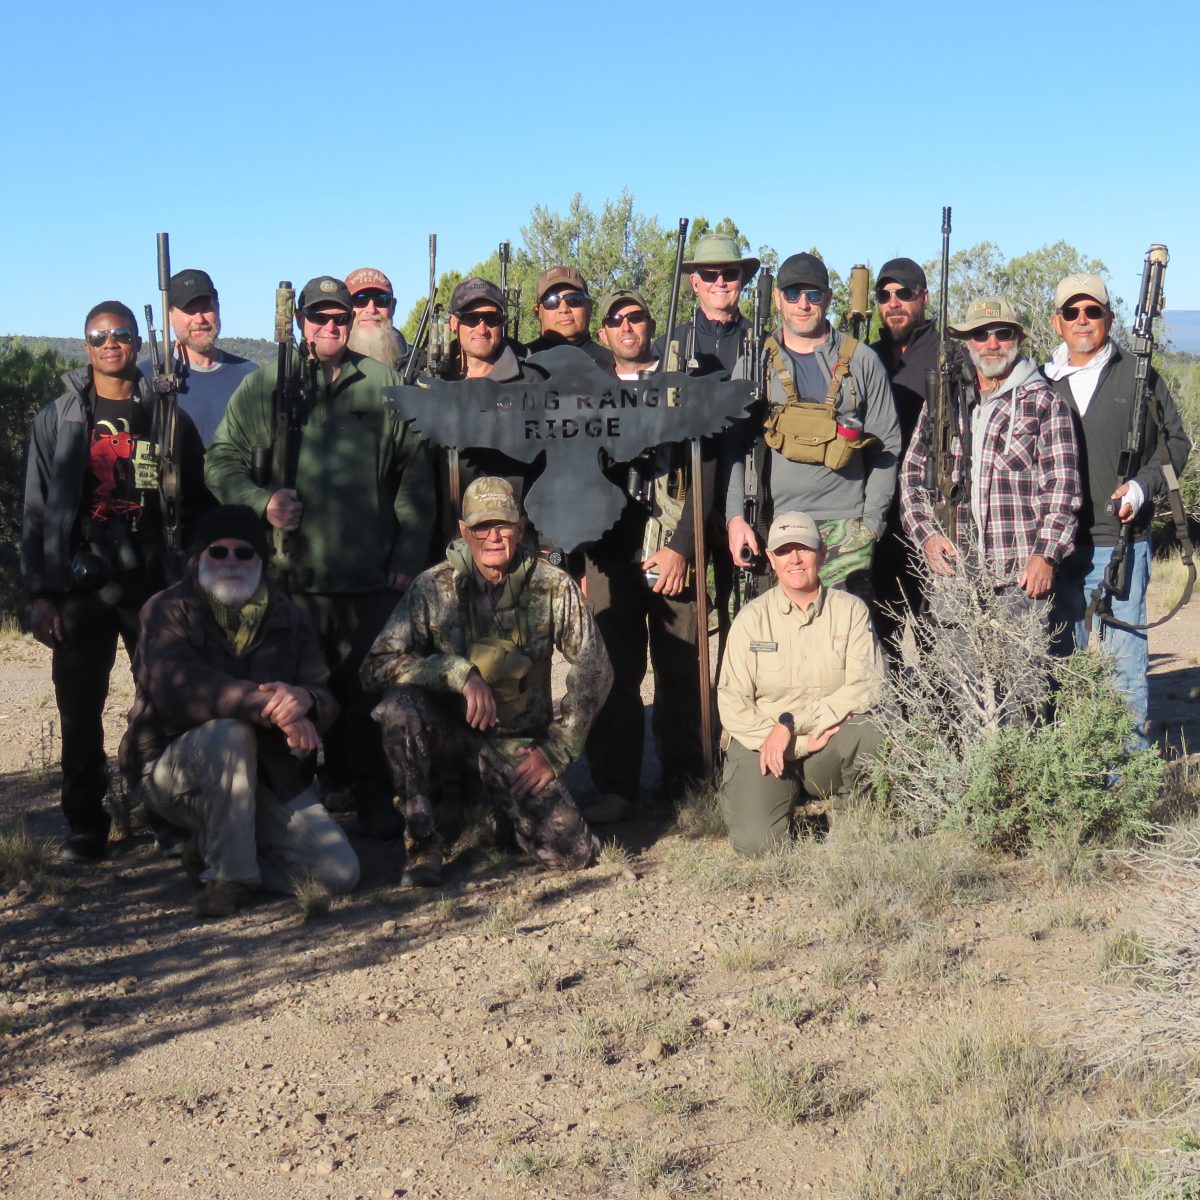
When I signed up for the PR7 course at Gunsite, I was really looking forward to it. I’d received a verbal invitation from the Training Coordinator, Dave Hartman, but it took over a year to finally pull it all together.
I had no idea how tough the course was going to be. Although I’d read the description on the website, I still didn’t have a good grasp of everything I would learn.
This seven-day grind, taught masterfully by expert instructors, was a revelation. Because it was difficult, I cherish the knowledge I gained even more.
My goal in writing this review is twofold: I hope to share my experience and educate potential students on what to bring and how to prepare.
So buckle up, reader, some of what I describe is not for the faint of heart! But you should know it before you decide to go.
Table of Contents
Loading…
What It Is
The description on Gunsite’s website does an ample job of detailing what you’ll actually do, but falls short of encompassing the entire experience.
I took over 4,000 words of notes in my phone and also filled out most of a 4×6 notebook, so even my compressed effort will only provide a little more detail.
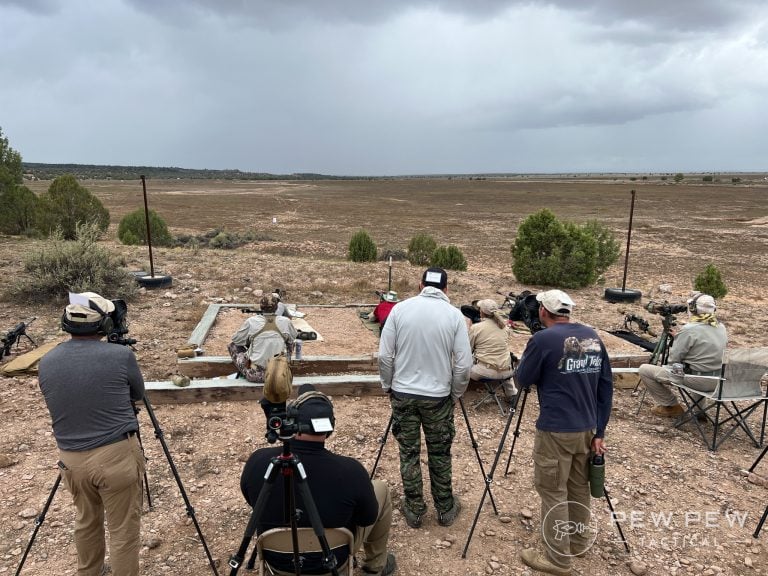
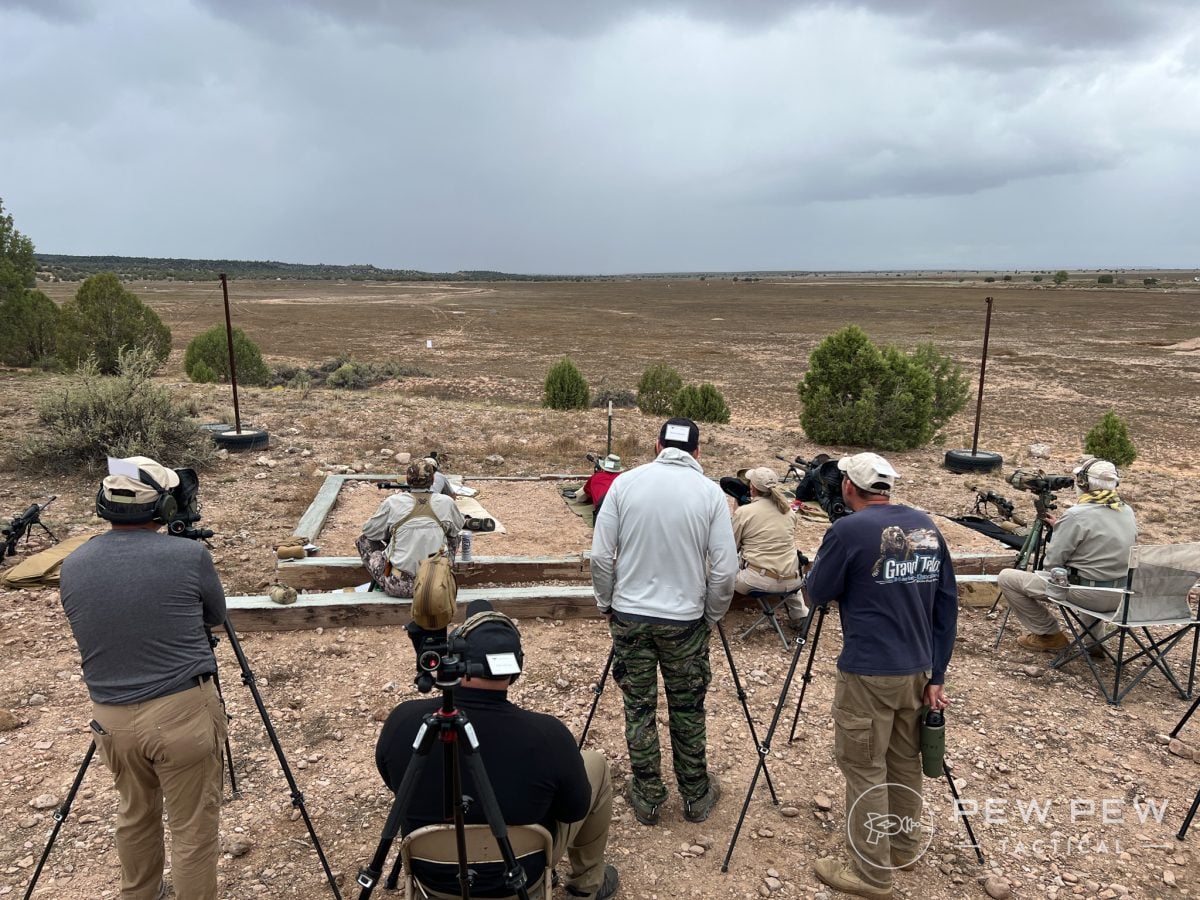
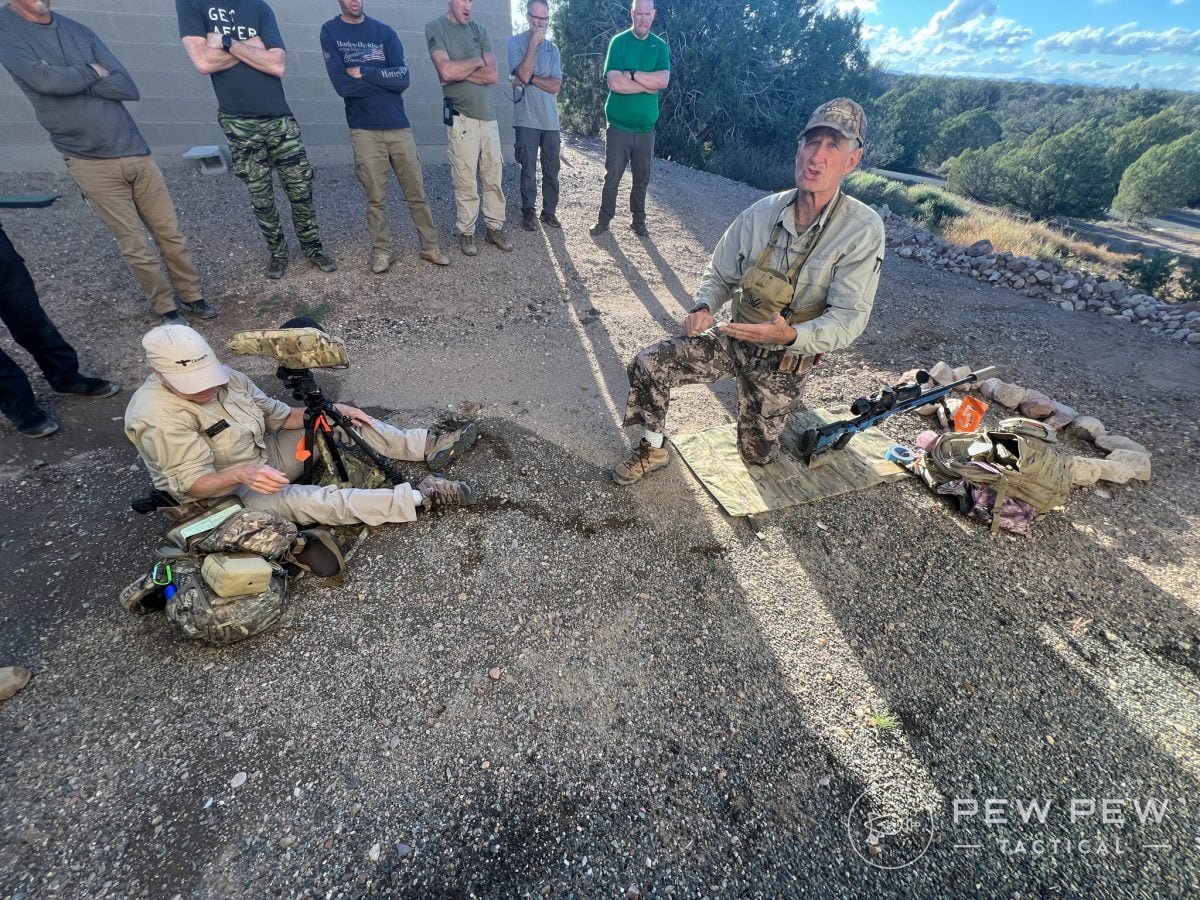
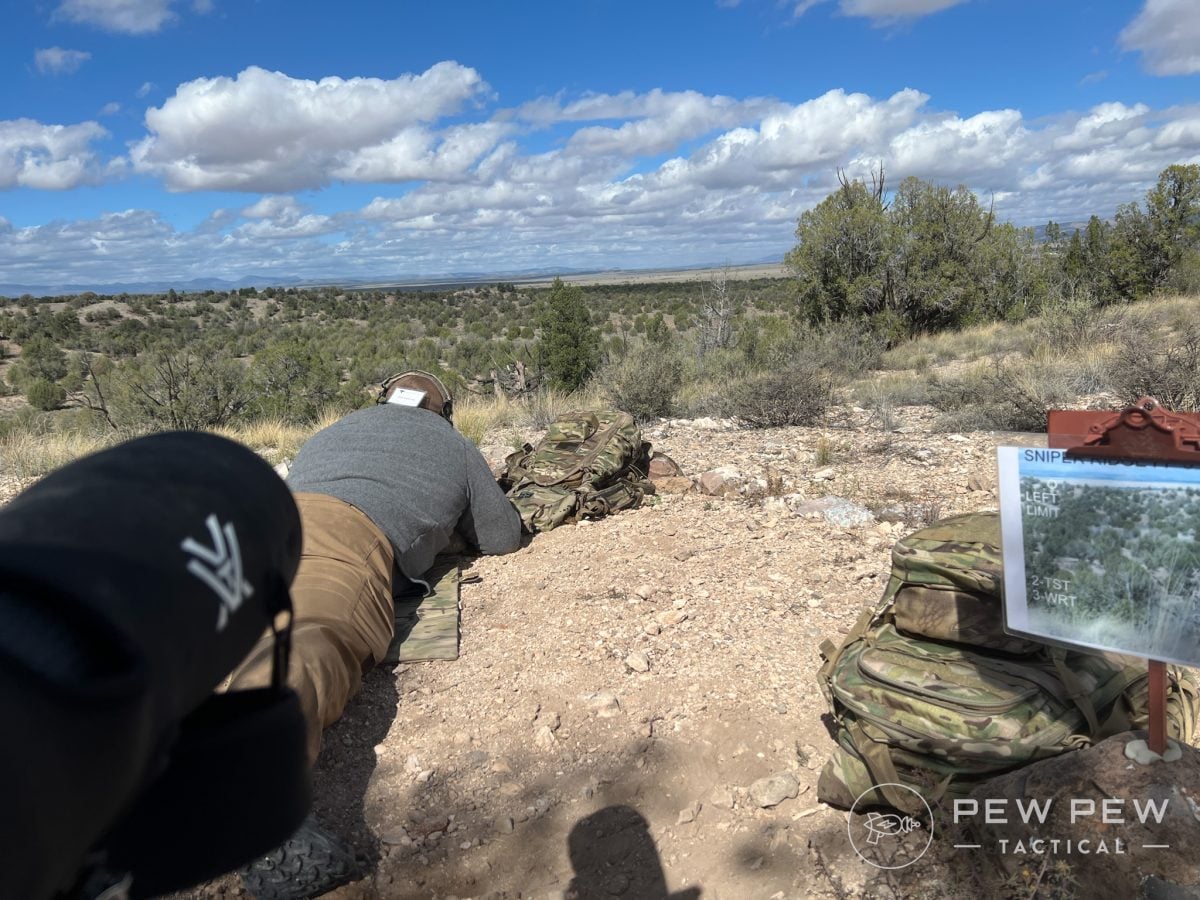
You will be paired with another shooter (if you don’t bring a partner) and learn to work as a team to accomplish all the course goals. Gunsite teaches to a standard, and there is a test at the end, which takes the form of a competition.
First and foremost, one of the greatest skills you will learn in the PR7 course is reading the wind. The instructors describe it as the number one reason we miss distance shots, and I observed this repeatedly demonstrated.
What I mean by “reading the wind” is looking downrange at your target and using clues to give your shooter the proper adjustment to hit the target before they shoot. It’s arguably even more important to read and call the wind after a miss.
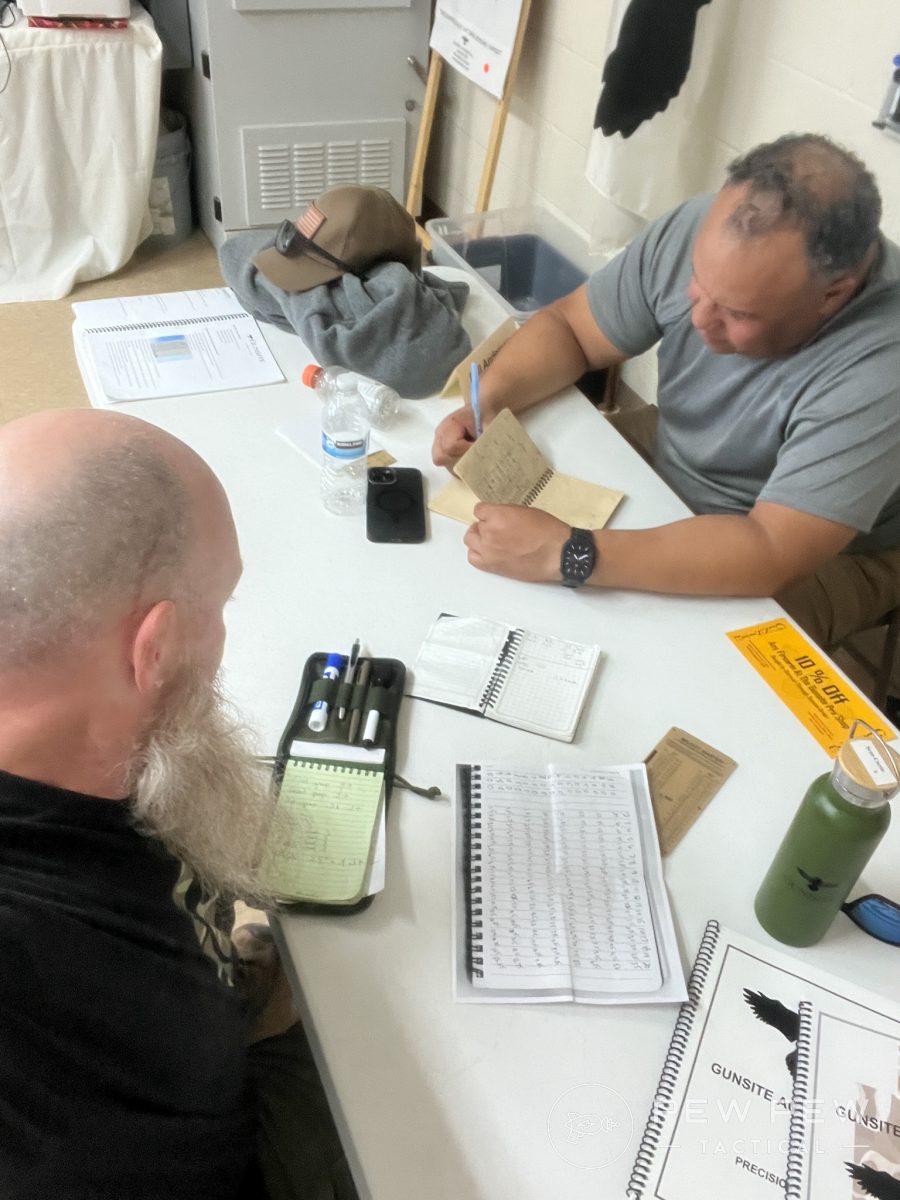
Another skill we learned was how to determine our “come-ups”. This is essentially what you need to dial in elevation on your optic to hit targets at progressive distances.
Often referred to as DOPE (Data of Previous Engagement), we were taught how to establish a card with all our adjustments for varying distances. It became crucial information that we applied for the entirety of the course.
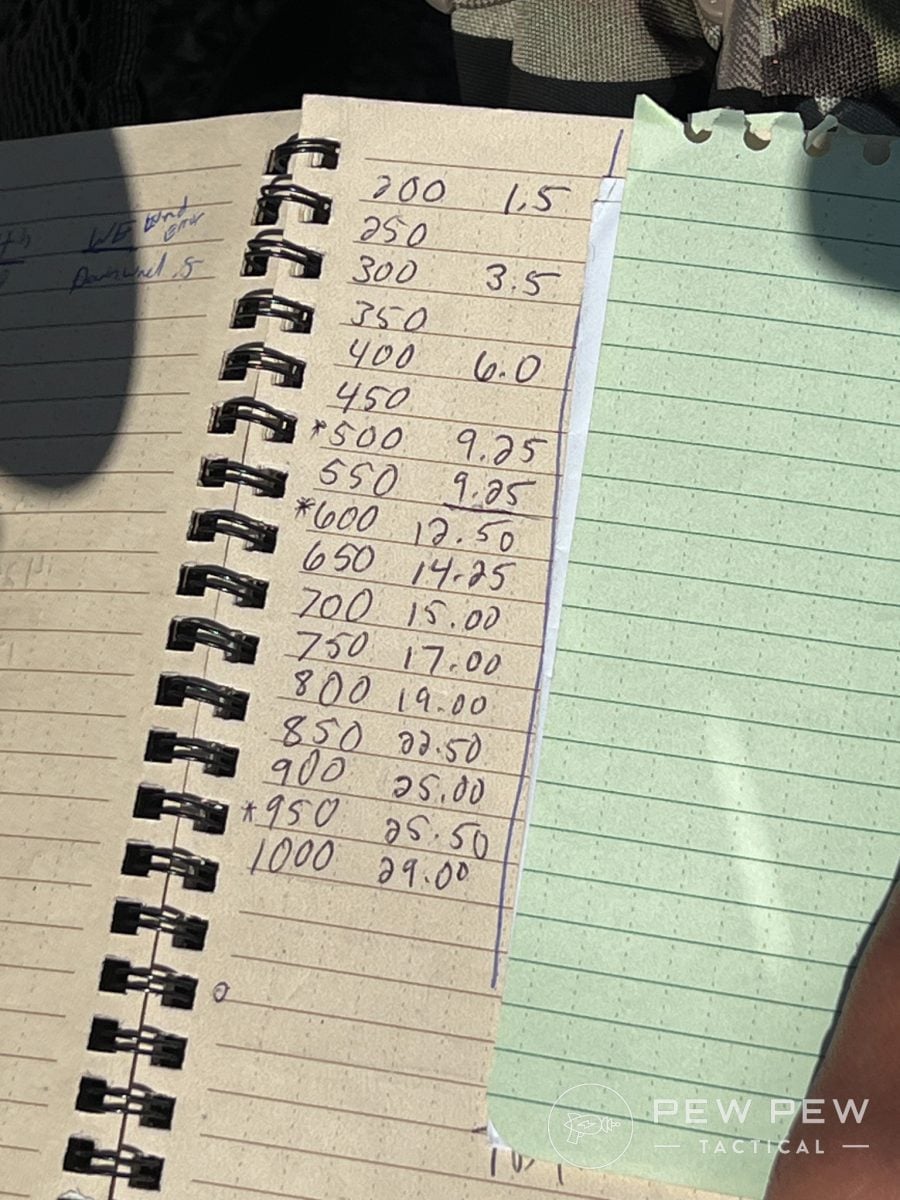
We also learned how to range unknown distance targets by using our reticles to measure, then plugging in that data into a slide rule called a Mildot Master to come up with a shooting solution. This was pretty challenging.

-
25% off all OAKLEY products - OAKLEY25
Copied! Visit Merchant
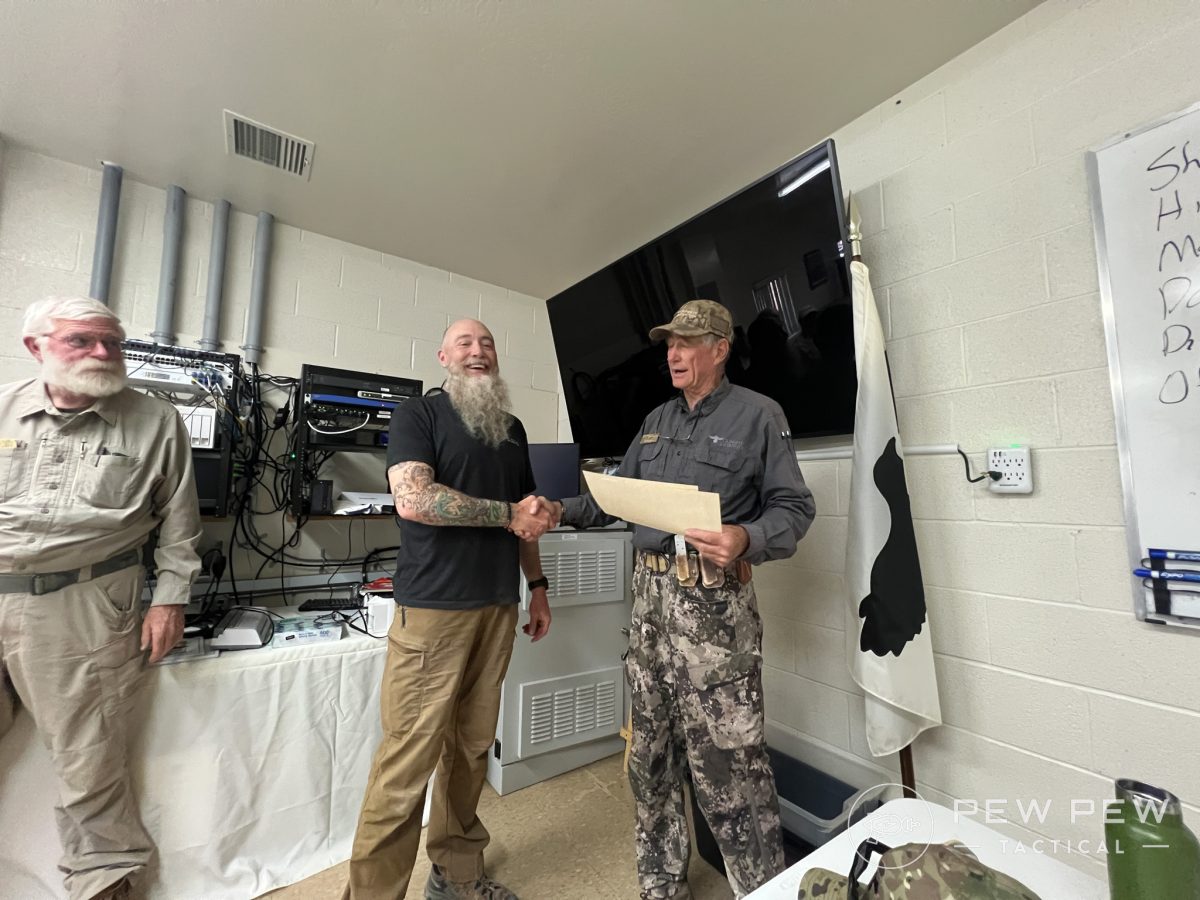
CEO Ken Campbell told us at the beginning of the course that it was wise to bring an extra brain because the class is one of the most difficult at Gunsite. Throughout the week, when slack jaws and vacant stares permeated the classroom, the instructors reminded us that the course is hard.
What it Isn’t
You don’t need to be a pro shooter in order to attend this course, but it will be helpful if you already have a skill set that includes knowing how to build a prone shooting position.
The instructors are well-versed in dealing with students of varying proficiency, so they didn’t spend much time demonstrating this skill in our class.
I did hear instructors offering corrections when they watched our performance, but don’t expect several hours of instruction on this element.
You should have a good idea of how to set up your bipod and use a rear bag to establish a stable shooting position. If you aren’t comfortable with this yet, check out this article and practice what you learn at the range to get competent with this skill.
Learn what natural point of aim is and how to adjust your rifle to achieve this. Also study techniques on breathing, and manipulating the trigger without disturbing the rifle.
While I wasn’t certain about exactly what we’d be doing, I imagined we’d spend more time on building positions, and that wasn’t the case. There is too much else the instructors are trying to teach you.
When I attended training at Rifles Only, this was one of the first things I learned. It’s completely reasonable, too, because I had never done it before attending that course.
You may also be inclined to think you’re going to be doing a lot of shooting. While there is quite a bit, the biggest skill you take away from the PR7 course is easily spotting.

As you will learn, it is far more difficult and takes more practice to learn because there are many prerequisite skills that fall under the umbrella of spotting. The instructors joked they could take any random person and have them successfully shoot a target at 1,000 yards with minimal effort.
The skill set required of a spotter to get a novice shooter hitting targets at that distance is far more complex. This point was reiterated multiple times throughout the course.
Another noteworthy observation: this course is analog. You don’t use a ballistic calculator or any app to come up with your shooting solutions. It’s a rare nod to the ways of old.

Wind Reader
“The wind is a demon, and a worthy adversary, so sharpen your swords!” -Walt
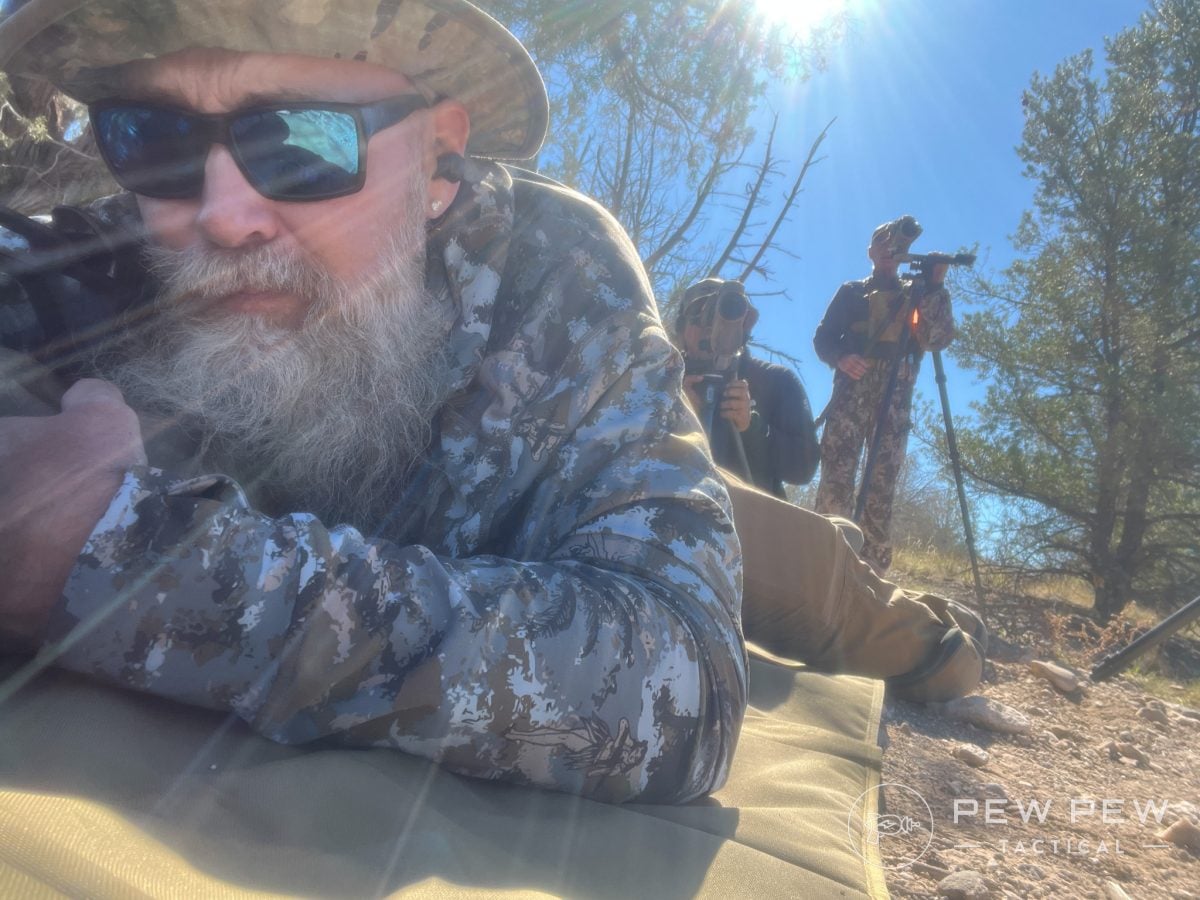
There are a number of things that go into the formula of reading the wind. Before the first shot, these clues include mirage (visible movement of moisture in the air) and movement of local vegetation.
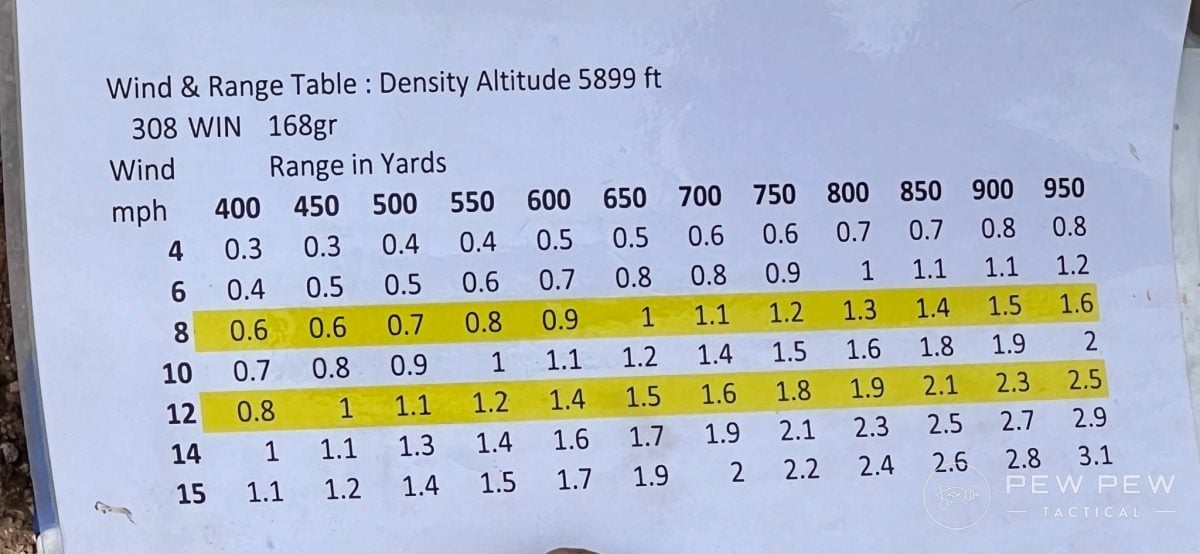
Keep in mind that you must account for the wind’s impact on the entire flight of your bullet’s path. Most of the shots we took ranged between 400 and 1,000 yards, so that can be a significant influence.
My beard blowing around indicated quite a bit of wind where I was shooting, but that isn’t necessarily the case downrange at the target’s location. Another critical component to the complete picture comes after the first shot.
Our instructors explained that whatever you shot at wasn’t going to stay the same if you missed. Wind conditions change quickly, and living targets tend to move when they realize they’re being fired upon.
Accordingly, you have to give a correction quickly and have your shooter re-engage with what you learned from the first shot. This is where we learned about seeing trace.
Trace is the visual disturbance created by the fast-moving bullet as it tears through the air. You can literally watch a bullet on its way to the target and call the impact before the sound of the hit reaches your ears.
This is important because that path can show you how much the wind is affecting its flight. Additionally, it provides a clue about the accuracy of your elevation or DOPE.
Finally, impact offers even more clues you can plug into the equation. If you miss the target, you may see a puff of dust that pops off and drifts away.
The movement of the small cloud will give you wind direction and approximate speed near the target. This is crucial information to pass on to the shooter after a miss so they can quickly shoot again.
The instructors explained to us that while there was science in reading the wind, there was also a lot of art involved. Your head essentially becomes a ballistic computer, analyzing what happened, formulating a proper correction, then communicating it to the shooter.
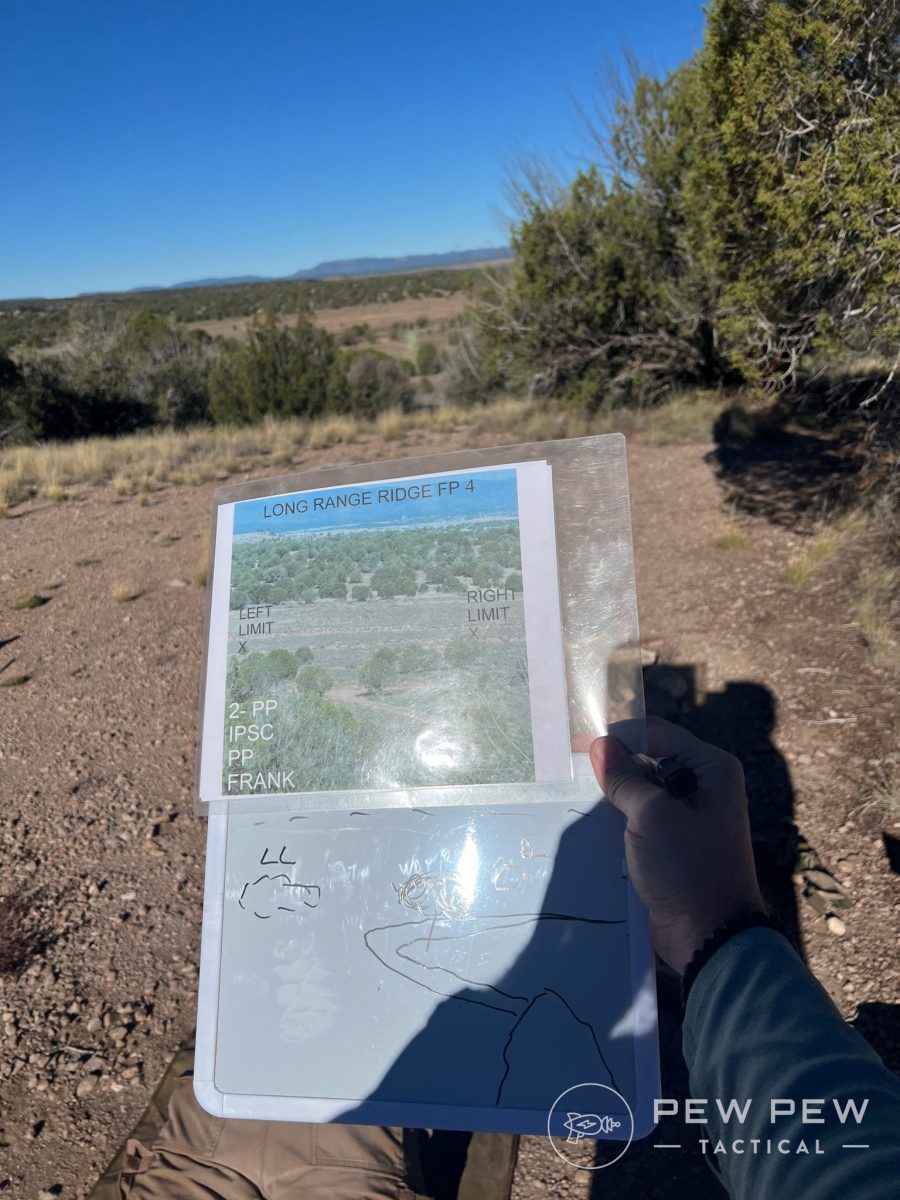
Ranging Targets
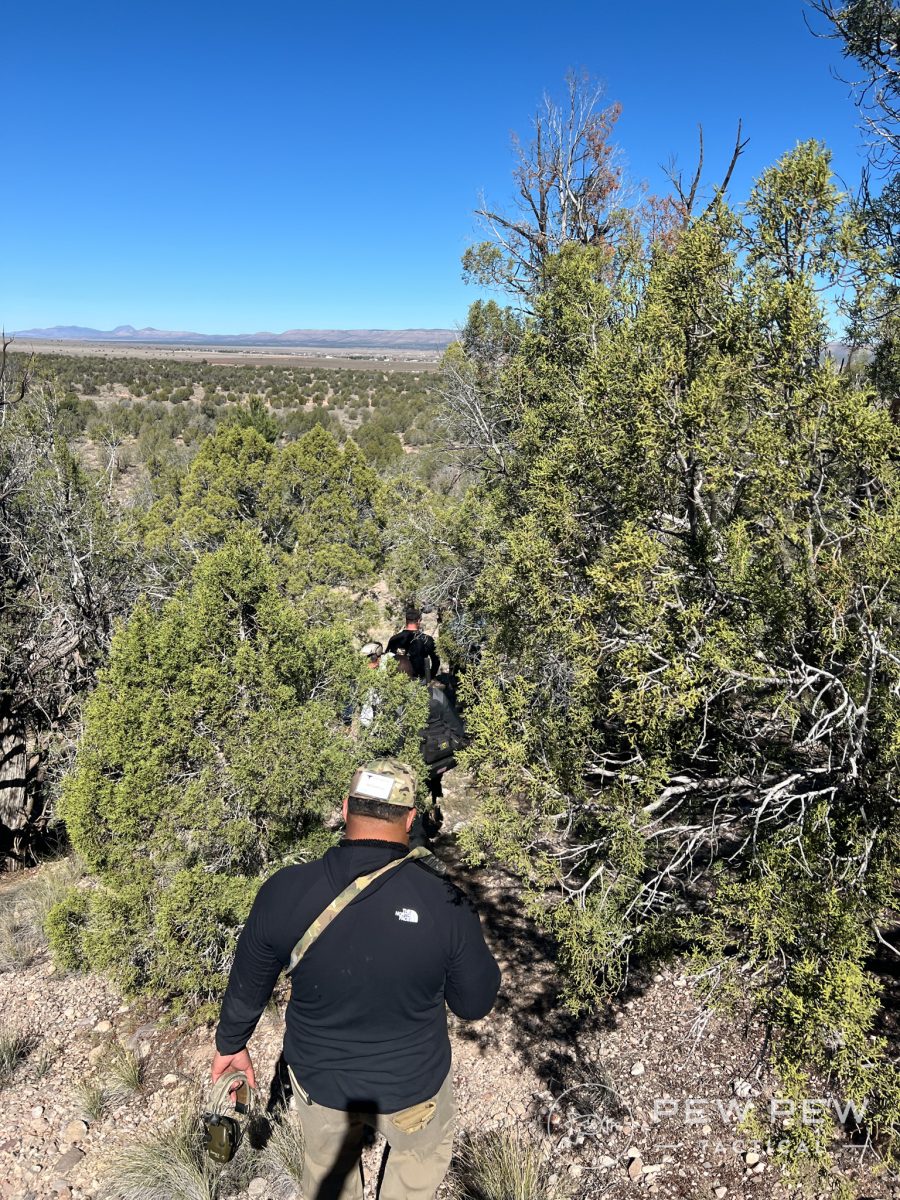
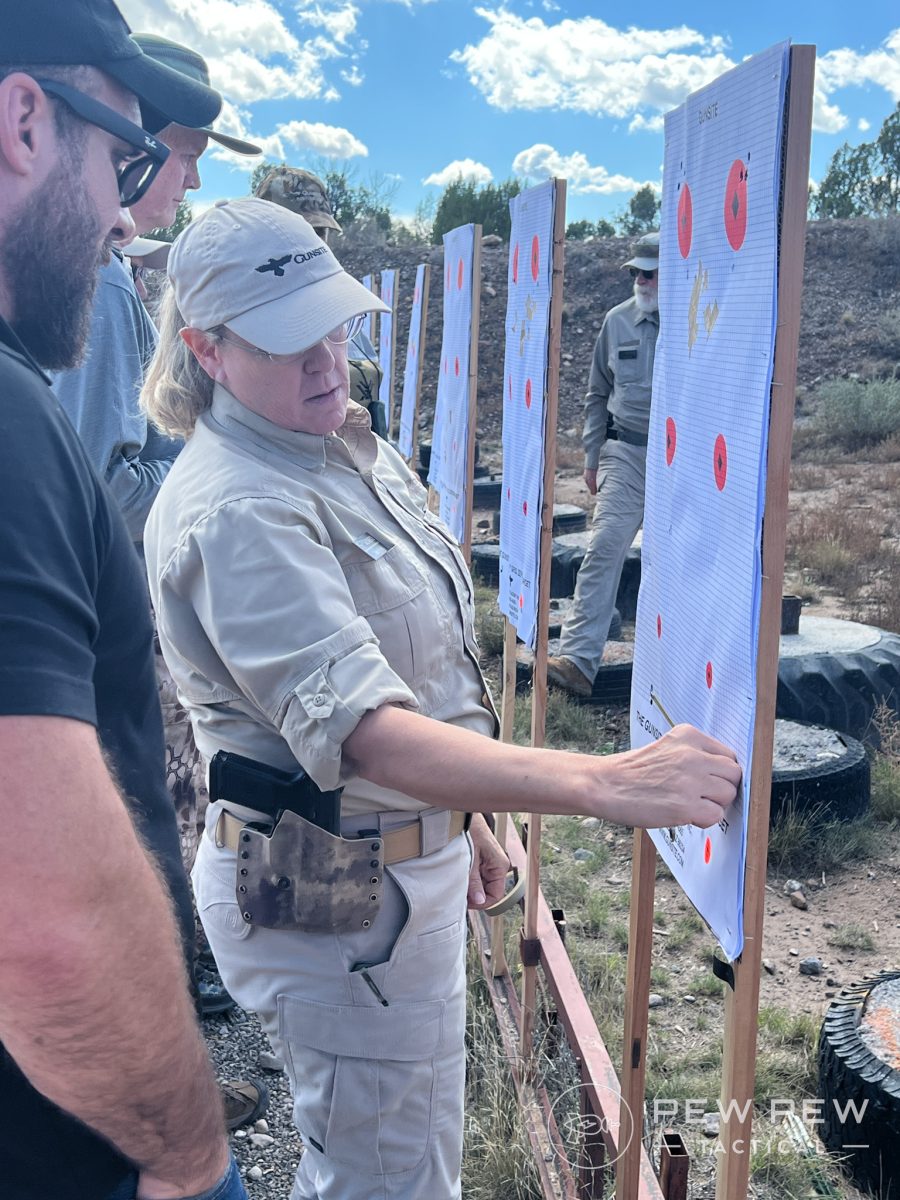
As part of the big test at the end of PR7, you and your partner are required to cycle through six stations, then range and engage unknown distance targets while being timed. No pressure!
In the classroom, we filled out notebooks of the usual suspects we’d see out on the range. All of these steel targets came in various shapes but had known dimensions.
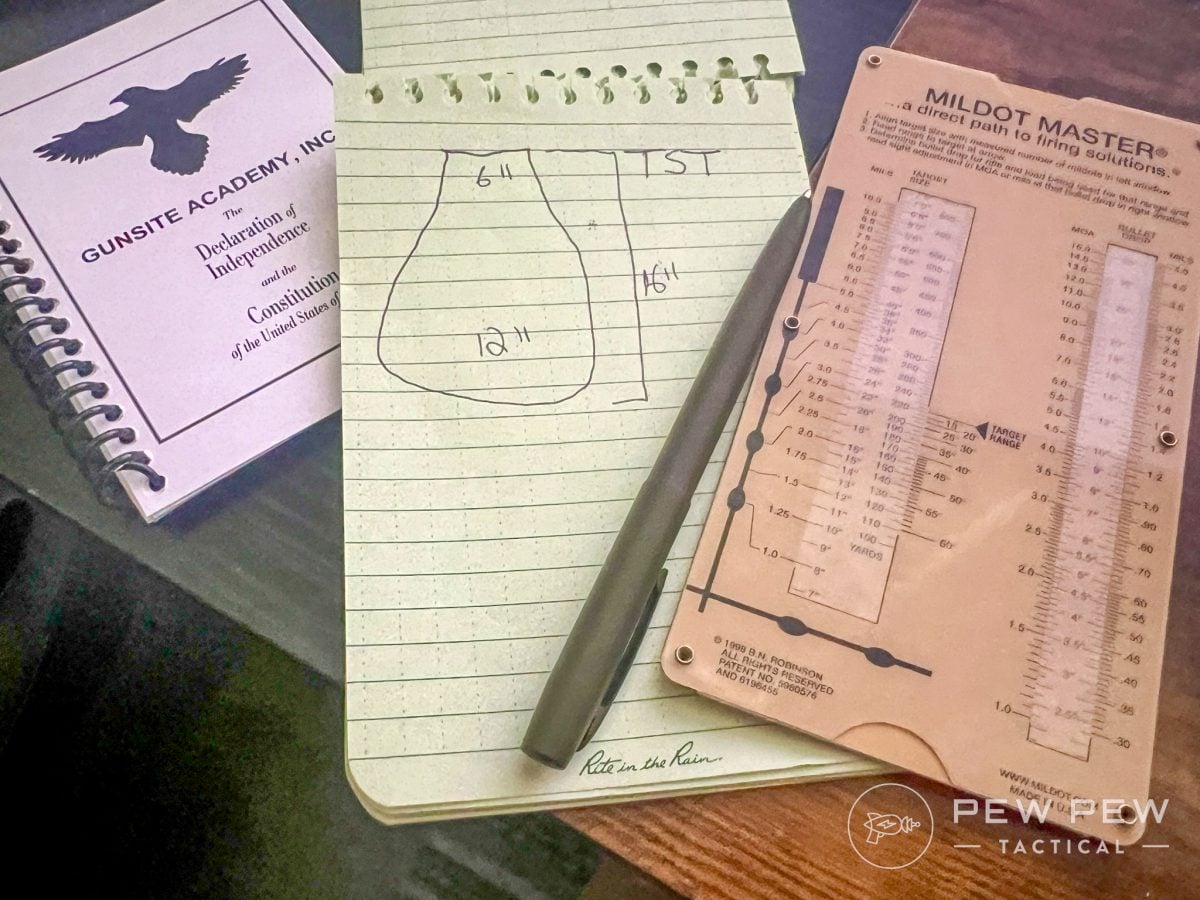
For example, one of my favorites was called a TST (toilet seat target). This looked very much like its namesake, and was 16” tall, 6” wide at the top, and 12” wide at the base.
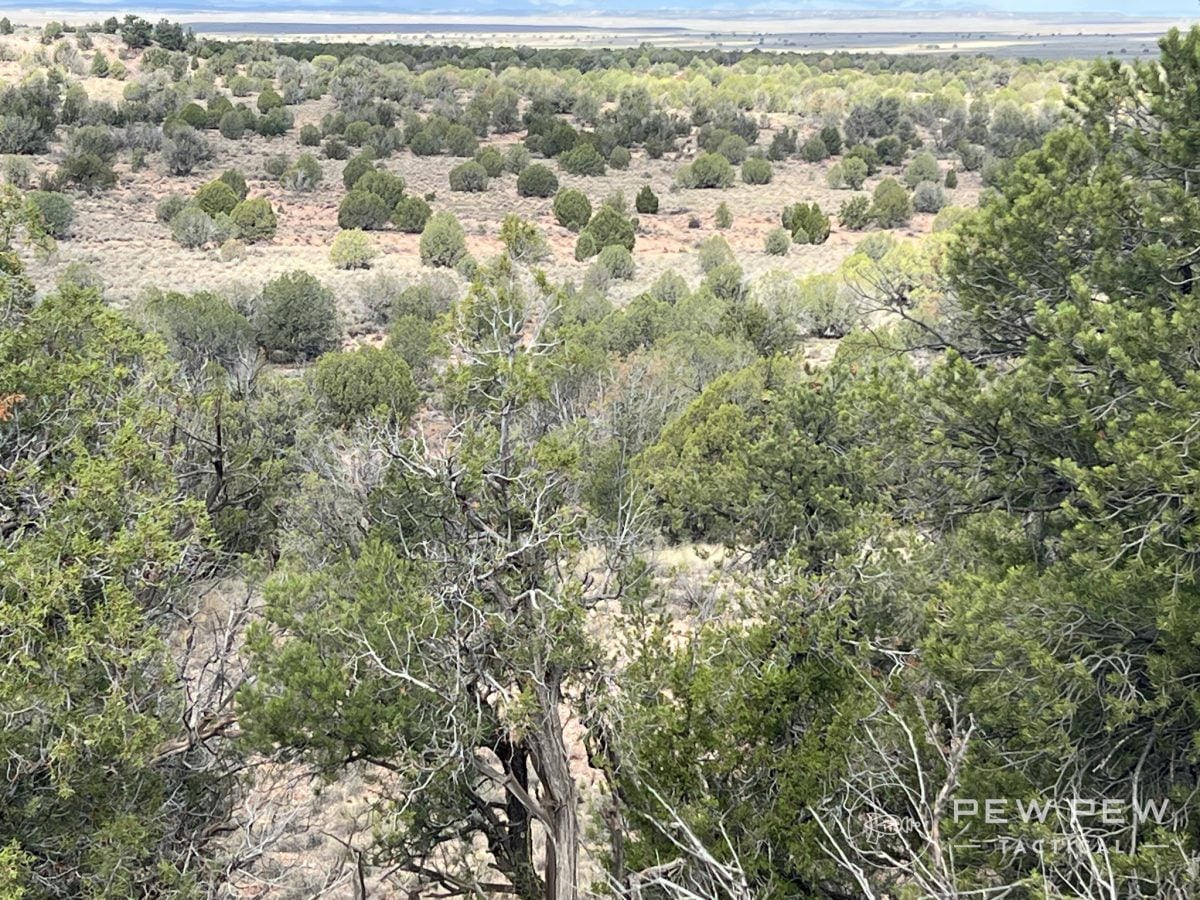
It’s important to know this because when you begin ranging targets, you have to find them first. While the final test utilizes orange targets, all the ones you shoot before that are kindly painted camouflage by the instructors.
This makes them hard to initially find and tough to measure, too. The process involves using your reticle to measure the height and width of these targets.
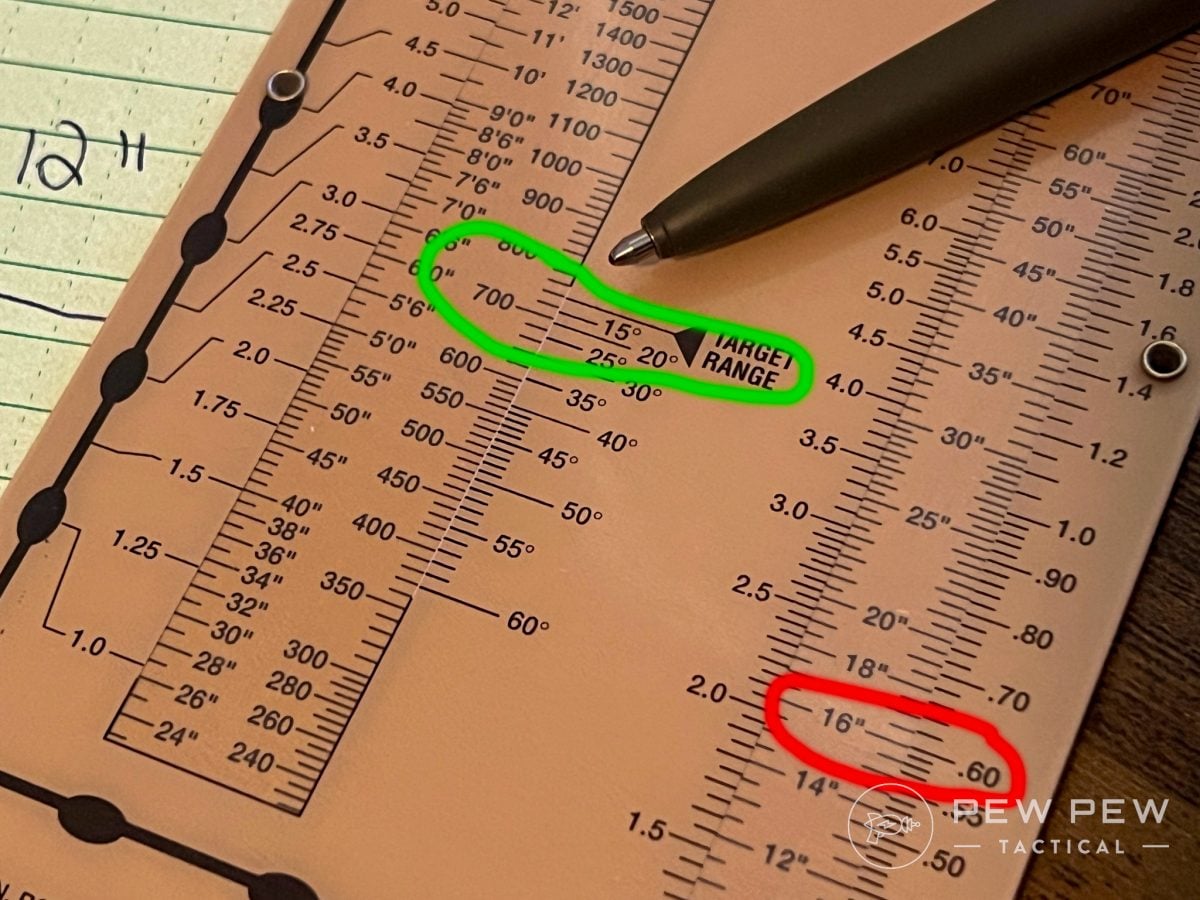
Once you have a number, be it in Mils or MOA, you plug that into your Mil Dot Master, and it provides you with a range. This was one of the more challenging skills we learned, and the penalty of getting it wrong usually meant your shooter missed.
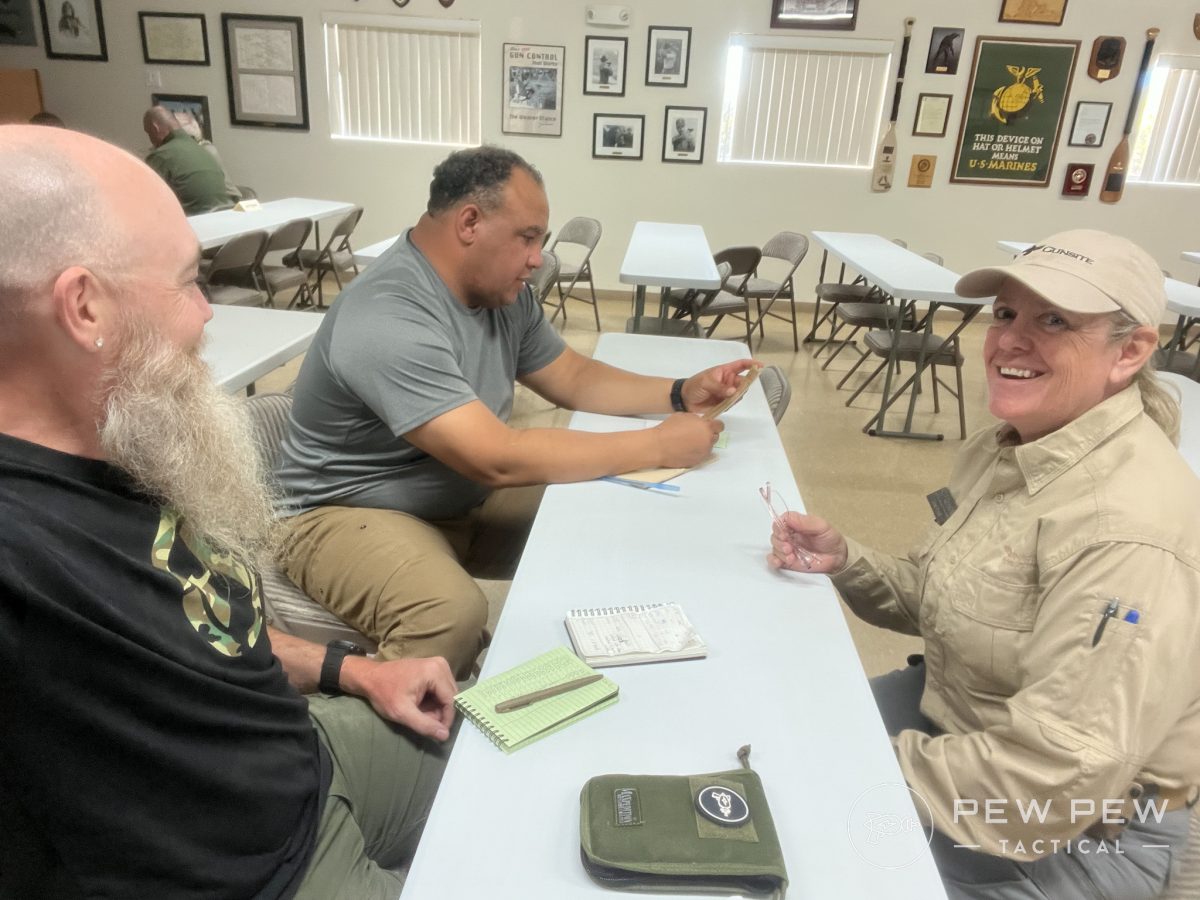
Spotter/Shooter Communication
Good communication between the spotter and the shooter is crucial. I have an enormous vocabulary (often stymied by my wise editor), and it repeatedly failed me.
Why? Because looking across a large field of fire and walking a person’s eyes onto the same thing you’re looking at is surprisingly difficult.
The instructors taught us how to look at our area of operation and identify TRPs (target reference points). That way, we’d have common geographical points of reference to discuss.
We quickly learned the hell of using trees to walk someone onto a target. See that juniper? Next to the open field? Okay, go left to the next three junipers and look at the target in the middle of the shadow.
Meanwhile, your shooter is looking at a completely different set of three trees, but you both think you’re talking about the same area. Finding distinct, even iconic, terrain features, such as the “narrow field shaped like a pizza slice with three pepperonis,” was critical to mission success.
Essentially, the more unique and specific, the more likely you were to get your shooter on target. It’s also important to start with your eyes, get in the area, and then move to magnification through optics.
Gunsite also uses a strict procedure of communication between spotter and shooter for actually engaging targets. Learn this well because you will be graded on it.
Gear Dos & Don’ts
The high desert of Gunsite is an unforgiving place to test gear. I strongly recommend you test things out before you go because equipment breaking during the course can be very bad.
Thankfully, there’s a Pro Shop and a Gunsmithy, but you are a long way from a large outdoor store that can offer a wide array of options. Quality gear is key.
The instructors told me about a student who came to the course and brought an optic so cheap that he was able to buy two. Unfortunately, they both broke during the class.
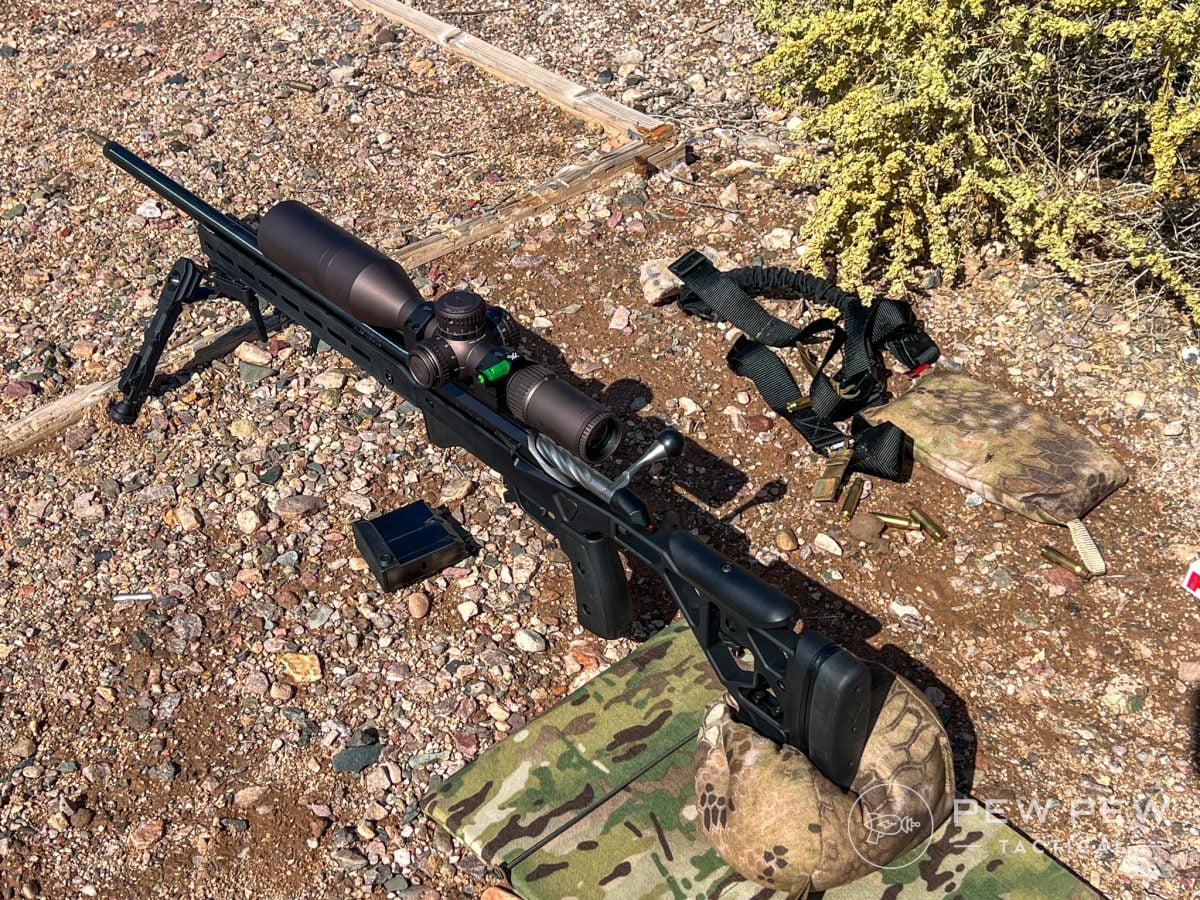
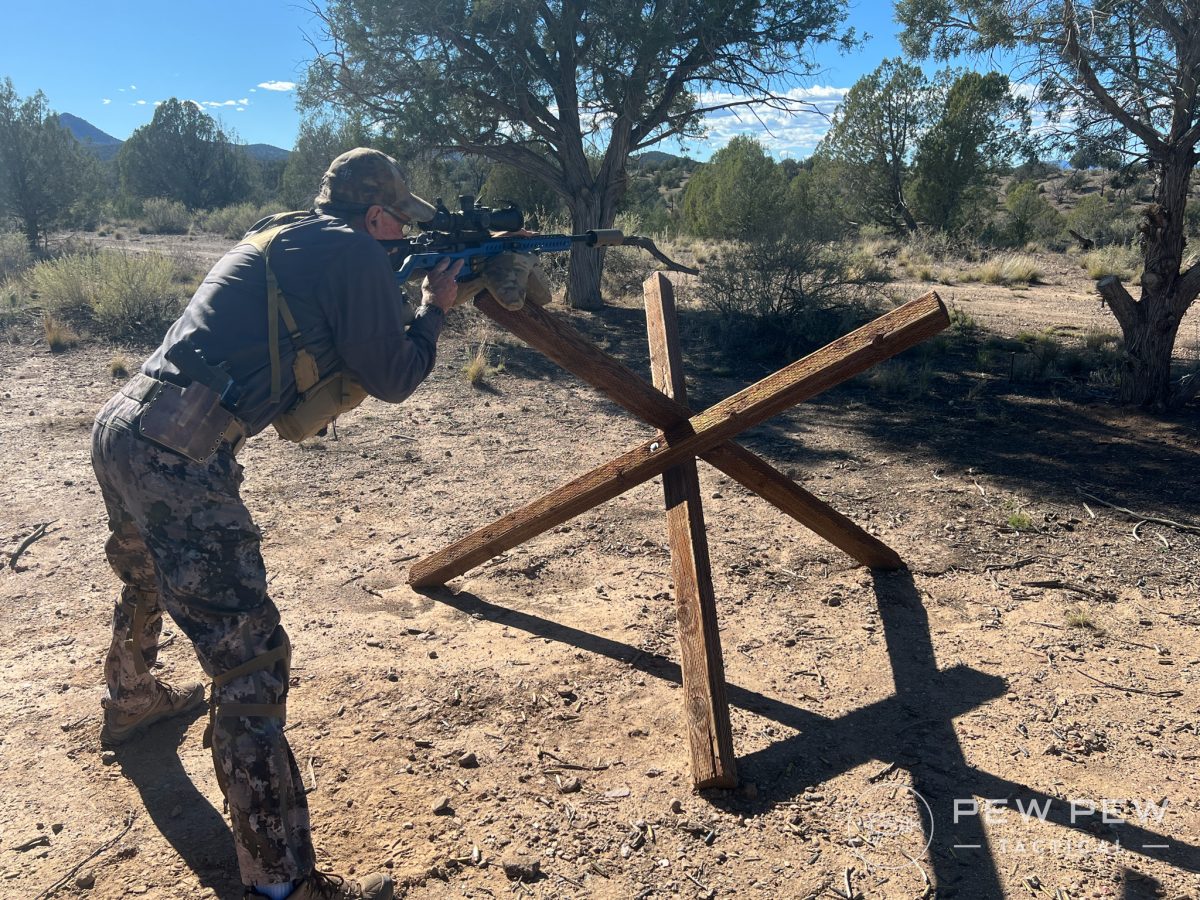
Weapon choice is important. The instructors want you to use a bolt-action rifle because they are simple, hardy, and stand up well to repeated fire and austere conditions.

Prices accurate at time of writing
Prices accurate at time of writing
-
25% off all OAKLEY products - OAKLEY25
Copied! Visit Merchant
There is a silt-like dust that ebbs and flows around the high desert of Gunsite, perhaps the very grist for making better shooters. It will find its way into everything.
I saw a couple semi-auto rifles in the class. One did fine, and the other had some issues. As difficult as this class is, you don’t want to add equipment frustrations.
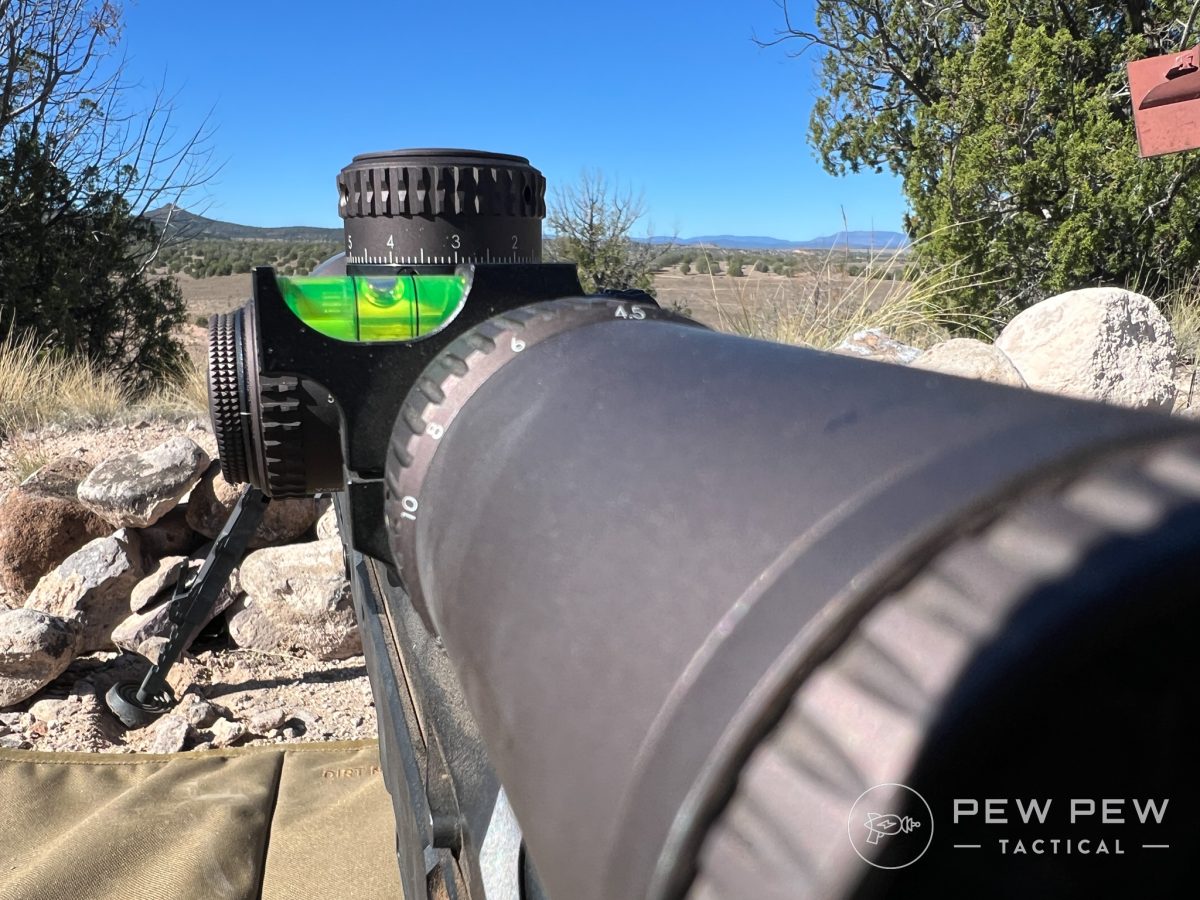
Although they are expensive, be sure to bring a first focal plane optic. Second focal plane are cheaper, but their reticles force you into max magnification.

Prices accurate at time of writing
Prices accurate at time of writing
-
25% off all OAKLEY products - OAKLEY25
Copied! Visit Merchant
“Magnification is not your friend,” stated Cory during one of the classroom sessions. Walt described using maximum magnification as looking through a cocktail straw, and they’re both right.
Eye strain and limited field of view become major challenges. First focal plane optics allow you to back off magnification and still have a relevant reticle to measure and range targets.

Another important area is reticle selection. You definitely want a full crosshair (vertical line all the way up) to range targets. A good amount of smaller stadia lines in that reticle will also help you with measuring.
The instructors warned people against the Christmas tree-type reticles and said previous students have struggled with them. A cluttered reticle can make it challenging to read and call corrections.
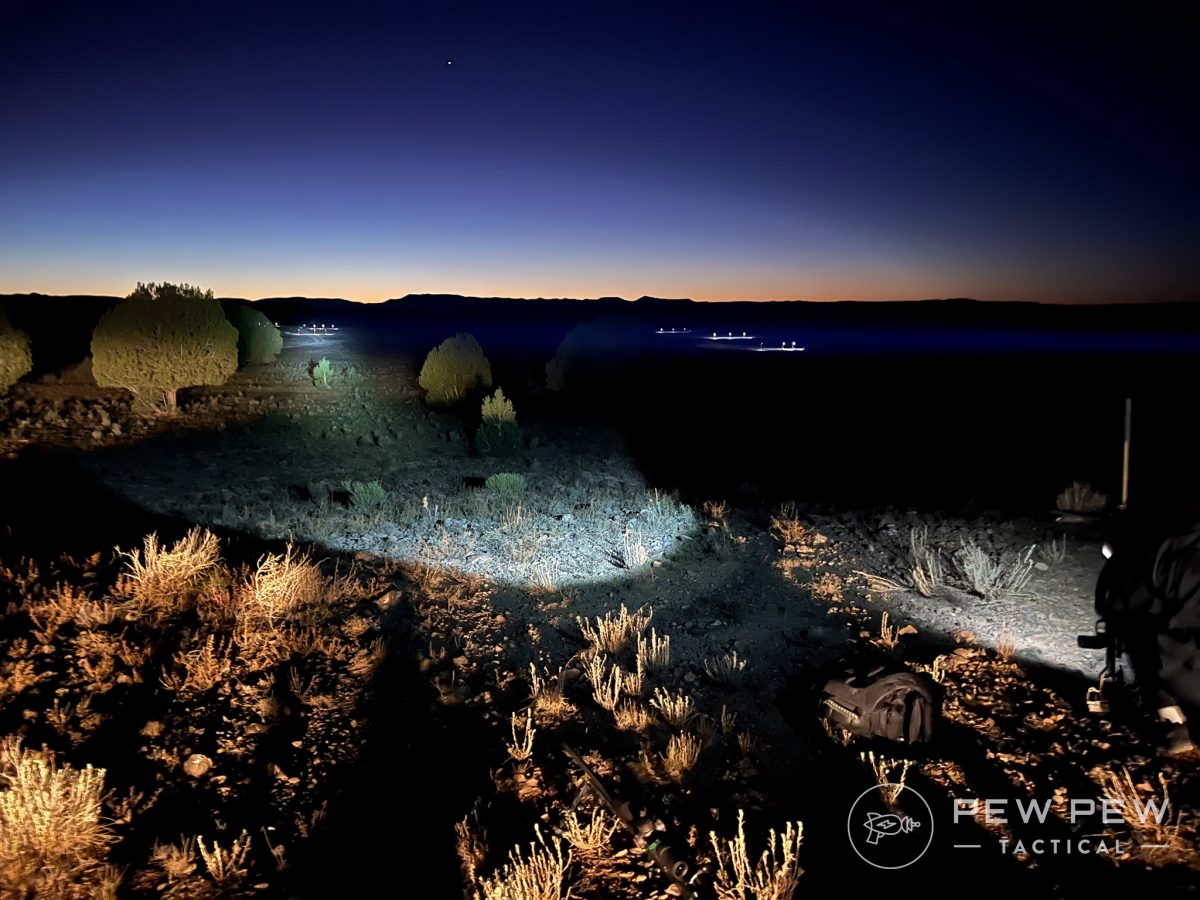
Finally, if you want to participate in the night shoot, you should bring an optic with a lit reticle. I strongly suggest you do, because this was a very cool experience.
On spotting scopes, you must have a reticle that matches your scope—mils to mils, or MOA to MOA. Your spotting scope should have adjustable magnification.

Prices accurate at time of writing
Prices accurate at time of writing
-
25% off all OAKLEY products - OAKLEY25
Copied! Visit Merchant
Trying to scan a target area at maximum magnification is one of the more frustrating things I experienced at PR7. Scanning the terrain at low power, then zooming in, is so much easier.
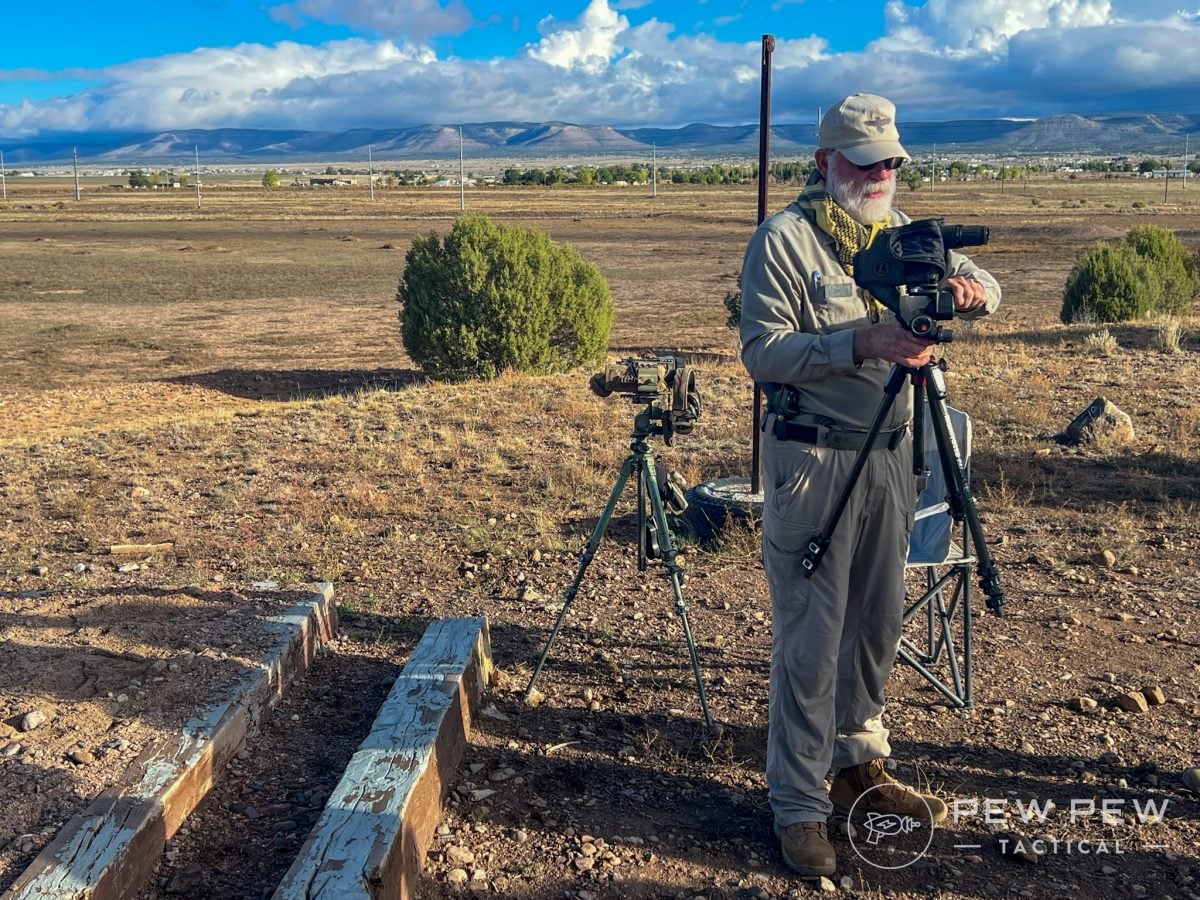
For tripods, you need to opt for quality, focusing on both lightness and strength. While a ball head is great for shooting from, it sucks when you’re trying to fine-tune your spotting scope—especially at maximum magnification.

Prices accurate at time of writing
Prices accurate at time of writing
-
25% off all OAKLEY products - OAKLEY25
Copied! Visit Merchant
My best experience came from using a tripod head that allowed me to get generally close, then use adjustment knobs to refine my picture. Gross adjustments get you off target quickly and lead to frustration.
Bipods are clutch in this course, so bring a good one. You’ll want plenty of elevation to clear some of the rocky terrain you’ll be shooting over.
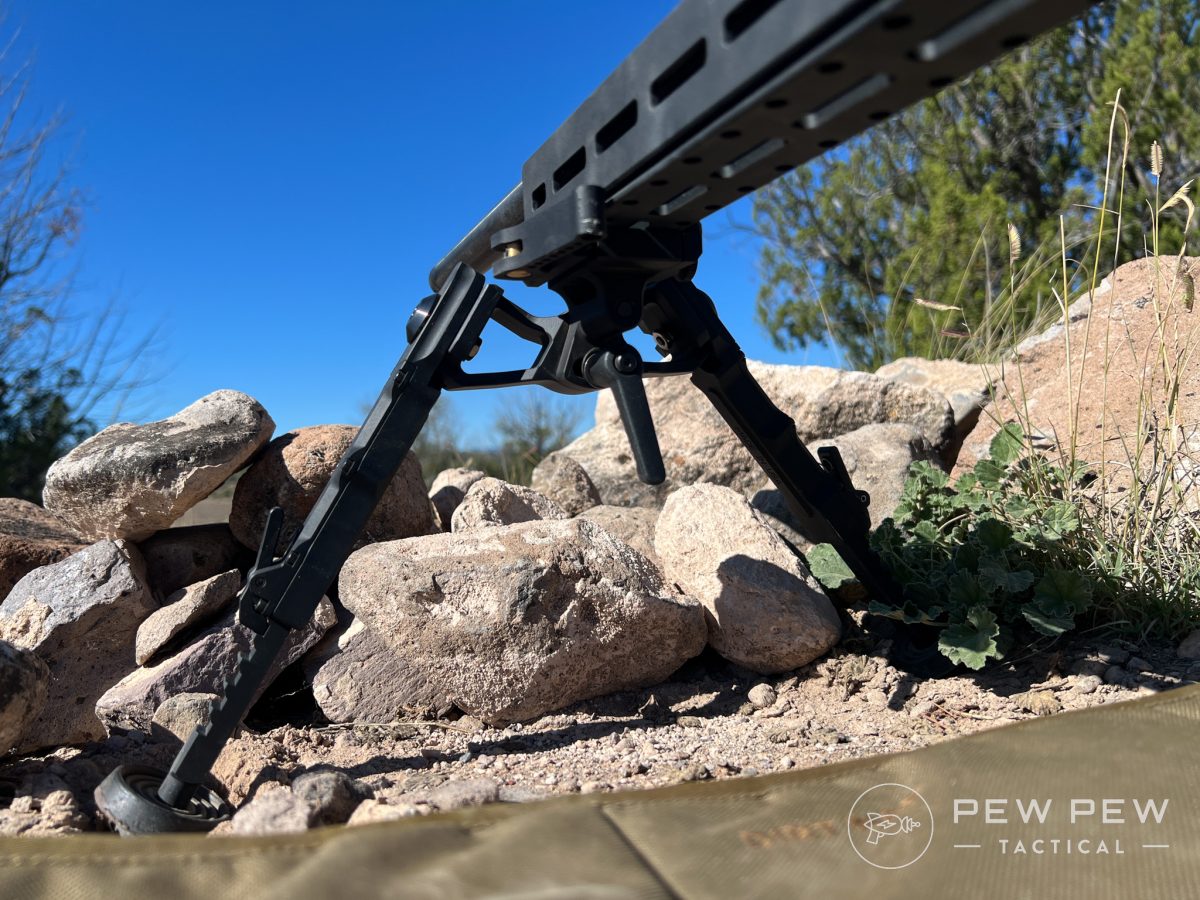
Choices like Atlas, Accutac, or even Harris all performed well in the PR7 course. Bipod feet are important too, so bring some that won’t sink down into the gravel or dirt like rubber feet do.

Prices accurate at time of writing
Prices accurate at time of writing
-
25% off all OAKLEY products - OAKLEY25
Copied! Visit Merchant
Rear bags come in a wide array of prices, shapes, colors, and sizes, but you want something that can become nearly rock solid with pressure to provide a stable shooting platform.

Prices accurate at time of writing
Prices accurate at time of writing
-
25% off all OAKLEY products - OAKLEY25
Copied! Visit Merchant
Brands like Cole-Tac and Weibad did well and are durable enough to survive the abuse they encounter.
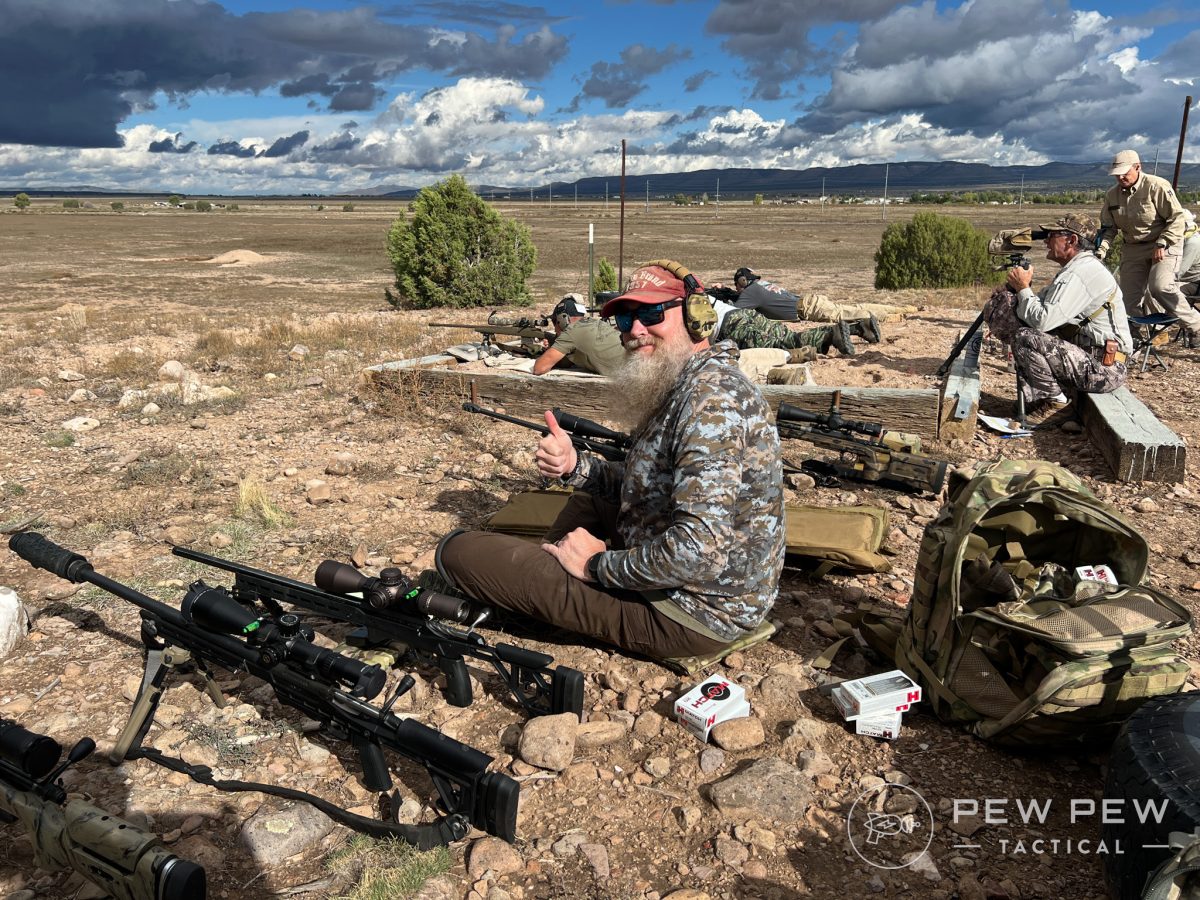
Shooting mats are important because you’re lying down for most of the shooting in PR7. The rocky terrain can get very uncomfortable.

Prices accurate at time of writing
Prices accurate at time of writing
-
25% off all OAKLEY products - OAKLEY25
Copied! Visit Merchant
I found the Cole-Tac Spartan mat was a great compromise. It was quick to deploy and put away, plus was thick enough to protect me from unforgiving terrain. It’s not very wide, so accompanying elbow pads are a must. You’re better off having some thickness in a shooting mat, rather than a thin and wide one, because the rocky terrain is uncomfortable.
(Gunsite has created a gear list on their PR7 course website, as well as a number of videos detailing recommended gear choices. I urge you to use these resources.)
A good backpack is critical. Because the range is quite a way from the classroom and parking lot, you need to have a pack capable of hauling everything.

Prices accurate at time of writing
Prices accurate at time of writing
-
25% off all OAKLEY products - OAKLEY25
Copied! Visit Merchant
I used a 5.11 Tactical Rush 72, and although it might have been a little bigger than I needed, it was comfortable and absolutely held all my gear. Keep in mind you’ll want to carry all your shooting kit and comfort items too.
The weather at Gunsite around October presents a range of risks. I saw everything from frozen windshields in the morning to sunburns in the afternoon.
Bring enough clothing to support this range, and you’ll be fine. I love covering up with sun shirts like Magpul’s Sun & Steel Performance Hoodie.
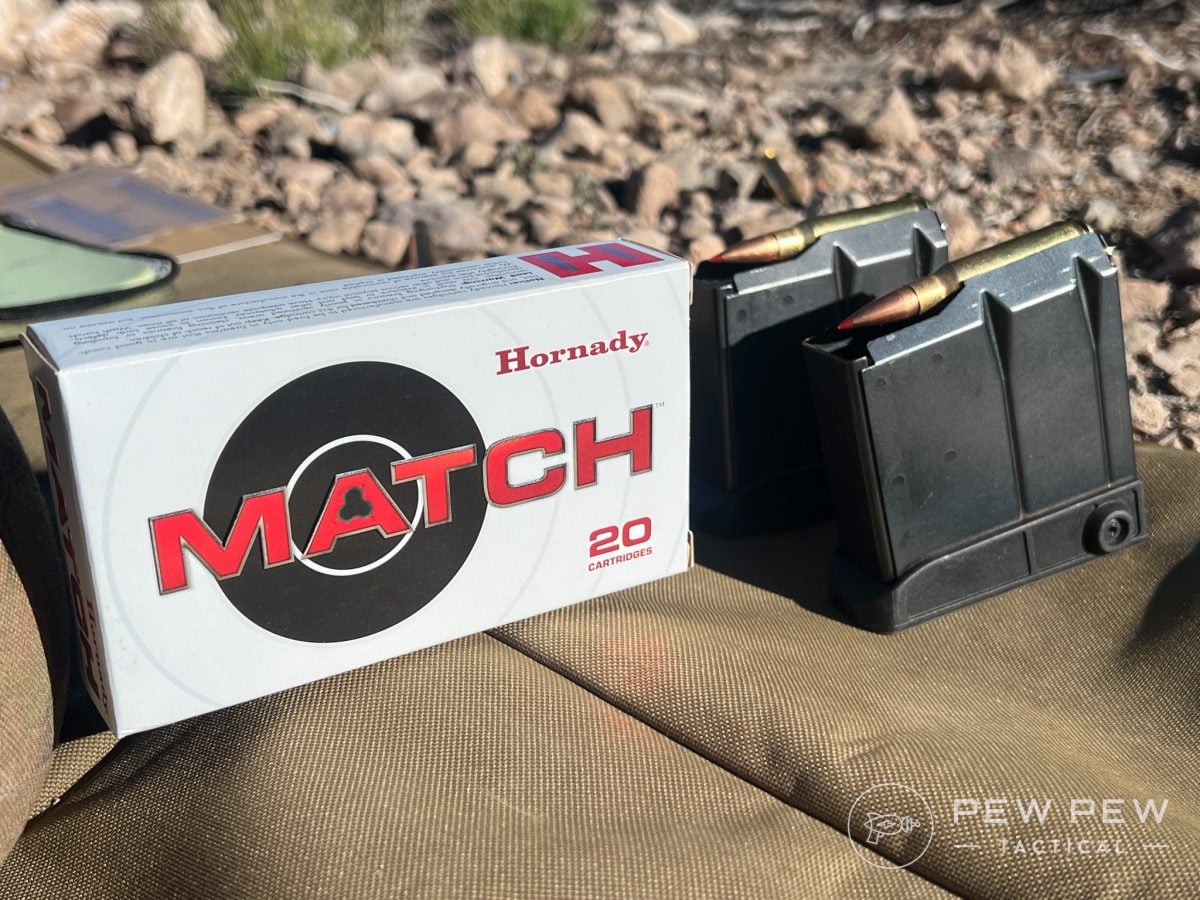
Finally, ammo selection is crucial. You need dependable and repeatable performance, so I went with Hornady’s Match in .308 and noticed my corrections for wind and elevation were less than those of other students.
Adult Learning
There are several effective practices that the instructors of Gunsite employ, which originate from adult learning theory. I’m familiar with these because I learned them when I became a firearms instructor years ago.
One of the first is crawl, walk, run. The instructors at Gunsite recognize that they are introducing new concepts and skills to individuals, often for the first time.
They work hard to create an environment where they present an idea, usually in the classroom, discuss it to gain understanding, and then use repetition of practice to solidify the idea in their head.
This meant we often watched presentations, then went out on the range and put these things into practice. The instructors don’t want to overwhelm you by having you do the hard thing right out of the gate.
Accordingly, they also use skill stacking. This means you learn bits and pieces of a procedure before eventually stringing them together to complete the whole.
Another adult learning concept I saw put into continual practice is the idea that we don’t learn well when we are bored, or completely overwhelmed. Optimal learning occurs when students are slightly uncomfortable.
There were several times in the week when I experienced uncertainty, whether I struggled to grasp a concept or complete some physical skill that I’d already learned. I even found myself experiencing emotions in that range — disappointment, confusion, anger, elation, frustration, even triumph!
Toward this end, I feel I must warn you — the instructors can be a little testy at times when they push you to learn things. This can get more pronounced if you make repeated mistakes.
Most of them come from military or law enforcement backgrounds, and they often carry that mindset in their instruction. If you’re used to that, it’s not an issue, but it can be a bit startling if you’ve never had someone bark commands at you.
I rolled with this and only chipped back when I felt unjustly accosted, but I came to understand something toward the end. The course is seven days long and is compressed.
I truly believe you could spend 14 days learning the curriculum at a more relaxed pace. The instructors are under incredible pressure to cram a ton of information into your head in a short period of time, so the occasional terse correction is understandable.
Final Test
A full six days’ worth of borderline overwhelming knowledge finally comes to fruition on the last day. You and your partner are taken out to the testing area and given your stations.
You are then put on a clock after being shown the targets. You have a few minutes to draw a range card, identify TRPs, measure and range targets, and then identify your order of engagement.
You’re graded on how close you are to the actual range of each target before the instructor gives it to you. Once this is known, you plug them in and prepare to start the actual test.
Yet again, the timer starts, and the instructors listen carefully to your communication and grade you on your order and sequence. If the shooter misses, the spotter must immediately measure the miss and offer a correction.
The shooter then immediately adjusts and fires again, hopefully hitting. There were three targets at six stations, and the teams switched spotter/shooter roles each time.
I can honestly tell you, my teammate and I did not place as well as we would have liked, but we learned some valuable lessons that day. And while it’s easy to feel disappointed, that wasn’t the major takeaway.
When I compared what I knew before I attended the PR7 course, and what I knew by the end of it, I was amazed. I had learned to set up a spotting scope, draw a map of my target area, and then find and communicate target locations to my shooter.
I had learned how to establish a DOPE card for my rifle and calculate intermediate ranges. I had my mind opened on how to read the wind and call corrections for wind and elevation.
My math-anemic brain was forced to calculate speed on moving targets and build in a lead for a first-shot hit. I also learned how to use the reticle to measure targets and utilize a Mil Dot Master to determine their ranges.
I know I’m falling short of conveying everything, but in the interest of keeping this article short of a novel, I was genuinely surprised at how much I took away from the PR7 course. It was easily one of the most difficult things I’ve done in some time — and equally, one of the most rewarding.
I chided Walt for being acerbic, but at the end of our test, he said, “Good job, guys. Very impressive”. Hard-earned praise is more meaningful, like sweet, sweet water to a man dying of thirst.
Final Verdict
This is an expensive and long course, and did I mention, it’s difficult too? However, it is one of the best classes I’ve attended in my nearly 30-year shooting career.
Gunsite instructors get accused of being the “old heads” in online forums and social media, rigid in their ways. I’ve attended several courses here, have been to other schools for comparison, and I disagree with this assessment.
They do what they do because it works. The unspoken secret here is that most of the techniques taught across a range of courses are derived from hard-won knowledge gained in local law enforcement jurisdictions and battlefields around the world.
If you had a transmission problem in your vehicle, would you want the recent graduate who wears fashionably tight pants? Or would you want someone who’s seen that problem a thousand times?
What if you or a loved one needed a critical surgery? Are you calling the doctor who has a large social media following, or someone who has done that very operation, seen and countered every complication that could arise, innumerable times?
Cory Trapp, Tessa Wyrick, and Walt Wilkerson have decades of experience not only shooting in competitions, but also teaching precision rifle to students. They’ve seen just about everything that can go right and wrong and are passionate about their craft.
While they can occasionally be sharp in instruction, they have a world of knowledge to pass on to you within the tight constraints of seven days. If you’re willing to put your ego aside and approach this course with the proverbial empty cup, the rewards are phenomenal.
I had a lot of support to attend this course and would like to thank Gunsite, Magpul, Tikka, Vortex, 5.11, Cole-Tac, and Hornady. Also, thanks to my partner, Dell, and the other students who helped out with photos!
Will you be attending the PR7 course in the future? Let us know in the comments below. For even more precision rifle training options, check out 11 Best Long Range & Precision Shooting Courses!


Leave a Reply