Those of you with any amount of experience dealing with milsurp guns have probably also encountered the enigma of cosmoline.
The gooy, gross, petroleum preservative that is seemingly locked within every porous surface and crevice possible.

Usually requiring a full detail stripping and cleaning of the rifle before its remotely capable of being operated safely.
If you want to check this out in a video, take a look! Like this kind of content? Don’t forget to subscribe to the Pew Pew Tactical YouTube Channel!
Okay, What Is Cosmoline?
For the unfamiliar, cosmoline is sort of the genericized term for a family of petroleum-based greases with remarkably high viscosity with inherent rust and corrosion protective properties, a signature waxy brown visage, and unmistakable industrial smell.
Originally developed in the late 1800s and marketed as a home disinfectant and veterinary anti-swelling agent, presumably by the same turn of the century physicians inclined to prescribe you cocaine for a staph infection or whatever.

Cosmoline was quickly adopted by militaries the world over as a way to chemically embalm small arms, artillery pieces, armored vehicles, and so on for either long term storage or trips across the Atlantic.
Sealing them in a greasy tomb of cosmo guards against the corrosive nature of maritime environments.
And that brings us to where we are today…
What You’ll Need:
There are lots of options and choices you can make, but what we used were:
- Shop Rags
- Paper towels
- Exam Gloves
- Lyman Sonic Cleaner
- Lyman Turbo Sonic Cleaner Solvent
- Non-chlorinated Brake-cleaner
- Bore Rod
- Q-Tips
- Goof-Off
Time To Clean
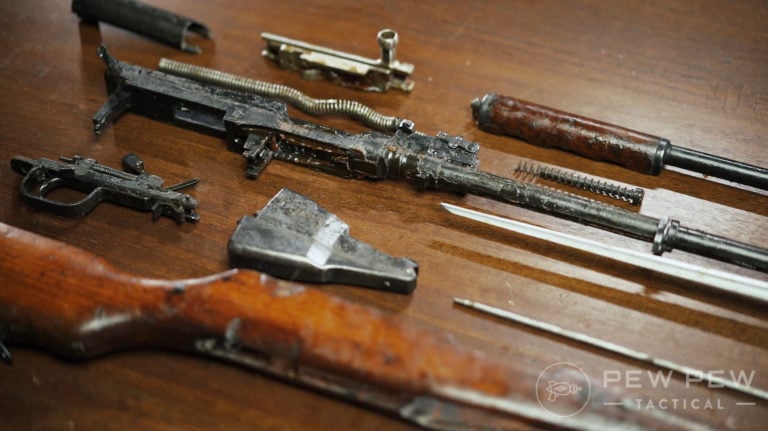
Specifically, we’ve got 3 surplus Type 56 carbines that we picked up from Palmetto State Armory — which are essentially Chinese domestic clones of the Soviet SKS with a few minor tweaks here and there.
Again, if you’ve ever dealt with military surplus guns before, you might have some experience with the somewhat laborious process of removing the infamous goop from them.

Prices accurate at time of writing
Prices accurate at time of writing
-
25% off all OAKLEY products - OAKLEY25
Copied! Visit Merchant
But it’s worth noting that every cosmolined gun is going to be a little bit different in terms of uh… grease severity.
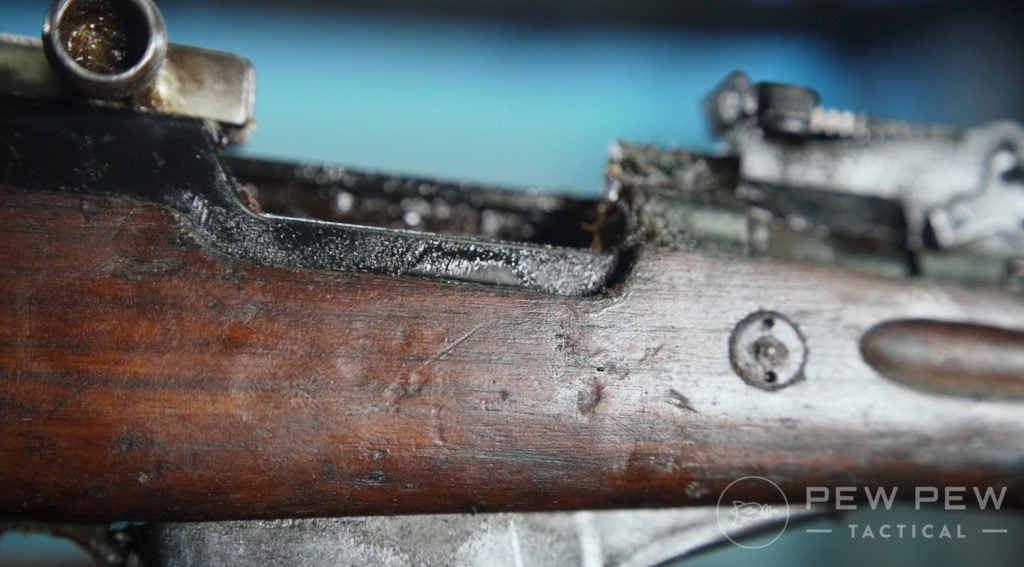
Cosmoline hardens over time when exposed to oxygen and not sealed properly, so some might be very gooy while others are hardened balls of crud.
In our case, the two Type-56’s we received directly were definitely in the latter category of goo-boundedness, with lots of solvent-resistant hardened grease nuggets tucked away throughout the entire firearm.
Be that as it may, your general overall approach to de-gunking your gun is going to be pretty similar no matter how much shit is built up within it.
First off, you’re going to want to disassemble the gun down to a level that you’re comfortable with.
While really bad cosmoline build-up might require a few steps further than a field stripping for whatever rifle you’re working on.
With the Type 56, we broke the guns down into their main field-strippable components: rifle stock, barreled action, bolt carrier, assembly, trigger assembly, magazine, op rod, etc.
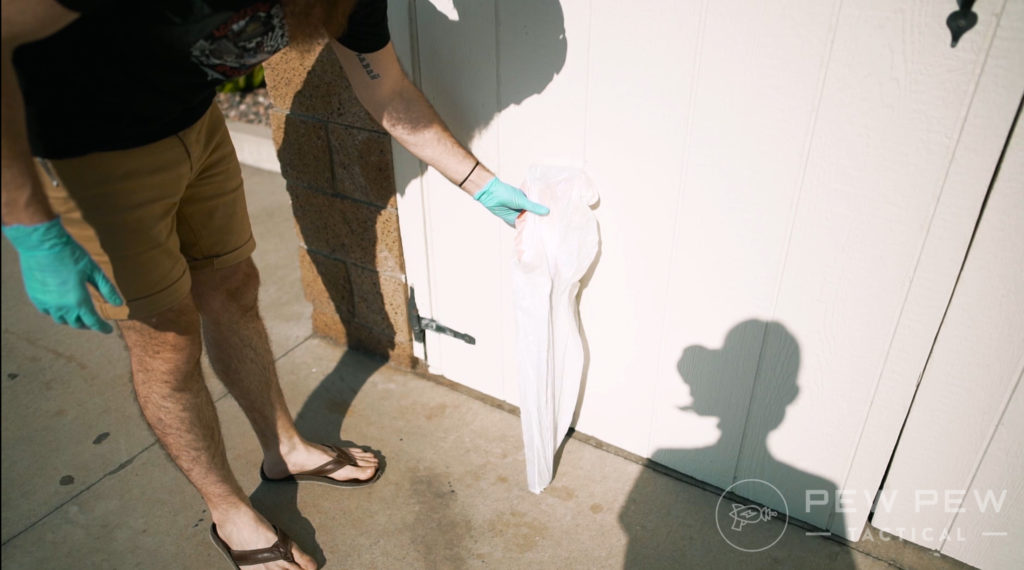
If you’ve lucked out and scored a surplus rifle with some relatively light cosmo packing, you can probably jump ahead to cleaning the individual components, but for us, step 1 was wiping away what external grease was easily accessible with some basic shop rags.
Don’t worry too much if you can’t actually get to most of the grease yet, just consider this an initial pass that’ll make later cleaning a little bit easier.
From there if you’re working on a rifle with wooden components, now’s the time to separate them and toss them in a trash bag.
Because of the general porous nature of wood, chances are pretty decent that a good amount of grease has managed to penetrate the wood fiber itself, even if it retained its original finish.
Luckily, cosmoline melts at anywhere between 115-125 degrees Fahrenheit.
Which makes it susceptible to environments that also kill small children and pets when they get locked inside minivans — which we’ll simulate by stuffing it in that trash bag and letting the angry heat orb outside do its thing.
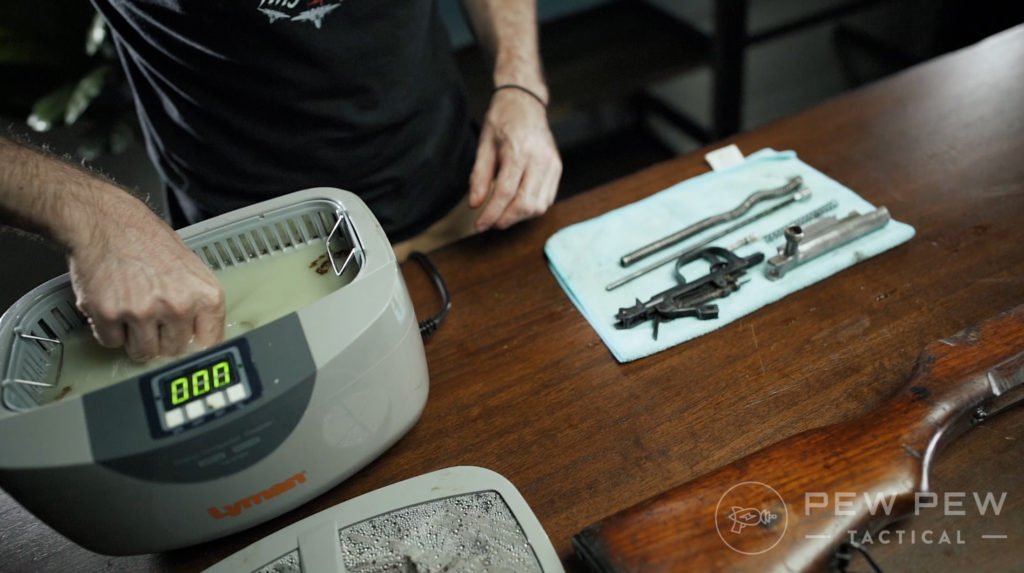
From there, we like to take all of the small components and run them through a nice sonic cleaner bath to free up some of the hardened gunk that’s worked its way into small spaces.
This give us a headstart on polishing those bad boys up or if left long enough, cleans them totally with almost no extra work on your end.
We personally used a Lyman sonic cleaner and Lyman solvent, which worked pretty well and got us most of the way there, with only a tiny bit of extraneous scrubbing required afterwords.

Prices accurate at time of writing
Prices accurate at time of writing
-
25% off all OAKLEY products - OAKLEY25
Copied! Visit Merchant
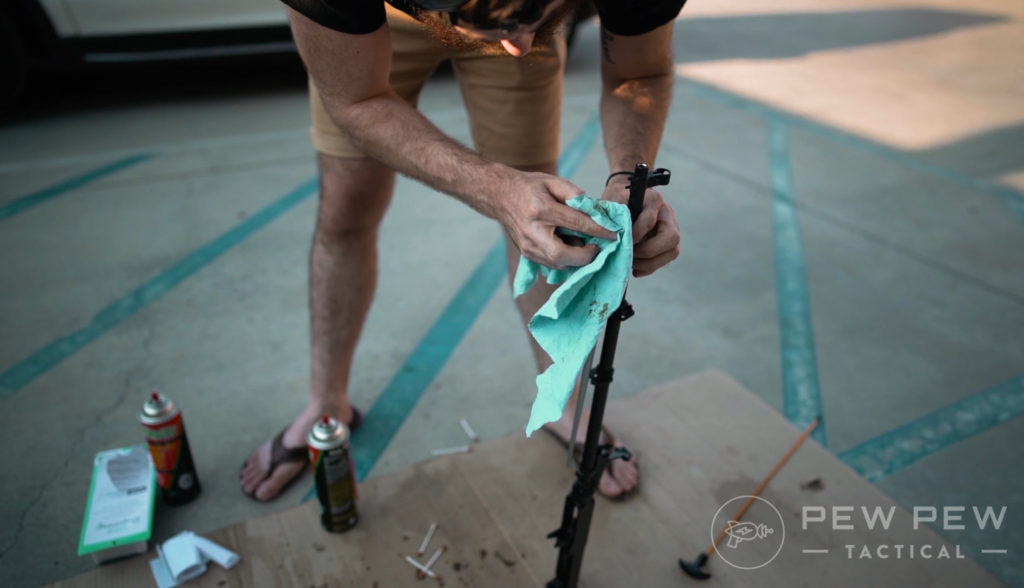
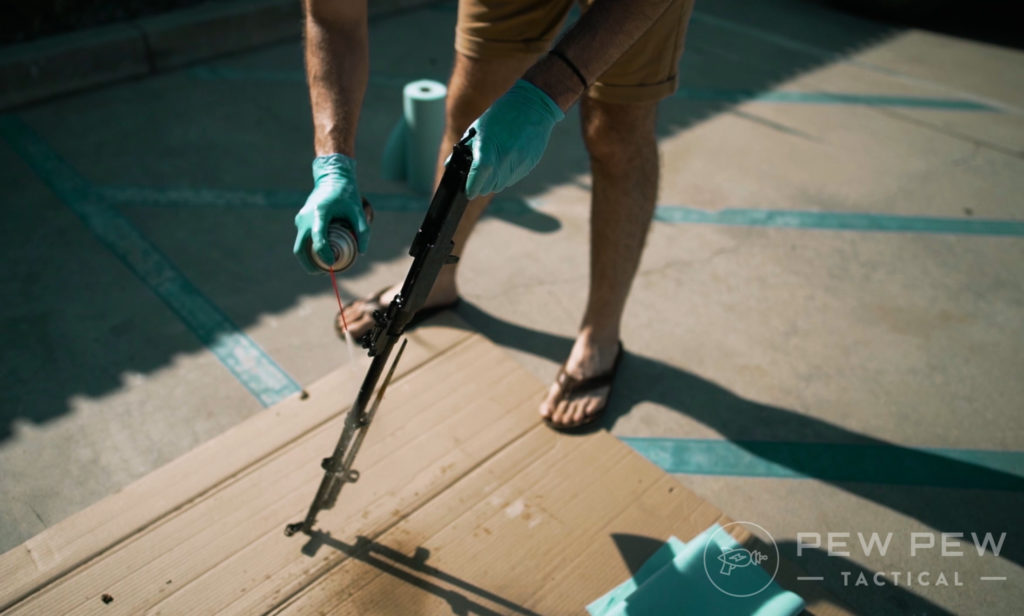
While our small parts soak, we took the barrelled action and receiver outside to just absolutely douse in brake cleaner.
Common internet gun wisdom is that you’re going to want non-chlorinated brake cleaner, as a byproduct of chlorinated brake cleaner heating up is phosgene gas.
Please — avoid producing WW1-era invisible poisons in your shed.
Brake cleaner is pretty nasty even it’s not in chlorinated form though, so make sure you’ve got gloves and a well-ventilated area to work in.
Depending on how much hardened build-up you’ve got, it’ll probably take you a few cans of brake cleaner to get everything loosened up.
We wound up using about ~3 cans of cleaner total per rifle, using a general “spray vigorously and begin wiping down” method.
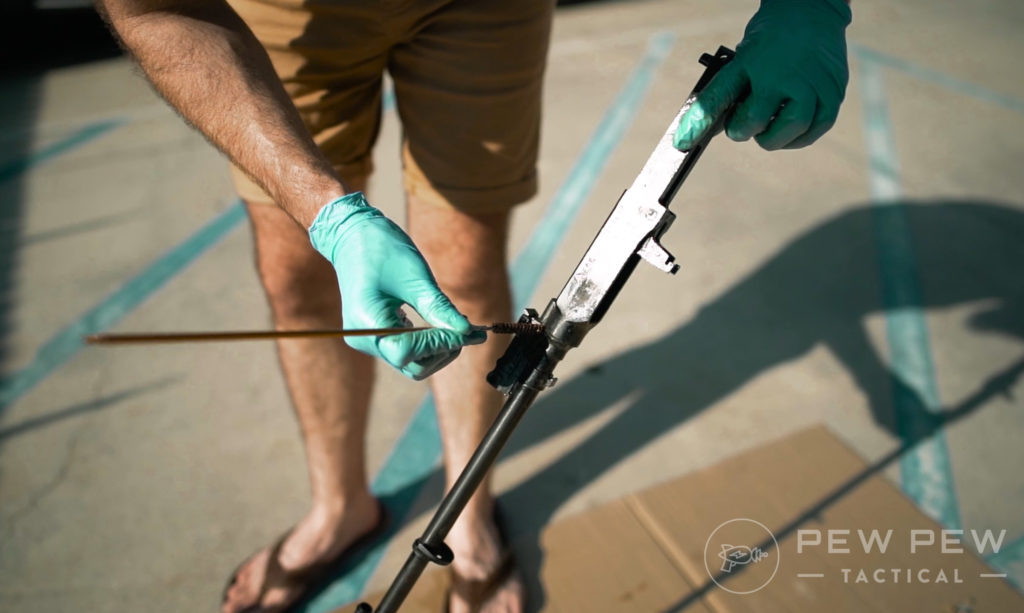
Once you’ve got all of the surface cosmoline more or less handled, you’ll want to really start tackling the goo in all of the nooks and crannies of the receiver.
We personally found Q-tips to be useful if a bit tedious. Throw on a podcast or something — you’re likely going to be here for a bit. If you need suggestions, try one of our favorite YouTube channels.
With that out of the way, spray a shitton of brake cleaner into the barrel and gas ports as well, then use a bore cleaning brush to ram all of that nasty ass gunk out.
This is obviously going to be one of the more critical parts of your cosmoline cleaning voyage, as any residue buildup you don’t address is going to negatively affect the accuracy of the rifle once you get it out to the range.
We used our same bore brush to ram out the gas tube as well — and while it’s not as critical to get this part as sparkling clean as the barrel, you obviously don’t want any obstructions in the cavity that your piston sits within.

-
25% off all OAKLEY products - OAKLEY25
Copied! Visit Merchant
At this point you can check up on your sonic cleaner parts and see how they’re doing.
In our case, you might need to run the gadget a few times to really penetrate the crud.
You can empty your disgusting cosmoline soup as you go along or just leave it, cosmo floats in water so you might need to skim that off at least before taking the parts out.
But it’s a background process that you can mostly leave alone outside of hitting the timer again once it’s finished a round of cleaning.
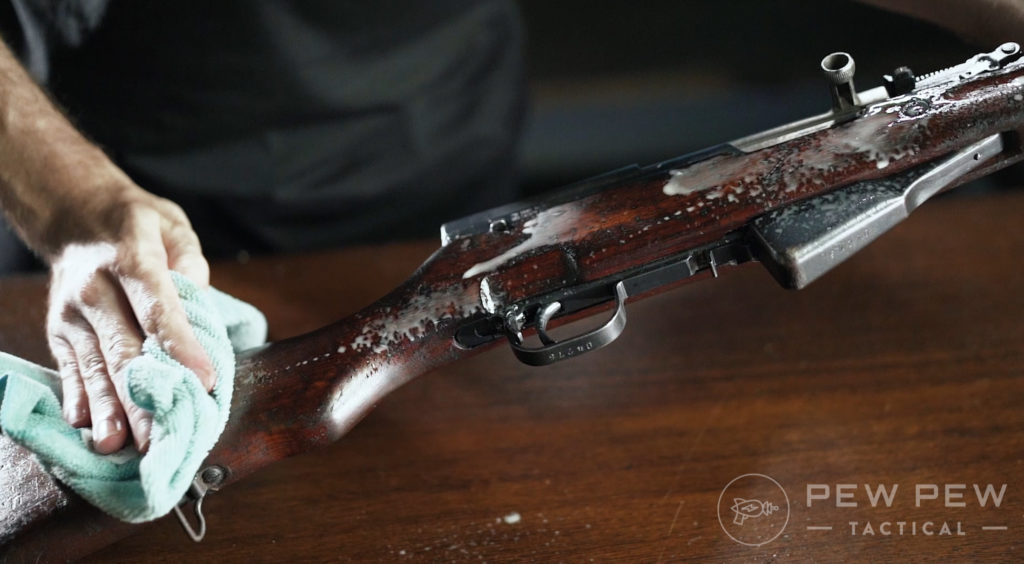
Once you’ve got your barrel and receiver assembly cleaned up, you can check on your sweaty wood bois and see where they’re at.
A couple of hours in the hot seat predictably allowed a ton of cosmoline that had been locked inside of the wood fibers the opportunity to seep out to the surface.
Wipe it off with a combination of shop rags for the surface grease, as well as goof-off to grab any of the sticky residues that are going to be left behind.
Once you’ve uh… unslimed your wood, return to your sonic cleaner components and use brake cleaner as needed to grab any chunks that might be left with your Q-tips.
Something to pay final attention to when doing the last pass on all of your small internal parts is the firing pin channel.
Depending on the gun you’re working on, this may or may not be a concern. For rifles like the SKS with a free-floating firing pin, it’s a critical place to make sure you got REALLY clean.
Free-floating firing pins, like the one found in AR-15s and the SKS, need to… freely float. Cosmoline can cause the pin to get stuck in the forward position and lead to slam fires and a runaway rifle.
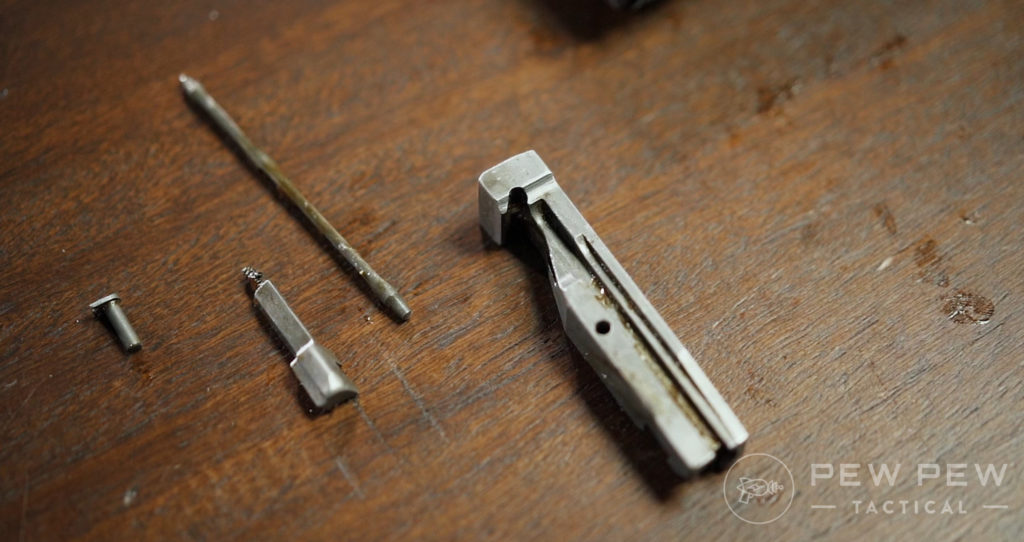
Avoid that by making sure it’s very clean!
Reassemble the gun, perform a functions test to make sure that everything feels right and is operating correctly, and you’re basically done!
Parting Shots
It’s worth noting that we didn’t go SUPER deep with our cleanup job on the two in-house Type 56s as they’re already pretty thoroughly trashed.
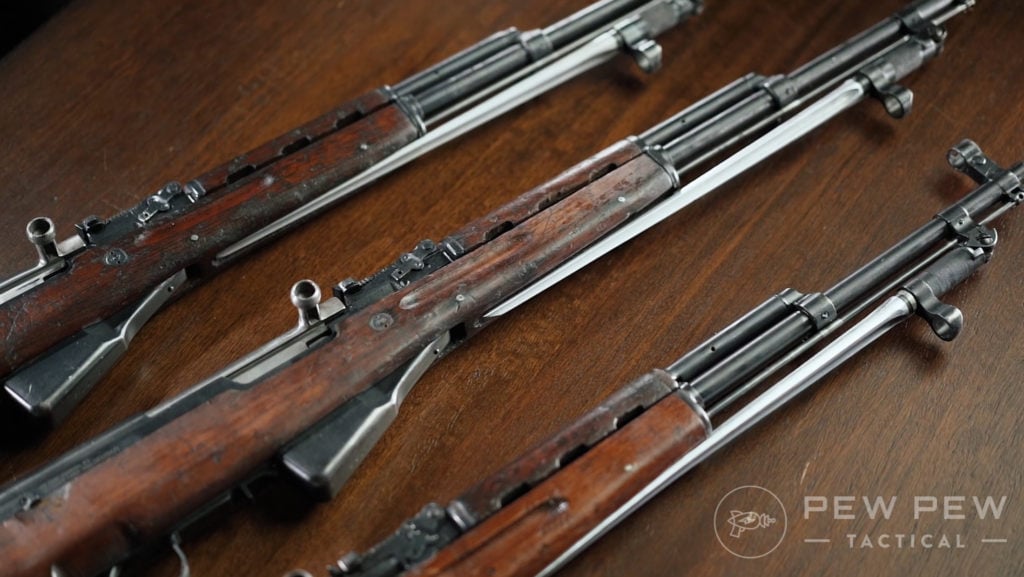
Whatever their history was with the PLA prior to being locked in the goo grave for an indeterminate amount of time, they certainly weren’t babied.
So we essentially got just enough cosmoline out of them to make them safe to fire and left it at that.
As expected, once we actually got them out to the desert, they had just a tiny bit more grease to leak out from weird places as the process of shooting warms up places not easily accessed by brush or rag, but so it goes!
Consider this just a primer on how you might tackle a cosmoline cleanup job, but there are tons of ways to go about it.
If you’ve got some super-secret method that you swear by, go ahead and yell about it in the comment section below. For some more cool old guns, take a look at our Walther P1 — a much cleaner and easier milsurp.


21 Leave a Reply
Back in the day when STENs were a hot item I bought about 50 of them. They were demilled but still had plenty of cosmoline on them. I tried gasoline and kerosene. Didn't work. I then tried Stoddard solvent. No luck.
Having had quite a bit of experience with rebuilding (greasy) automotives I called a repair shop that rebuilt engines and asked them if they would "hot tank" something other than auto parts. They agreed to do them so I wired groups of 5 pieces of parts together. I had 10 groups of half-cut receiver rears, 10 groups of half-cut receiver centers, 10 groups of half-cut receiver lowers and 10 groups of half-cut barrels. They accepted them and called me a couple days later to pick them up. CLEAN and SPOTLESS !
Cost me about $50 for the mess, saving me lots of time and effort and gave me good kits I could pass on to friends who wanted to build up semi-autos.
Interesting that you wore protective gloves when spraying brake cleaner on the gun parts, yet wore shorts and flip-flops w/o socks.
We like to live life on the edge. Lol.
In the Marine Corps, more than once did we have to 'un-Cosmoline' weapons, gear or other 'NOS stuff'...and without fail, the answer was always the same: 'Disassemble the device (if required) to field strip position, place the Cosmolined-item into the BOILING WATER TANK, and allow to soak for 4-5 minutes, as needed'. You would tie an old shoelace to a receiver, a gear, a bolt assembly, whatever...drop it in a pre-prepared tank of boiling water, watch the clock, and remove. IMMEDIATELY hit it with penetrating oil (NOT WD-40...but a real petroleum-based penetrating oil), and wipe down with a soft cloth. You can now use, and regularly clean. No finish injured, wood stocks like-new (it cooks Cosmoline out of the wood grain), and IT'S CHEAP! Forget the other 'dangerous processes'...boil with water, and you're good-as-new!
We have purchased closed to 20, mostly Chinese SKS"s, all of which were coated with cosmoline. We finally discovered the quickest way to remove the cosmoline was to fill up a teapot with water, bring to boil, then slowly pour the boiling water onto the SKS. We would rest the muzzle in a 5 gallon bucket to catch the cosmoline filled water. The cosmoline literally runs off with the water. Afterward, disassemble the rifle down the the point where you can remove all the moisture and clean a few nooks and crannys and properly lube. Done. There you go.
Simple Green works great on metal parts, particularly in the ultrasonic cleaner. A lot less toxic than brake cleaner, naphtha, and acetone. If you search "ultrasonic cleaner" on Amazon you can find one identical to the Lyman for $30-$40 cheaper. All ultrasonic cleaners are made in the same factory in the PRC.
Hmm, so it's like packing grease. Back in the day when I was a kid, we use to take packing grease of with gasoline.
I read a funny (?) story somewhere on the interwebs (possible urban legend) about some guys during the Battle of the Bulge in WWII who were assigned to strip cosmoline off M2 .50 cal. machine guns to get them ready for action. They dunked in the guns in a 55-gallon drum of gasoline. Because it was so darn cold (sub-zero temperatures) they decided to speed the process with heat. They built a fire under the 55-gallon drum of gasoline, with predictable results. Funny, as long as no one got set on fire and the machine guns made it to the front on time.
Back in the day, ethyl or "high test" gasoline was good stuff. Not so sure about current unleaded bio-fuel with all the additives.
The use of gasoline as a cleaning solvent is DRAMATICALLY Dangerous. A little spark/open flame & gas vapors can be a recipe for personal disaster, even outside. The stories of miss steps with gas are legion. Pick any other cleaning option!
Yes, I used it back in the day when I did not know better.
Purchased a SKS Type 56 that was so loaded with Cosmoline that the sales person would not even touch it. I had to pull it out of the plastic to verify numbers. When I started cleaning it I used a heat gun after tearing it completely down. Heat gun saved a lot of solvent. Only used it to finish wiping off the light residue. Heat gun is a total saver.
I've restored a couple cosmoline soaked rifles using different techniques. There is something hugely satisfying about bringing one of these old things back to life.
I just go to the car wash and hit it with the degreaser setting then rinse setting. Gets 95% of everything off and takes less time.
Thank you for the environmental damage
Just throw the parts in hot water. It will “melt” off the Cosmoline then wipe and oil everything down
How would a different solvent such as naphtha fare against the cosmoline? Brake cleaner and acetone will dissolve nearly anything but often they evaporate before you can get the gunk off and you are back where you started.
hey thanks for this information. Now I know why I don't buy mil surplus stuff. Now how come some drug dealer/crook can buy one of this things and whamo bamo it works right out of the box??
That only works if there is a person close by that can yell "CUT" right after the take.
All good tips, and this is how I clean the metal parts for the most part. I will offer that after trying everything, the absolute best method for degreasing the stock is to put it in a large black garbage bag and fill it with either kitty litter, or that similar stuff you use to soak up oil on the driveway. Then lay the bag on your dash in the hot sun for a week. I last did this with an SMLE stock from 1944, and it was wicked completely dry of every spec of cosmoline, and the oil absorbing compound was almost black. The stock was so dry it could easily be sanded and refinished.
Unique method. Thanks for sharing.
Pressure steam and air dry large parts and wipe down with good oil 3 in 1 is good run hoppes#9 thru the bore after steaming and compressed air drying. Bolt assembly and small parts steam on top off kettle with rack and follow same process for clean and lube for reassemble .had to deal with this stuff with stored engine cylinder heads and guns a lot steam and compressed air