
Failures happen, no matter what type of platform you’re shooting.
Handguns, bolt-actions, levers, revolvers – everything can fail. Yes, even revolvers.
But today we’re talking about the AR platform.
Unfortunately, while this design has many benefits, it’s not immune to malfunctions. The good news is that most of these failures are easy to diagnose and correct.
Today, we’re going to review common AR failures and go over some simple tips, tricks, and adjustments that will get your gun running normally again.
Let’s get started!
Table of Contents
Loading…
Always Observe Safety Precautions
Before we dig into AR malfunctions, we need to go over a few critical safety tips.

If your AR doesn’t fire as expected, stop.
Blindly attempting to load another round or forcing the trigger to work can often lead to further misfortune.
Instead, remove your finger from the trigger and make sure your gun is pointed in a safe direction.
At this point, you can proceed to diagnose the problem.
This process naturally becomes more intuitive with time and experience. But even expert gunslingers know to take their time and prioritize safety over speed.
You’ll eventually learn how to clear failures like a champ, but take it easy while it’s a new skill. Be careful, pay attention, and learn as you go.
8 Common AR-15 Failures
1. Failure to Feed (FTF)
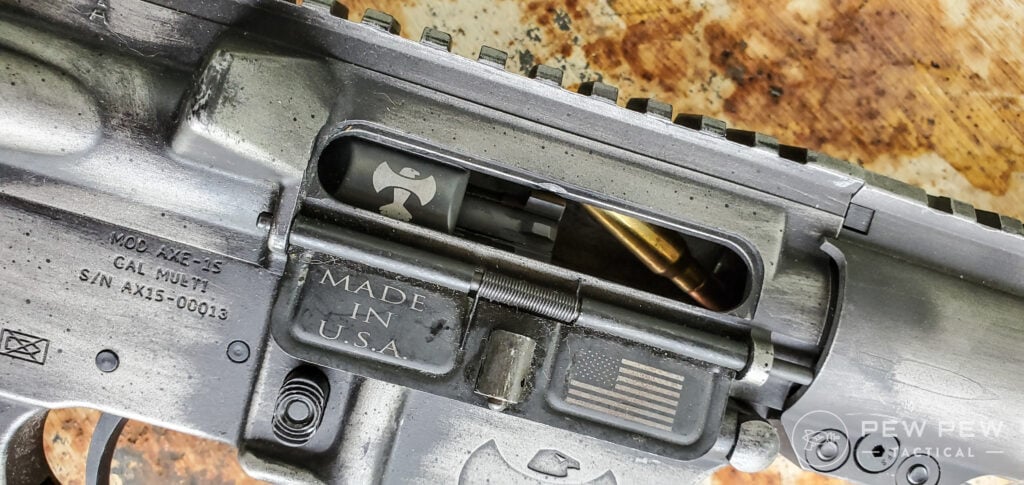
Failure to feed (FTF) is one of the most common malfunctions you’ll encounter as a gun owner.
It occurs when a round fails to load into the chamber of an AR from the magazine.

What’s really annoying is that FTFs can happen at any time. It could be your first shot of the day, or it could kill your vibe halfway through a magazine.
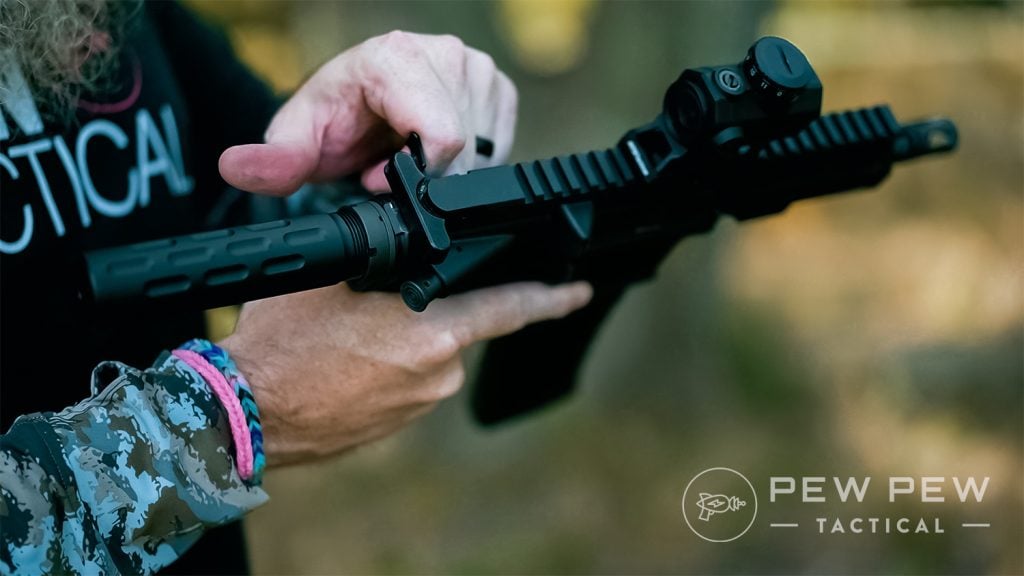
Step 1: Tap, Rack, Reassess
The tap, rack, reassess procedure (also known as tap, rack, bang) is extremely useful and can be used to clear multiple types of malfunctions.
- Tap: Give the bottom of the magazine a firm upward tap to make sure it’s fully seated
- Rack: Pull the charging handle back and let it go in order to reseat or clear the round causing the issue.
- Reassess: With the muzzle pointed in a safe direction, inspect the bolt and chamber to see if everything appears to be seated properly. If so, resume shooting as normal.
Sometimes you’ll get lucky, and this is all you need to get back to shooting.
Step 2: Inspect your magazines
If the tap, rack, and reassess maneuver doesn’t get your AR up and running, it’s time to conduct a more comprehensive diagnosis.
That said, magazines are the most common cause of failures to feed.
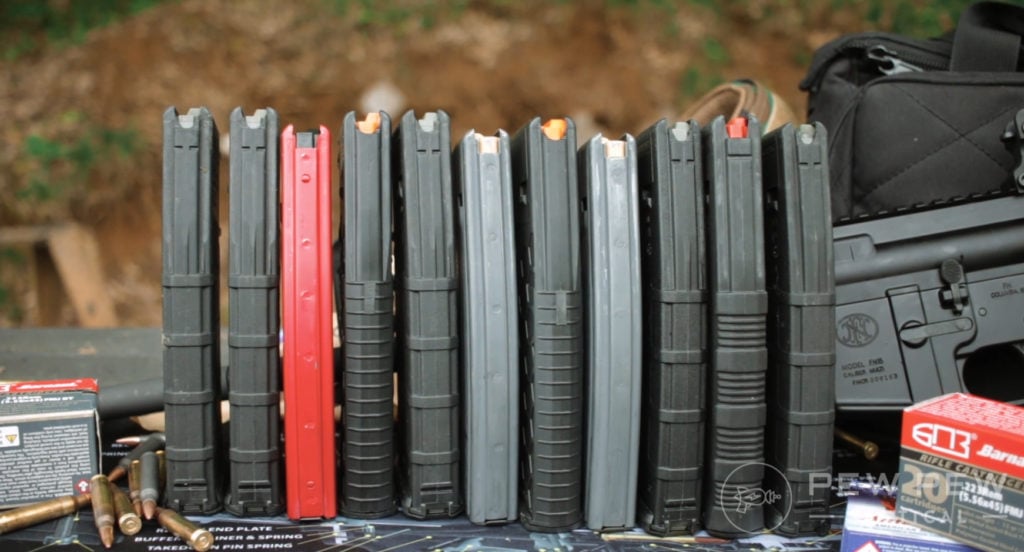
The first step is to switch out the magazine and see if the problem persists.
If a new magazine fixes the issues, you can then inspect the problem magazine for the following issues.
- External Damage: Dented magazine bodies, bent feed lips, or missing pieces can cause failure.
- Spring Damage: A worn-out magazine spring can cause failures by not providing enough upward pressure to present the next round. Push down on the magazine follower when it is empty to see if the resistance is similar to that of your other magazines.
- Round Count: Loading a magazine past its intended limit is a surefire way to cause issues. Even if a mag can fit more than the advertised capacity, don’t do it (ex. 32 rounds in a 30-round mag).
- Proper Ammo Orientation: Make sure your ammunition isn’t crooked inside the magazine and that all of the rounds are seated evenly and correctly.
Step 3: Inspect your ammo
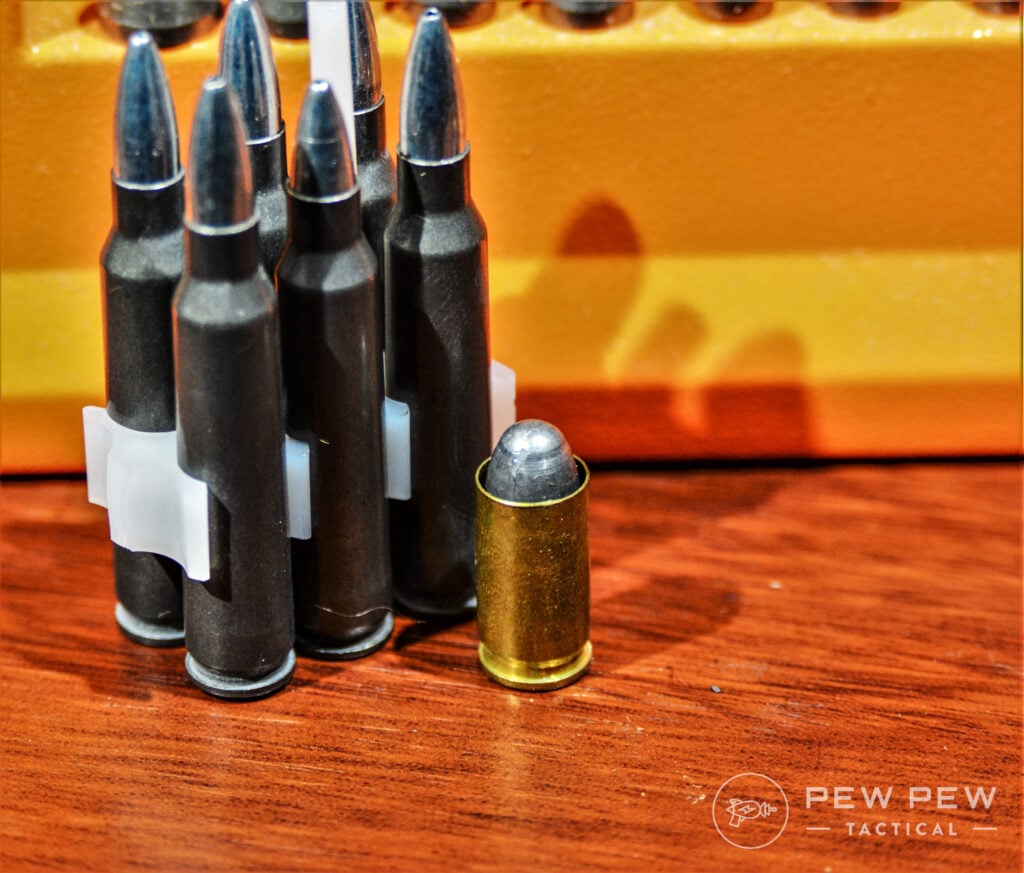
Sometimes it isn’t the gun, or even your magazine, but rather the ammo itself.
Quality control depends on the manufacturer, but when automated assembly machines are responsible for spitting out thousands of cartridges a day, it’s no surprise that a few bad apples find their way into ammo boxes.
You can encounter missing or loose primers, improperly seated bullets, or other issues that could lead to problems – sometimes dangerous – when feeding or firing.
While we strongly recommend paying close attention when loading ammunition into your magazine the first time around, sometimes things slip through the cracks.
If you think your failures might be ammo-related, you can unload all of the rounds from the magazine to visually inspect them for any dents, bullets seated too deep, or other abnormalities.
Properly dispose of any damaged rounds you find. If you are on the fence whether a round is good to go or not, always err on the side of caution and get rid of it.
If you would like to learn more ammo safety tips, check out Ammo 101: The 4 Parts Of A Cartridge.
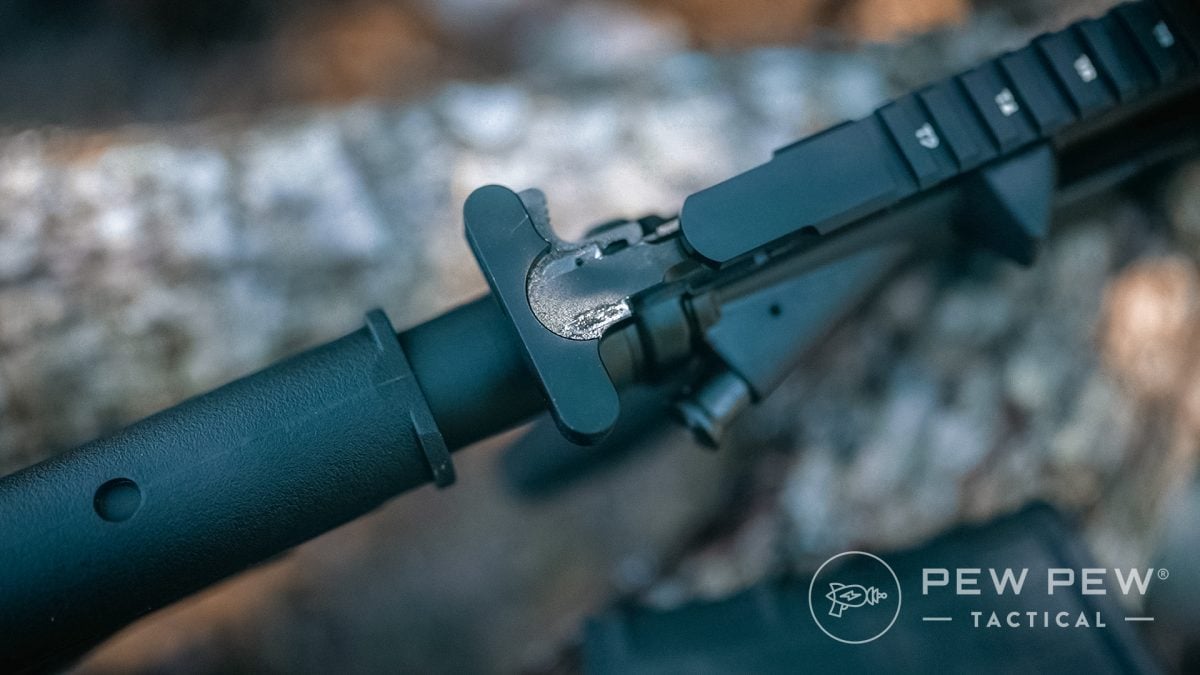
2. Failure to Extract (FTE)
A failure to extract (FTE) occurs when the empty cartridge of a just-fired round remains in the chamber.
Step 1: Lock the bolt to the rear
If the bolt did not lock itself back during firing, do it manually.
Step 2: Drop the magazine
Once the bolt is locked to the rear, drop the magazine. Sometimes the spent casing will fall out through the magazine well during this process, and the malfunction will be cleared.
Step 3: Shake the gun
After the magazine has been removed, try pulling the charging handle and giving the AR a slight shake or jiggle to dislodge the wayward cartridge. Have the ejection port facing down so the spent casing can fall out freely.
Step 4: Mortar the gun
If all of the above steps fail and the round is still stuck in the chamber or if the charging handle won’t move at all, you can attempt a process called “mortaring.”
Collapse your buttstock all the way in (if applicable), grip the charging handle with one hand, apply rearward tension, and then tap the butt of the rifle against the ground or a shooting bench. Ensure the muzzle is pointed in a safe direction.
You can see a demonstration in this excellent short video below from Breachers Customs.
If you can lock the bolt to the rear but the cartridge still won’t come out, you can try using a cleaning rod to push it out from the muzzle end. Read up on which cleaning kits we recommend here!
Step 5: Inspect Your Ammo
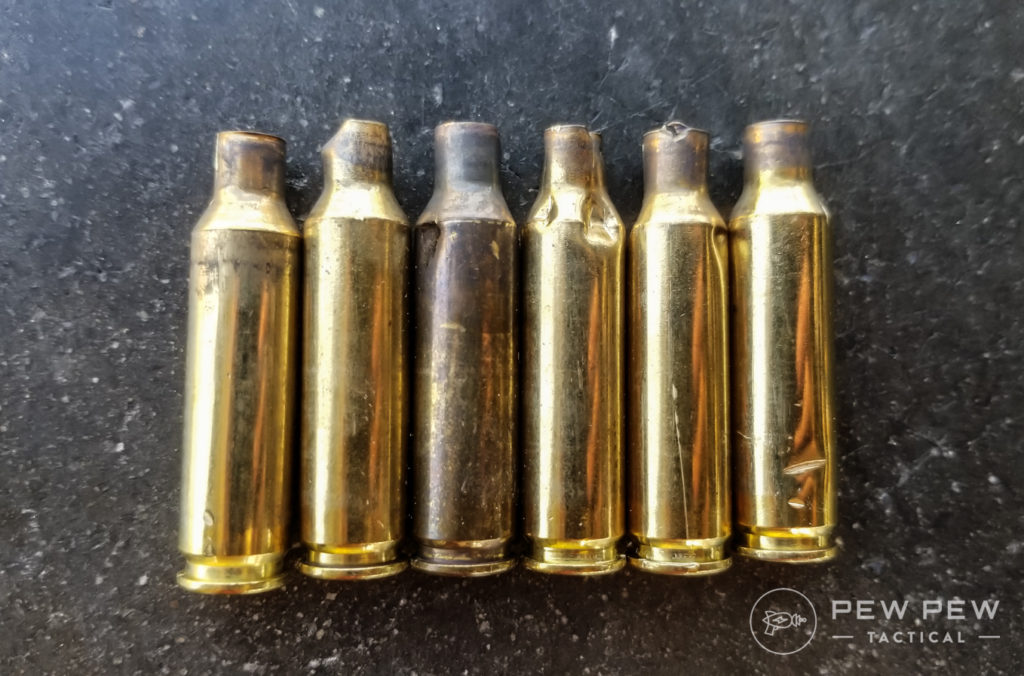
If the issue persists, inspect your ammo for dents, deformities, or other damage to see if it may be causing the issue.
What causes FTEs?
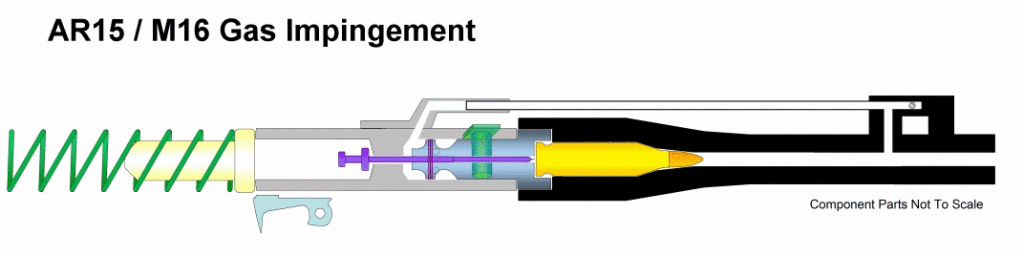
The causes of FTE can range from a worn-out or broken extractor, a dirty chamber, or an undergassed rifle (more on that later).
Sometimes, FTE is simply bad luck. It could be an improperly loaded round or even just a bad cartridge from the ammo manufacturer.

AR-15s like to run well-lubed and mostly clean. If you haven’t cleaned your gun in a while, we highly recommend checking out our ultimate guide on AR-15 Cleaning and Maintenance.
You can also watch our video tutorial below on how to clean and lube your AR-15.
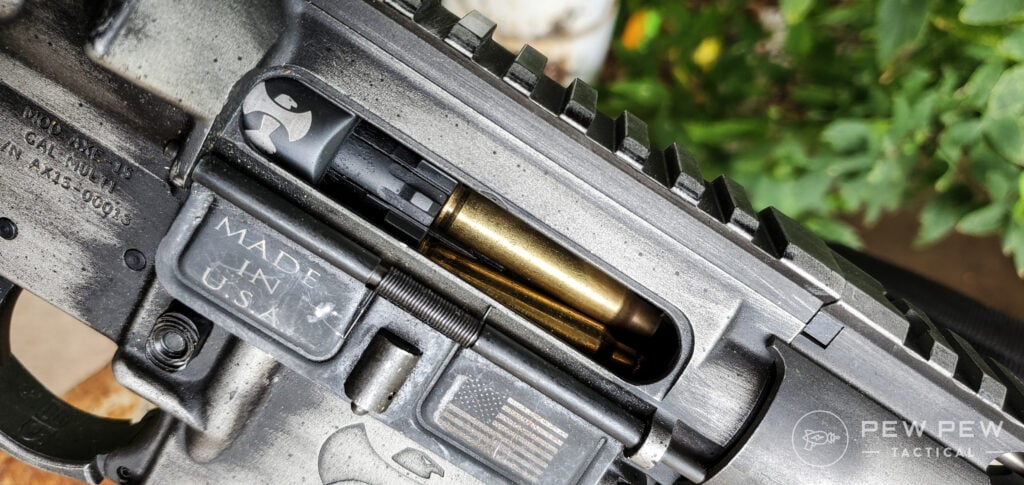
3. Stovepipe
A failure to eject (FTE) happens when the empty cartridge is extracted from the chamber but remains stuck in your rifle.
The most common FTE is what is called a stovepipe. This is when spent brass gets caught in the ejection port during extraction.
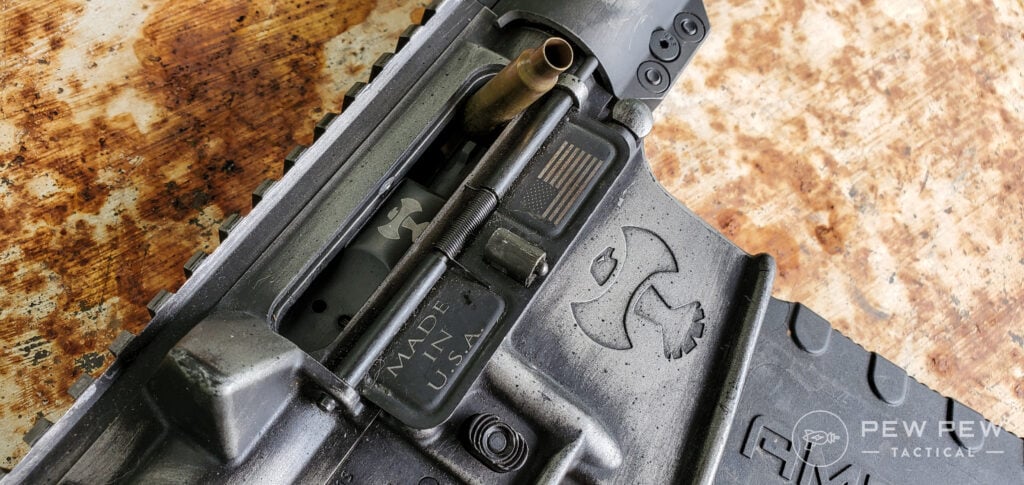
The offending cartridge case should be clearly visible and sticking out.
Luckily, these are usually the easiest malfunctions to clear. Simply follow the same tap, rack, reassess process we described earlier.
Step 1: Tap, Rack, Reassess
- Tap: Give the bottom of the magazine a firm upward tap to make sure it’s fully seated
- Rack: Pull the charging handle back with the ejection port angled down and jiggle the gun to shake the spent casing loose. Let the charging handle go to seat the next round.
- Reassess: With the muzzle pointed in a safe direction, inspect the bolt and chamber to see if everything appears to be seated properly. If so, resume shooting as normal.
In a perfect world, the spent casing will fall out, leaving you free to reload your magazine and get back to shooting. But what if it keeps happening?

But what if it keeps happening?
Step 2: Swap out magazines and ammo
You can usually rule out magazine issues by trying a different magazine, preferably a different brand.
Some AR-15s simply don’t like certain ammo. Before you write the gun off, try one or two different types of ammunition to see if that resolves the issue.
Step 3: Inspect the BCG
A faulty ejector or extractor spring on the bolt carrier group (BCG) can lead to weak extraction and ejection, which can cause stovepiping.
Inspect your BCG for any signs of physical damage. If it is extremely dirty, we recommend doing a disassembly and deep clean.
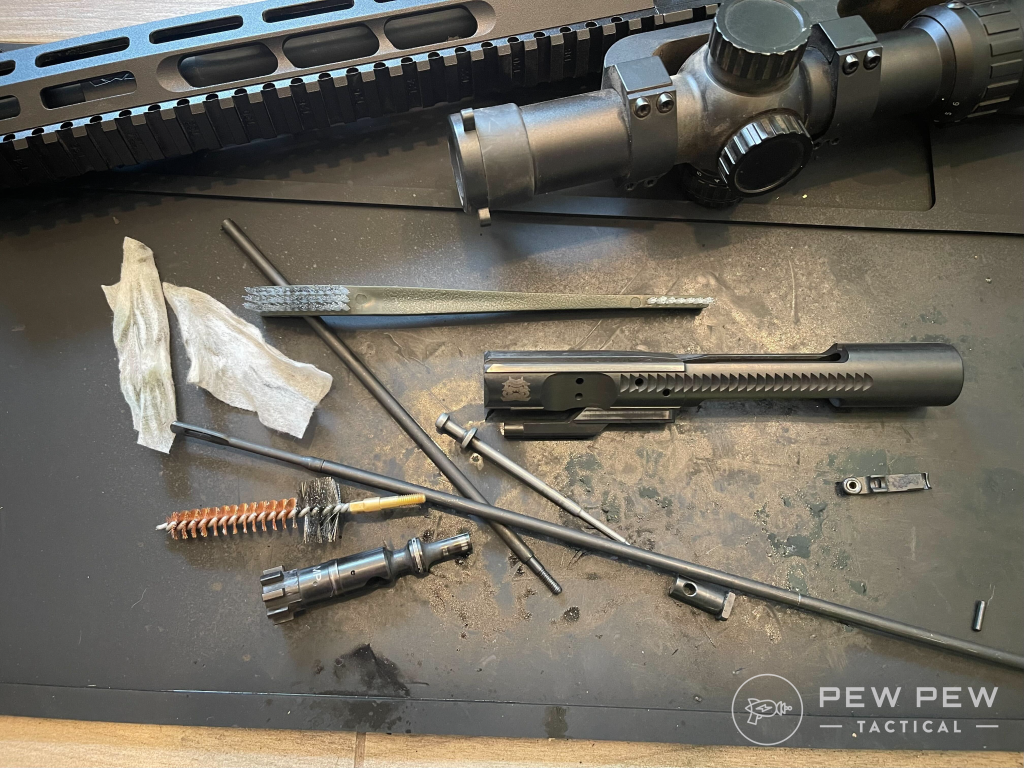
If the issue still persists, you can try swapping out your BCG with another one if you or a friend has a spare rifle on hand. This can help determine whether the issue lies with your BCG or elsewhere.
Still no luck? You might need to visit an expert.
But before heading off to a gunsmith, do yourself a favor and verify that your gun doesn’t need to be cleaned or lubed.
4. Failure to Fire
A failure to fire occurs when you pull the trigger and hear a click, but the round doesn’t go off.
This issue is almost exclusively caused by two things: ammo or firing pin issues.
Step 1: Eject the round
If you have a round that doesn’t go off, wait a few seconds to ensure that the round doesn’t have a delayed detonation. This is exceedingly rare, but better safe than sorry.
After a few moments have passed, eject the round from your AR.
Step 2: Inspect the primer
You should be able to see an indent in the primer from where the firing pin struck against it. A shallow or absent indent indicates that you had a light strike.
At this point, some doomsayers online might jump to the conclusion that something is catastrophically wrong with your AR. They might even suggest disassembling it for replacement parts.
Slow your roll, friend.

In my experience, this is usually an ammo-related problem. If it happens one time and can’t be replicated with other ammunition, take a breath and move on.
Step 3: Try different ammo
However, if it proves to be a repeat issue, my suggestion is to try a different ammo brand. Not naming any names, but certain companies are notorious for failures.
Step 4: Inspect your firing pin and BCG
If the malfunction persists, then you might be dealing with a bigger problem.
The most obvious place to start your investigation is the firing pin.
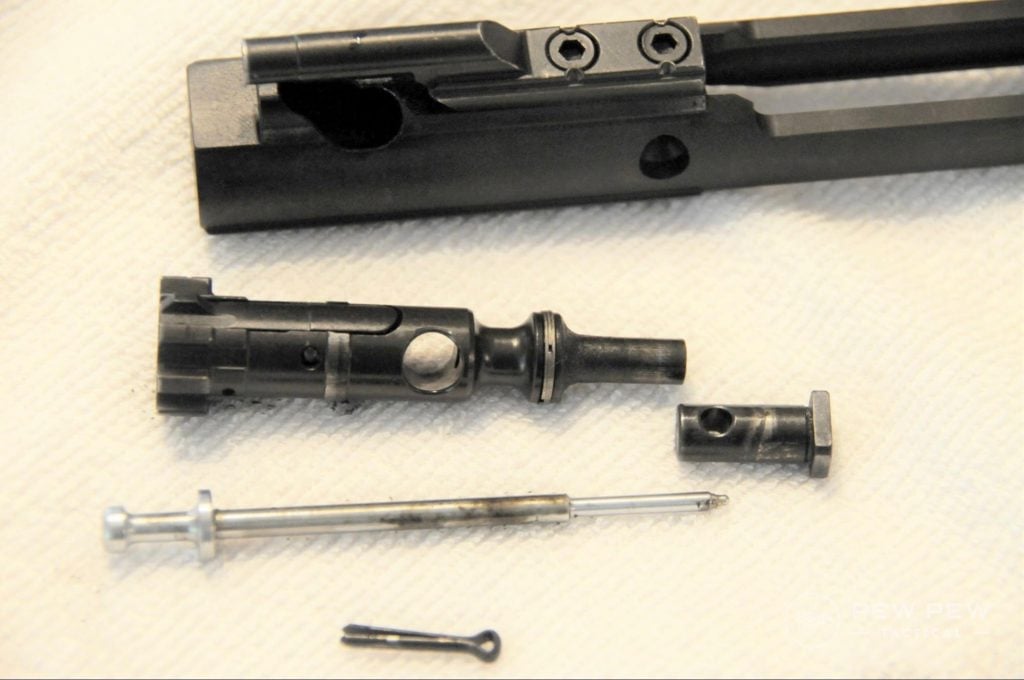
Disassemble your BCG and check your firing pin for any deformities or damage that could result in a malfunction. The tip of the firing pin is the most prone to breakage.
You will also want to inspect the firing pin channel inside the bolt itself. Frequent shooting can lead to a buildup of gunk that might slow down the firing pin to the point where it won’t reliably ignite rounds.
I highly recommend cleaning and lubing your BCG before pursuing repairs or replacing any parts.

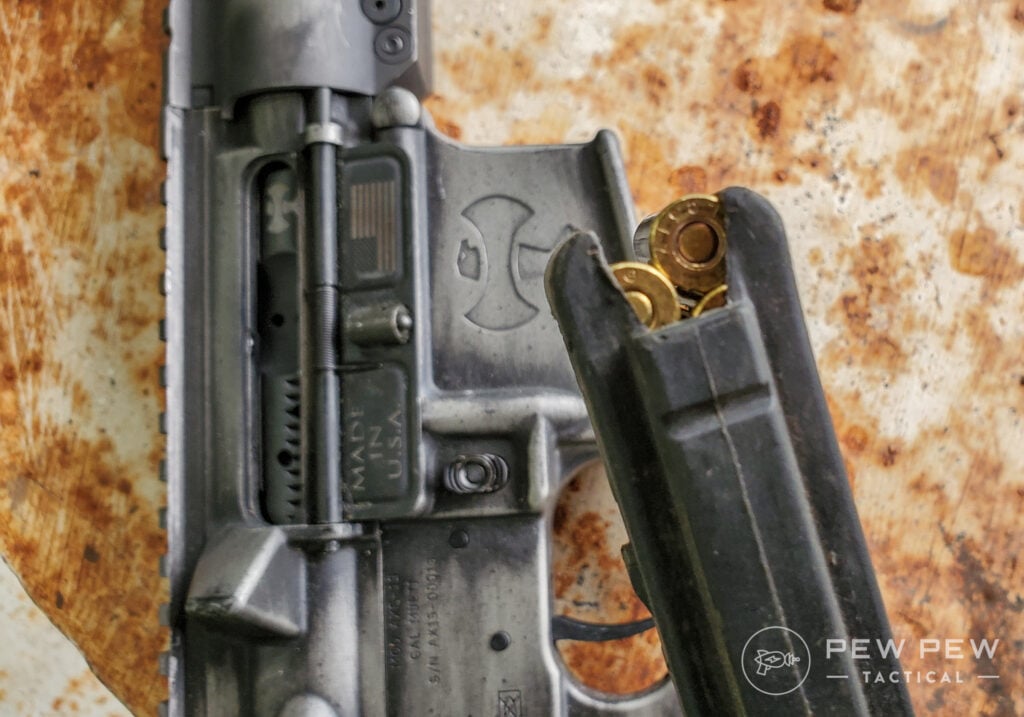
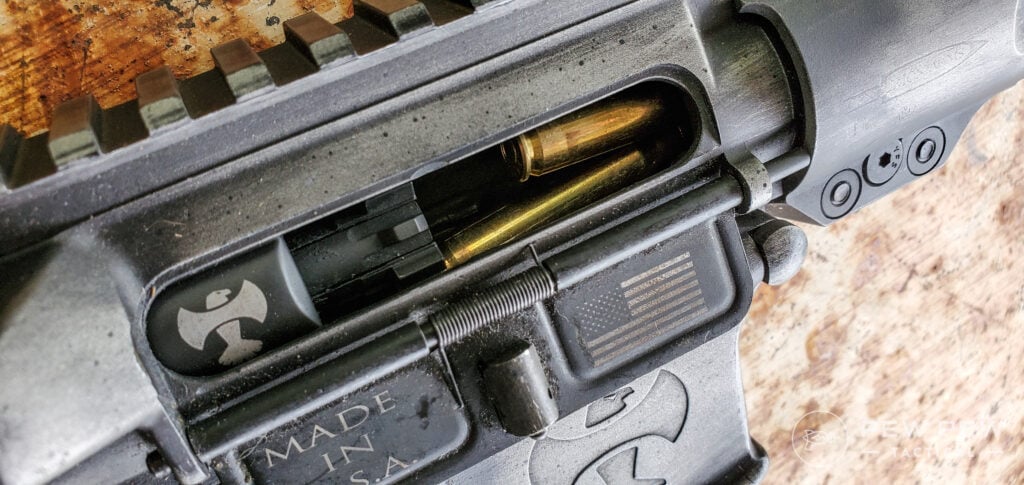
5. Double Feed
As the term implies, a double feed is when two rounds try to enter the chamber at the same time.
This can be tied to a failure to extract, where a live round gets stuck behind the previously fired round or its case.
Step 1: Lock the bolt to the rear
Grab the front of the magwell with your non-dominant hand, brace the butt of the rifle against your body, pull the charging handle firmly to the rear, and then use the bolt catch to manually lock the bolt into place.
This will take the tension off the rounds and the magazine, allowing them to hopefully drop freely.
Step 2: Drop the magazine
Sing it with me: To clear a double feed, drop that magazine!

All of the affected rounds might drop out through the magwell when you remove the magazine. If they don’t fall out, don’t panic.
Step 3: Manually clear the rounds
If nothing fell out when you dropped the magazine, carefully reach your fingers in through the magazine well and up toward the chamber to try and dislodge the rounds.
You may need to use a non-marring tool to remove the bottom round if it is being stubborn.
Step 4: Rack the gun a few times
Sometimes the top-most round will be stuck in the chamber. Simply run the charging handle a few times to ensure any chambered rounds are removed.
Once everything is clear, reload the gun, and you are back in business!
What causes double feeds?
Double feeds are usually caused by magazines loaded past capacity, compromised feed lips, or magazines inserted with too much force.
Slamming magazines in too hard from the bottom can cause multiple rounds to pop out of the feed lips. Insert your mags firmly, but don’t slam them.
6. Bolt Override/Brass Over Bolt
A bolt override failure is rare, but it is still worth mentioning.
These failures occur when a live round gets trapped at an angle above the bolt.
Step 1: Drop the magazine
Remove the magazine from the firearm.
Step 2: Lock the bolt to the rear
Grab the front of the magwell with your non-dominant hand, brace the butt of the rifle against your body, pull the charging handle firmly to the rear, and then use the bolt catch to manually lock the bolt into place.
With this specific malfunction, the bolt will almost never be able to fully lock rearward. This is okay. Pull it as far back as possible and engage the bolt catch.
Step 3: Push the charging handle forward
After the bolt has been partially locked back, give the charging handle a very firm slap/push forward.
This will force the bolt back forward, and the stuck round will typically be pushed forward and fall out through the magwell. Malfunction cleared!
Once it’s gone, use your eyes and fingers to confirm that the chamber and barrel are empty.
This can be a daunting malfunction to deal with if you have never experienced it. The video below from Downtown Tactical is a perfect example of how we prefer to clear brass-over-bolt stoppages.
7. Gassing and Buffer Issues
Alright, so you’ve run through the usual list of fixes.
Your gun is clean and lubed, you’ve tried different brands of ammo, but the bolt on the AR isn’t reliably locking open, the gun isn’t cycling properly, or maybe you are experiencing suspect ejection patterns.

The next things to look at are the gas and buffer systems that work in tandem.
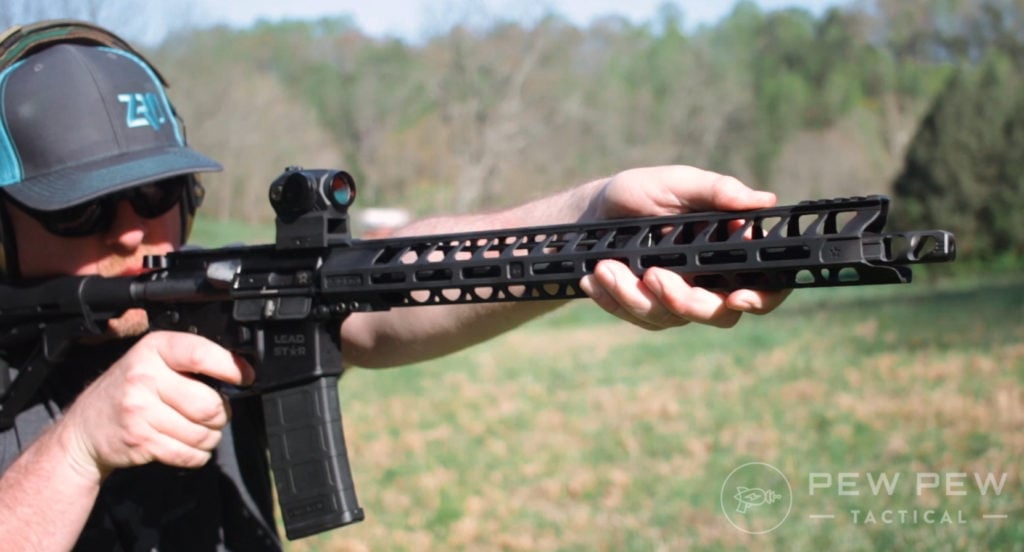
Undergassed rifles & heavy buffers
If your rifle is not cycling and the brass ejection is weak and to the rear, like in the chart below, your rifle is likely either undergassed or the buffer weight is too heavy.
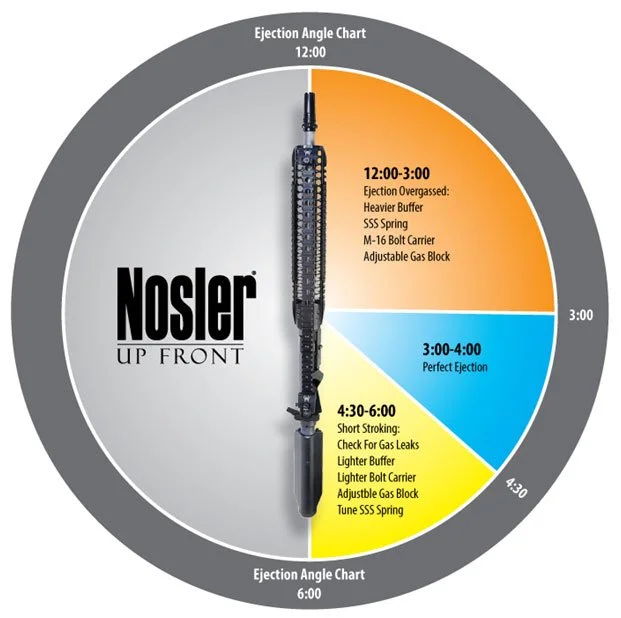
A rifle that is undergassed creates a situation where there is not enough gas hitting the bolt carrier group, which in turn means there is not enough force to reliably move the BCG rearward to pick up a new round.
This is often referred to as “short stroking” and is typically caused by either an undersized gas port on the barrel itself or a gas block that is not allowing enough gas through.
If the buffer weight in your buffer tube is too heavy, it can cause the bolt to slow down too much and cause the same issues as being undergassed.
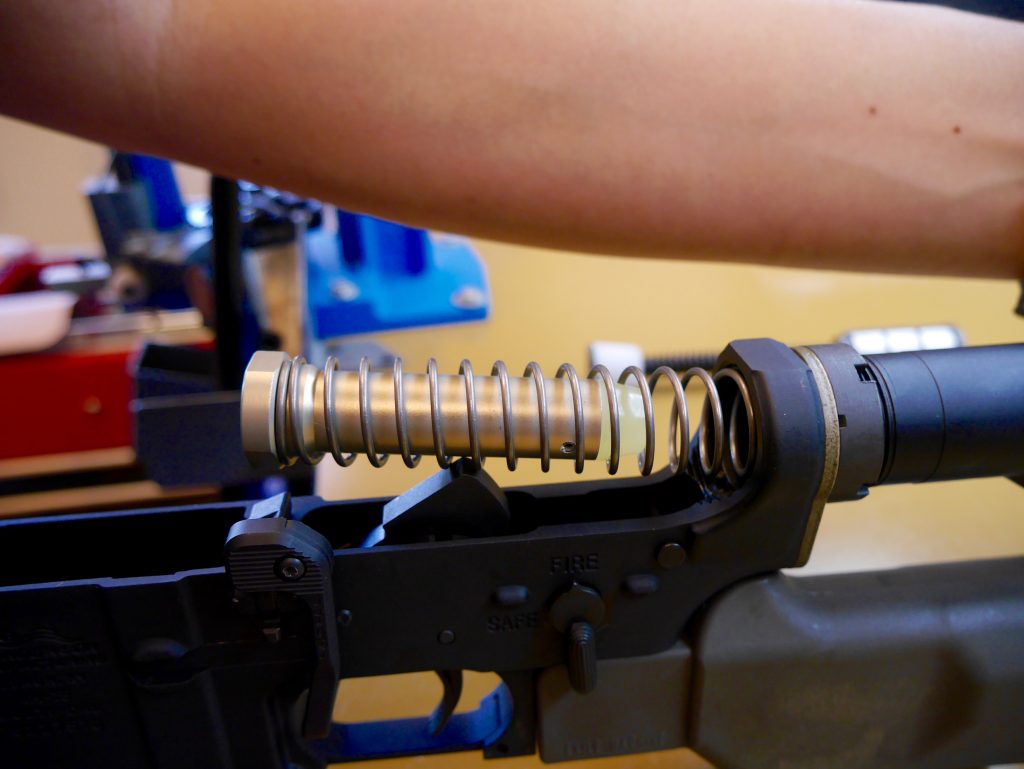
If the ejection pattern indicates you might be undergassed, we recommend swapping out the buffer weight for the next lighter weight first. Changing buffers is cheaper and much easier than replacing a gas block.
If the issue still persists, then you may want to consider purchasing an adjustable gas block that allows you to tune how much gas is coming back to the BCG.
To learn more about this awesome upgrade, mosey on over to Best Adjustable Gas Blocks [Complete Guide].
Overgassed rifles and light buffers
This is where it gets a little tricky. It can be difficult for the average gun owner to tell the difference between an under-gassed and an over-gassed AR.
An overgassed gun can result in excessive recoil, damaged cases, and failures to feed when the bolt moves faster than the magazine can feed rounds.
If brass is being thrown forward to the 12 o’clock to 2 o’clock position, and the recoil impulse feels sharp, the rifle is likely overgassed, or you may have a buffer that is too light.
Try swapping out the buffer for a heavier one first. If you are still getting erratic ejection patterns or failures, try an adjustable gas block.
If you want to learn more about how to tune your gas system, check out our tutorial here!
Final Thoughts
There are many failures that didn’t make the list, but we tried to stick to the most common issues for this troubleshooting guide.
Remember: When dealing with any malfunction, always prioritize your safety and be thorough in your diagnosis.
And there is no shame in asking an expert shooter or gunsmith for guidance! Education is an ongoing process, especially in the world of guns.
What malfunctions have you faced on the range? Let us know below. Ready to tackle pistol malfunctions next? Read up on what you might face over at the 6 Common Handgun Malfunctions & How To Fix Them.
Editor’s Note: This article builds on an original piece written by Kat Ainsworth Stevens with additional information added by PPT Editor & Sr. Review Analyst Wyatt Sloan.
Resources
- Ultimate Guide to AR-15 Cleaning & Maintenance
- How to Build an AR-15 Upper Receiver
- How to Build an AR-15 Lower Receiver
- Best Adjustable Gas Blocks
- Best AR-15 Magazines
- Best AR-15 Ammo
Latest Updates
April 2026: Restructured article and separated individual steps for various malfunctions.


14 Leave a Reply
I purchase a new 6.5 Grendel upper for my ar. When i shot the gun it fires fine but bolt locks up and doesn't come back at all. I am unable to pull the charge handle back at all. The only way I could get the bolt back is to pry it with a screw driver . I placed the empty casing in the chamber and closed the bolt and it seems very stiff when I pull back with the charge bar. Checked the empty casing and no signs of any deep scratches or signs off a problem. Cleaned all the parts and barrel but no change.
Built an AR for someone and everything working fine until suddenly the trigger quit working. Seemed like it was not resetting sporadically. With no mag and no ammo, pulled charging handle back hard and it cycled/reset fine every time. Noticed in cleaning it that the rotation pin in the bolt is super sticky and difficult to get out. Would that slow down the recoiling BCG enough to not get a recock and reset? Never had an issue like before so not sure what's going on.
I just built a AR 15 and took it to the range. On 25 rounds in my mag it fired twice and once three times with one pull of the trigger. Any ideas what is wrong? Thank you for any advise you care to give. Gene
I experienced ejection issues during a sight-in project with a different scope. After about 19 rounds fired, the spent cases would not eject. Some did others didn't. After hours spent checking the firearm, I carefully inspected the brass. I found that the lock nut on the full length sizing die had loosened to finger tightness which led to full length not occurring. I readjusted the die and made certain the lock nut was sufficient.y tightened. I resized (loaded) rounds and my problem went away.
Ok, I have a S&W M&P 5.56. Ran great stock out of the box. I couldn't leave well enough alone so I blew $800.00 on a can for it. Now it won't feed right. Rounds are hanging up on the way to the chamber and sometimes they enter but not far enough to go bang when the trigger is pulled I have to drop the mag, pull the CH while banging the butt on the ground to extract the damaged round! I have tried to reduce gas by adjustable front A2 site, tried the adjustable gas key, replaced the buffer weight, cleaned and lubed, changed mags, changed ammo, even said an assortment of selected cuss words with no luck. It will maybe fire one or two rounds then jam. I even sent it to Elite Iron for work and it still won't run right! I am frustrated and need a good place to send this rifle. Thanks
Just started getting FTE only after removing the magazine and clearing the last unfired round. I'm out of ideas. I can't replicate it any other way such as ejecting unfired rounds before firing.
Built my own AR15. Only FTF happened with Tulammo steel case. Even put a few rounds in a 30 mixed with brass. FTF every time the Tulammo came up. Learned a lesson that day.
I need one of these guides for Cali compliant ARs. Most of my shooting is at the range and have had range masters provide various solutions. And none are quick nor ideal.
1) rifle on bench, pulled charging handle back, pointed down range. Tap out the round in chamber with multi tool or pocket knife.
2) unscrewing the magazine from bottom and pulling out.
It should be noted that Drop that Mag doesn't mean drop the mag... One of your pictures even shows a mag half way in it's flight to the ground. Many mag problems are caused by careless handling. A mag that hits the ground should always be inspected for damage, and be sure to look the exposed ammo over too.
Thanks for the comment. Yep, you definitely want to take care of your gear. We opted for that picture, though, because it dramatically illustrated the point. As always, thanks for the feedback!
Great Article. Only one problem I live in the DPRC (Democratic Peoples Republic of California) most of the solutions revolve around dropping the magazine. Since you have to separate the upper from the lower it is nearly impossible to do this with the bolt partially open. I have had to monkey motion the two parts to get enough clearance to drop a mag. Usually I have to pull both pins to get a magazine to drop. THANK YOU to the insane idiots in Sacramento for stupid laws!
Could just run with a featureless build instead of a maglock build. It doesn't look as normal, but it's a lot more functional, and easier to convert to a normal AR (when you're legally allowed to, like visiting a neighbor state).
Great Article. Only one problem I live in the DPRC (Democratic Peoples Republic of California) most of the solutions revolve around dropping the magazine. Since you have to separate the upper from the lower it is nearly impossible to do this with the bolt partially open. I have had to monkey motion the two parts to get enough clearance to drop a mag. Usually I have to pull both pins to get a magazine to drop. THANK YOU to the insane idiots in Sacramento for stupid laws!
Another cause of double feed: I changed up a rifle buffer to carbine when I switched out from an A2 stock to a Minimalist stock on a 6.8 SPC. From then on it was frequent double feeds, with a rare completed cycle with chambering. Pondering on this for quite some time, I decided the only dynamic difference between the two setups was the carbine buffer being lighter. Adding weights to it to bring it up to rifle and the problem immediately and permanently disappeared.
I calculated the bolt was moving faster, enough so that the round couldn't flip from the ejector soon enough, it was dragged into the receiver and then on returning straight over the magazine another round was stripped off and it all tried to chamber at the same time. Bolt cycle speeds are highly controlled in mil spec guns - CRANE recommends up to an H3 buffer in the 10.3" barreled weapons. And it's also the reason why the older carbine gassed Mforgeries ten years ago had issues - tapping higher pressure gas was battering the bolts. The industry move to midlength corrected it for the non mil spec 16" barrels we were running. Carbine is meant for those 10.3" barrels, not 16".
When building an AR, keep the gas port about 5" behind the muzzle and it cleans up a lot of issues before they can start. It sets adequate dwell time, and appropriate gas pressure. Done right, an AR will function with no issues - without an extractor at all - because you have tuned it to operate properly. Residual pressure in the barrel pushes the cartridge against the bolt face and that is what actually extracts it, at the level where the case has contracted the right amount. Too much gas too soon and the cartridge is still expanded, or just as bad, dragged out by the extractor by unlocking too soon. It's not like a manual bolt gun, it's a lot more like timing intake valve opening on a race car. From their all sorts of ingenious bandaids are applied when the basic "timing" is what is wrong from the git go.