Hand-Picked Daily GUN DEALS, and Exclusive Coupons Codes >>>

1911 80% Tactical Machining Build, Part 10: GunKote Application

Preparing surfaces with Sand Blasting, Brake Cleaner and K-Phos, then applying OD Green GunKote.

Now that you’ve finished your 1911, it’s time to make it pretty!  I went with GunKote since it is oven cured.  Disclaimer still.

I basically followed what I read in this thread.  I ended up doing it twice, first without sandblasting and the second time with sandblasting.  My preference is with sandblasting since it turned out to be a lot easier to do than I thought and with a much better end result.  My first time with just cleaning and K-Phos led to some premature wearing on some parts.

Preparation 1 (No Sand Blasting)

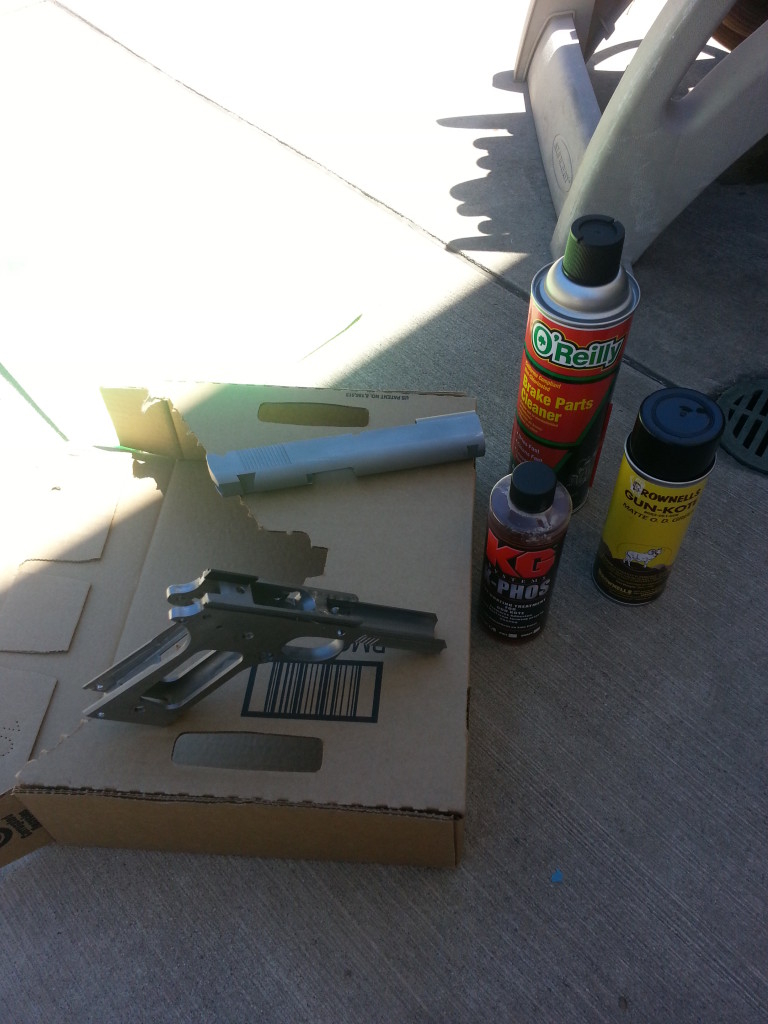
Cleaning Frame with Brake Cleaner

Went through and took apart everything down to just the bare slide and receiver.  You should be a pro at this after building it up yourself.  I then took it outside, put on my eye and breathing protection, along with some latex gloves, and blasted it twice with brake cleaner.  That stuff is nasty so be sure to do it in a well-ventilated area.  You want to get rid of all the oil since GunKote will not adhere correctly even if there is only the oil from you fingers.

I put the slide and receiver into the oven around 300 degrees for 15-30 minutes so any additional oil can seep out.  I then blasted it two more times.

I also bought K-Phos which is a pre-treatment for GunKote (I used green matte) since I didn’t have access to bead blasting.  I just dipped a clean rag into it and rubbed all the surfaces.  Then I let it sit for 10-15 minutes.

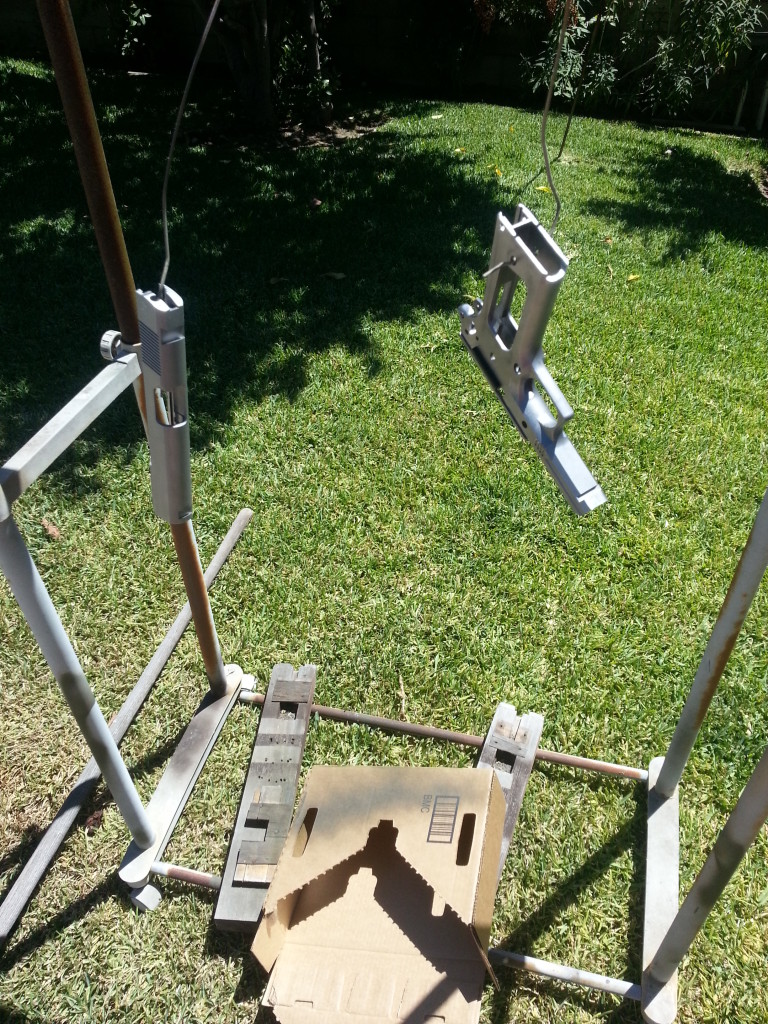
You’ll want the slide and receiver a little warm (around 100 degrees) when you apply the actual GunKote.  It was 100 degrees outside, but otherwise I would have popped it into the oven or used a heat gun.  I then strung them up.

Ready to Apply GunKote

I tested light coats on some cardboard first, and then just went for it.
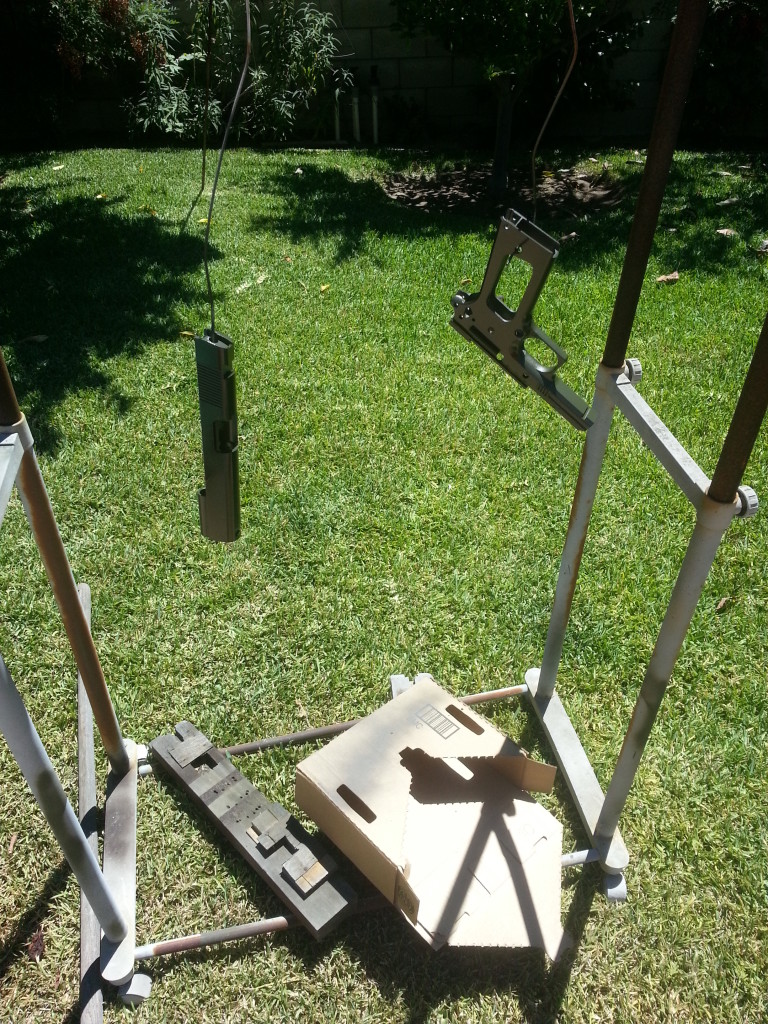
OD Green GunKote
OD Green GunKote

The thread mentions that if you pop it into the oven it will make the whole house smell, but that if you let it dry a little, the smell is significantly less.  I left it outside for 3 hours and then strung it up in my oven.  I also read that the higher the temperature the stronger and darker it gets.  I ended up following a post where they went 375 degrees for 90 minutes.

The smell was definitely not too bad with just letting the windows open.

After the time was up, I just turned off the oven and let it return to room temperature.  Put a light coat of oil on everything and put it back together.  I had to work the thumb safety in a little as well as my rails because of the additional paint thickness.  Not too shabby!

Completed Tactical Machining 1911, minus sights

Preparation 2 (Sandblasting)

Take everything apart and clean as much as you can with just regular gun cleaning solution.  I bought a cheap sandblasting kit from Amazon for $20 which worked great.  I also got some of the recommended 120 grit aluminum oxide off Ebay ($13 for 5 lbs).  I found that 5 pounds was enough if I captured the leftovers once.  If you just have virgin steel to blast, once through should be enough.

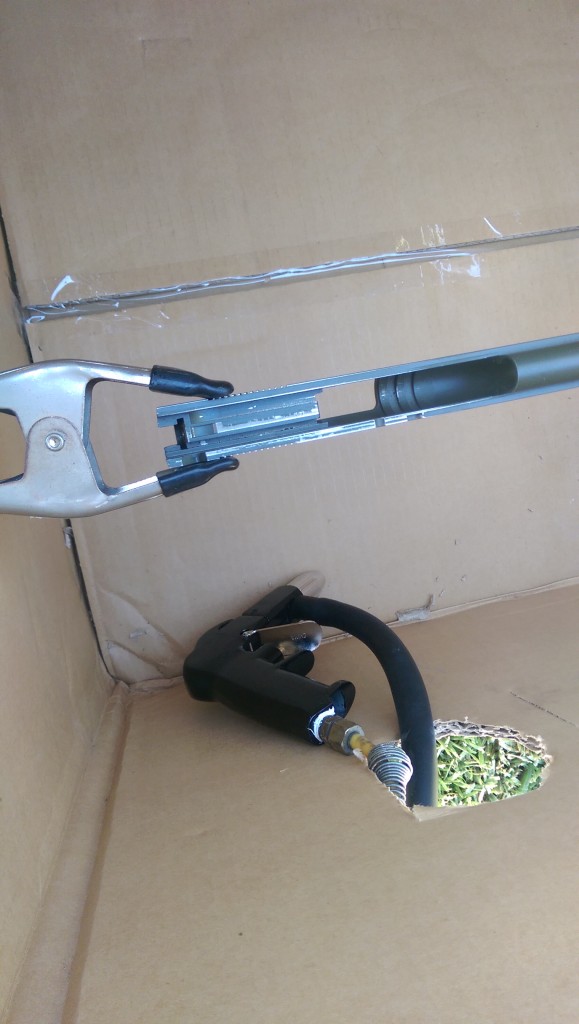
I made my own sand blasting cabinet from an old sturdy box, some clear plastic sheet I found in the garage, and by cutting two holes for holding the parts and the nozzle.

Homemade Sandblasting Cabinet

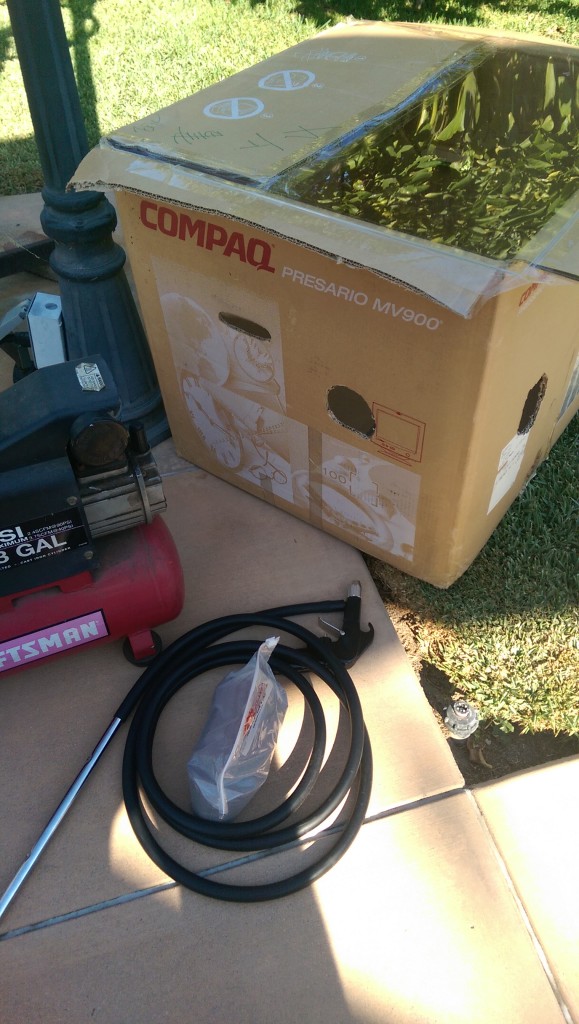
I borrowed a buddy’s air compressor which went up to 125 PSI with 1.5 BHP and 3 Gallon capacity.  It worked great as long as I let it keep above 90 PSI.  Here should be a good alternate from Amazon, or I’m sure good ole Harbor Freight will have some.

Have good eye protection, a good mask/respirator for the small particles that will fly out, and thick gloves for your hands.  I used a clamp for holding the parts when in the cabinet.

Inside View of Homemade Sandblasting Cabinet

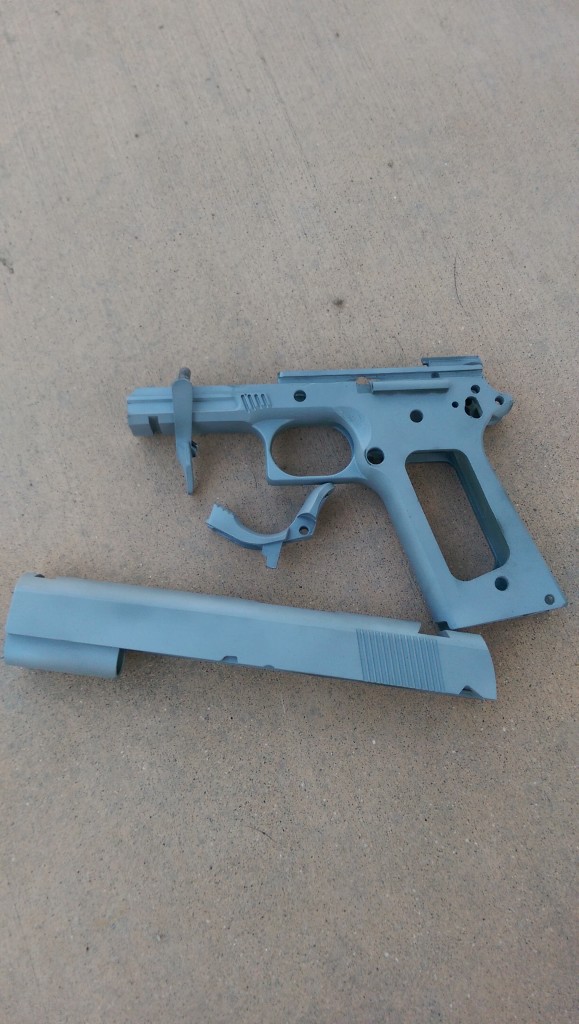
The end product looked great.  I went with sandblasting the beavertail and slide stop since I had some fitting work on them that exposed the bare metal.

Sandblasted 1911
Sandblasted 1911

After, I used the same procedure as before.

  • Wear gloves
  • Brake Cleaner
  • Oven to seep out oil
  • Brake Cleaner
  • Heat up parts
  • K-Phos
  • Spray in light coats
  • Let it sit outside for 2+ hours
  • Oven at 375 degrees for 90 minutes
  • Cool and lube
Completed Tactical Machining 1911, minus sights

Done!

Part 1: Intro (Finding the 80%)

Part 2: Tools

Part 3: Parts List

Part 4: Basic Fitting

Part 5: Cutting the Slide Rail

Part 6: Barrel Seating

Part 7: Hammer & Sear Pin Holes

Part 8: Fitting the Slide

Part 9: Assembly & Fitting

Part 10: GunKote Application

The Best Gun Deals, Coupons and Finds

Subscribe to Pew Pew Tactical's sales and deals email.

18 Leave a Reply

  • Commenter Avatar
    Matt Green

    Hi Eric,

    I just noticed the typos in my post dated 6/30/16! Is there a way to fix that? My eyes must have been high and to the right... The word was after "perhaps it" is a mistake on my part. The other mistake was painted. It should read "I applied two coats of paint as per the manufacture's instructions". Thanks again for the videos. I use them for reference often.

    July 12, 2016 9:45 pm
  • Commenter Avatar
    Matt Green

    Hi Eric,

    I wanted to share my experience with the the GunKote application. Perhaps it was can help someone else who is performing an 80% build at home. My frame is a bead blasted aircraft aluminum government model 1911. The preparation for painting was a little different than yours, but the result was superior. After taking the weapon apart to the bare frame, I ran it through the dishwasher on the top rack using citric acid instead of regular dish-washing detergent. The brand of dish-washing cleaner is Glisten Powder Dishwasher Magic [available at Amazon]. It stripped all the oil and debris from the frame, and it also left some additional pitting on the frame. After air drying the frame I applied two coats of painted as per the manufactures instructions, and then baked it at 350 degrees for 30 minutes. The result was as close to perfect as I can get. Thank you for your videos! They helped my first build go smoothly.

    June 30, 2016 3:18 pm
    • Commenter Avatar
      ehung

      Thanks so much for the tip, Matt!

      July 5, 2016 4:21 pm
  • Commenter Avatar
    Carlos

    Hi Eric, very nice job on this DIY instructional 1911 build project. Because I've learned so much I'm considering starting this project myself. Can you explain what exactly is SSE and why the exemption enforced and now is gone from CA?

    June 16, 2016 12:30 pm
    • Commenter Avatar
      ehung

      Hi Carlos, good question. CA has a "Roster of Handguns Certified for Sale" and for a period you could get a gun that was off the roster as long as it met some criteria, the most well-known was to have a longer barrel and be "single-shot". However, in 2015 AB 1964 passed which closed that route.

      June 16, 2016 1:14 pm
  • Commenter Avatar
    Kali

    I'm considering an 80% 1911, and I'm in California as well. How did you build it as a single-shot?

    April 2, 2016 8:05 am
    • Commenter Avatar
      ehung

      Hi, when I built it in 2014, I borrowed a long barrel and single-shot magazine. Not sure what the rules are now for CA now that SSE (single shot exemption) is gone.

      April 2, 2016 4:03 pm
      • Commenter Avatar
        Kali

        Thank you for your reply. I've just picked up the hobby, and this seems like a great way to learn more about the build process. Great job!

        April 4, 2016 9:22 pm
  • Commenter Avatar
    Mark

    Great instructional HOW TO, Eric. Maybe I missed it, but how much did you end up spending for parts alone in assembling this 1911? I realize you bought tools too that can (possibly) be used in another build, so how much did you spend on just the tools alone?

    February 20, 2016 5:45 pm
    • Commenter Avatar
      ehung

      Hi Mark, I just tallied up the tools (part 2 of my guide) and it comes out to be around $400 if you don't have anything. I had some stuff already like the drill press and a lot of the smaller items such as sandpaper, files, etc. The nice to have tools is around $150 if you want to have an easier time installing and also to do a trigger job.

      February 20, 2016 6:21 pm
  • Commenter Avatar
    Ken Kelly

    Hi Eric, I'm going to attempt to do an 80% 1911 and want to use 1911 Builders Stainless Steel kit. I'm planning to purchase the Matrix rail cutter. On the Stainless modle the barrel seat is already finished only requiring decking of the top. If you had that tool and didn't need to cut the barrel seat would it make an easier build.

    December 25, 2015 7:40 pm
    • Commenter Avatar
      Eric Hung

      Hi Ken, yea I've been looking at all this new tech in the world of 80% 1911's. Wish they were out when I started! I definitely have trying out a new build with their stuff on my to do list. Let me know how yours goes!

      December 29, 2015 11:03 am
  • Commenter Avatar
    James

    Eric,came across your article,was looking into a bit as a buddy with mill is going for a build starting for lack of better word 0%,i.e.,a chunk of quality steel.He will buy slide/ barrel ect. but the receiver totally a start from scratch.I was wondering as post about a year old,what sites did you finally go with and how did it do in the field.A great job with minimum tooling and your reuse of items as box for sand blast cabinet appeals to the New England Yankee in me,great job and happy shooting!

    December 25, 2015 3:55 pm
    • Commenter Avatar
      Eric Hung

      Hi James, thanks for the question. Looks like I need to update with the sights! I went with novak front sight .075 and novak lomount carry rear sights. And yeup, just using what I got to get things done!

      December 29, 2015 11:01 am
  • Commenter Avatar
    Don

    I've been wanting to do my own build and I want it to be a .45. I've never even taken apart a 1911 much less build one. Is there any way you might send me links to get all I need to build one including the 80% frame and jig. If not I understand but I would be most grateful. I really have a hard time comprehending things I read.

    Thank you,
    Don

    October 24, 2015 11:40 pm
    • Commenter Avatar
      Eric Hung

      Hi Don, apologies for the super late response, I haven't checked comments recently. But if you're still looking at building, just head to my first article (looks like you posted on my last article).

      December 29, 2015 10:57 am
      • Commenter Avatar
        Don Tuttle

        Yeah, u r way late but thx. I've ordered, received, built it, shot it and most of all live it. Shots perfectly every time and on target. Thx anyways.

        December 30, 2015 5:08 am
        • Commenter Avatar
          Don Tuttle

          Type-o (LIVE) =LOVE IT!

          December 30, 2015 5:09 am
Join the community! Log in
Please provide a valid email address.
Password is required.
or
Register
Please provide a valid display name.
Please provide a valid email address.
The password should contain at least 8 characters with at least one number or special character.
Please accept in order to continue.
or
Trouble logging in?
Type your email address and we’ll send you a link to reset your password.
Please provide a valid email.
Password
Type your new password and hit button below to confirm it.
Field is required.
Account already exists
We already have an account registered for email address () which is linked to your Facebook account.
To log in type your Pew Pew Meter password below.
Field is required.
Account already exists
We noticed that you have previously logged in with your Account which is linked to the same email address () - we can link both of your accounts together.
In order to link your accounts, hit button below and log in to your Account with the same email as above.

Account in Pew Pew Meter means more

Check what do you get by creating an account
Check and save your reviews!
Bookmark and compare your favorite firearms
Manage your newsletter subscription
pew pew tactical logo

new here?

Personalize your experience.
Select what level shooter you are!

pew pew tactical logo

level up your gun knowledge

Thanks! We'll send you the latest guides and training tips geared towards your level.

pew pew tactical logo

welcome!

You'll now receive newsletters of our best articles on techniques, guns & gear.

$47 value

yours free!

targets targets
free

practice targets

printer icon printable

our 9 favorite targets and drills

free

practice targets

printer icon printable

enter your email to download

We'll only use the information provided according to our privacy policy.

success icon

Ready to Download

Click below to begin your download

download pdf