Best LIVE Ammo Deals Online >>>
We review products independently. When you buy through links on our site, we may earn a commission to help support our testing. Learn more.

How to Paint Your AR-15: [Skip the Camo Krylon!]

Featured Image
Want to make your AR-15 unique? We cover paint and color choice, rifle prep, and camo spraying techniques. Plus lots of pictures and a full video tutorial.
Add as a preferred source on Google
We review products independently. When you buy through links on our site, we may earn a commission to help support our testing. Learn more.
JUMP TO SECTION Jump To:

    Sick of your AR-15 looking exactly like everyone else’s?

    Then it’s time to paint that bad boy!

    AR-15-Smith-&-Wesson-Sport-I-EOTech-EXPS-3-Rail-Scales-Spray-Painted-Camo-Magpul
    A spray-painted AR-15

    Painting your rifle isn’t hard or scary, but you can mess up if you go in completely blind. We have painted our fair share of rifles, so we know how to avoid the beginner mistakes.

    So join us as we cover the materials, prep steps, and techniques you need to paint your AR-15 and achieve good end results!

    Table of Contents

    Loading…

    What You Need Before You Start

    Must-Have Items

    Step-by-Step Instructions

    While we recommend checking out the rest of the article, we’ve got you covered with a full video on how to paint your AR-15 if you want to skip all the reading!

    Step 1: Select the Right Paint

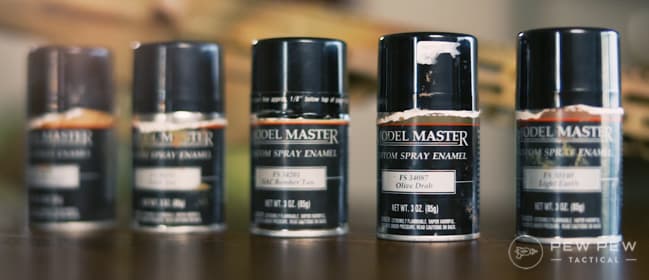
    Several brands offer great options for painting your rifle. In the video above, we used Model Master enamel paint, but their spray versions have since been discontinued.

    Model Masters
    Model Masters Enamel Paint

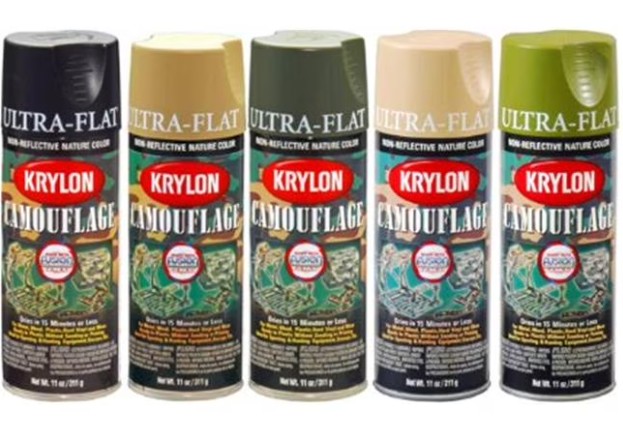
    We recommend Rust-Oleum Specialty Camouflage, Krylon Camouflage, and Brownells’ Aluma-Hyde. We have used all three of these paints on various rifles with great results.

    If you are looking to paint a camo pattern, you will likely want to buy several colors.

    Rust-Oleum and Krylon both have similar wear patterns, meaning they will show wear after a handful of trips to the range.

    $7
    at Amazon

    Prices accurate at time of writing

    Prices accurate at time of writing

    Available Coupons

    Wear and tear is expected on spray-painted guns, and it is even favored by some because it produces a battle-worn look. If you want something that will stay pristine, you may want to consider having your gun professionally cerakoted.

    Step 2: Prep the Surface

    If your gun is greasy, oily, or dirty, the spray paint won’t adhere properly. A clean surface is critical to a good paint job.

    Start off by giving the outside of your rifle a good cleaning. First, wipe it down to get any major dirt and grime off.

    Then follow up with a good spray-down with brake cleaner to strip any grease or oil that might still be on the rifle.

    Brake Cleaner
    Brake cleaner will help to remove anything that might still be on the surface.

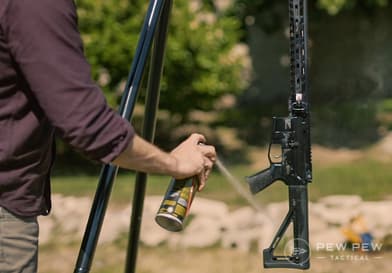
    We recommend going with chlorine-free brake cleaner to avoid damaging polymer furniture.

    Wipe away any excess brake cleaner with a microfiber cloth, a rag, or an old T-shirt that won’t leave fibers behind.

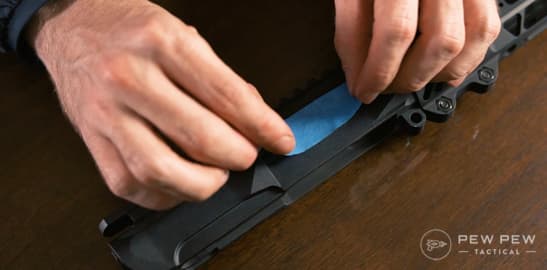
    Step 3: Tape Sensitive Areas Off

    You want to avoid getting paint into areas where tolerances are tight or where it should not be applied.

    Use masking tape or painter’s tape to block off the ejection port, magazine well, and muzzle.

    Tape Port
    Don’t forget to tape your ejection port, magwell, and muzzle!

    Getting paint in any of these areas isn’t the end of the world, but it can cause malfunctions until the paint wears off or is cleaned off.

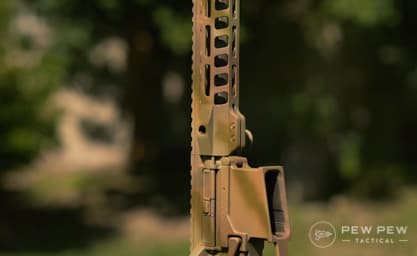
    Step 4: Apply the Base Layer

    If you are using multiple colors for a pattern, start with the darkest color you’ll be working with

    This will help set the tone of the rifle and provide a great background for the other colors to do their thing. For us, that meant dark tan.

    Dark Base Coat
    Dark Base Coat

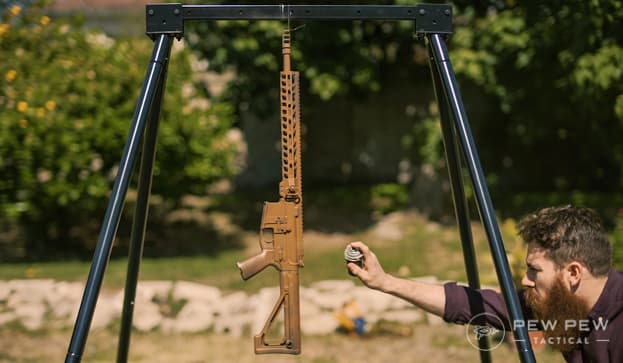
    Apply the color using sweeping strokes. Be careful not to hold in any place or to apply too much paint too quickly, or you’ll leave globs or drip streaks.

    If you don’t get the desired amount of paint applied in the first pass, let it dry slightly before making another pass. This can be done until you’re satisfied and will prevent the paint from pooling or dripping.

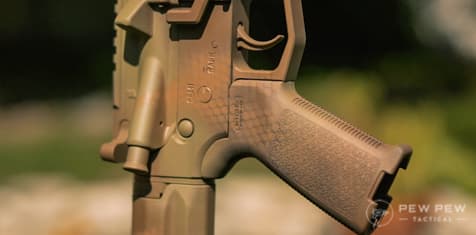
    Step 5: Add More Colors

    Once you have a good base coat ready, it’s time to change things up.

    We like going with strips using our lightest color to give the rifle sharp contrasts.

    Light Strips
    Light Strips

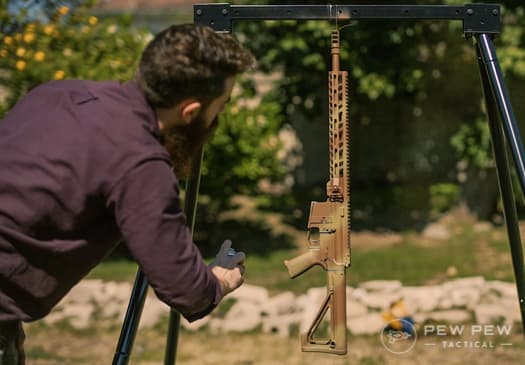
    For camouflaging, you typically want to avoid contrasts. But giving it these sharp lines now makes it easier to slowly blend in as more coats and colors are used.

    Use the same quick sweeping motion you used before when painting the strips. Too little is always better than too much.

    More passes with more colors will help to deaden the contrast and make your rifle blend into your surroundings more cleanly, but there is more to do than just color after color!

    Fade It In
    Fade It In

    Step 6 (Optional): Add Stencil and Foliage Patterns

    Using local foliage (leaves, stems, etc) or patterned objects, such as stencils, will produce varied patterns on the rifle that will further break up the sharp contrasts and lines.

    Mesh Bag
    Mesh Bag for that awesome look

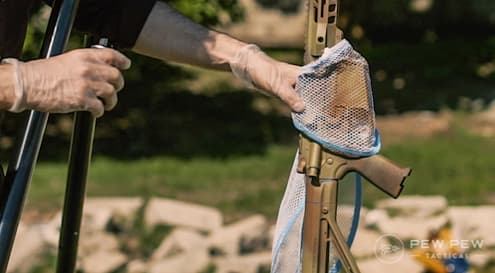
    We used part of a mesh laundry bag to give the rifle an ersatz snakeskin look. It’s cheaper than a proper stencil and just as good.

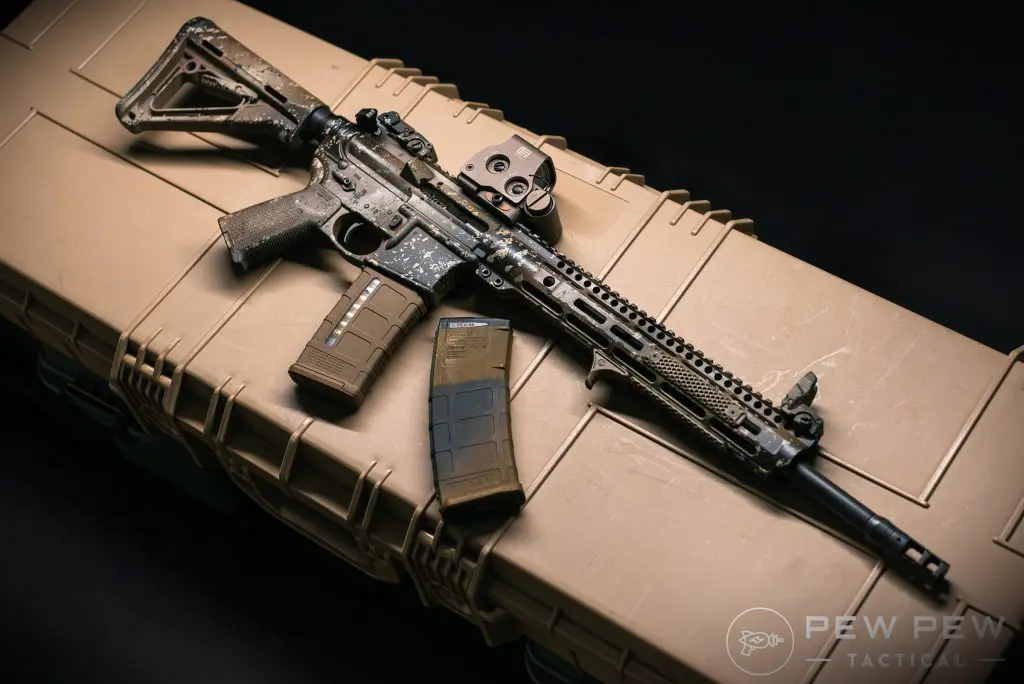
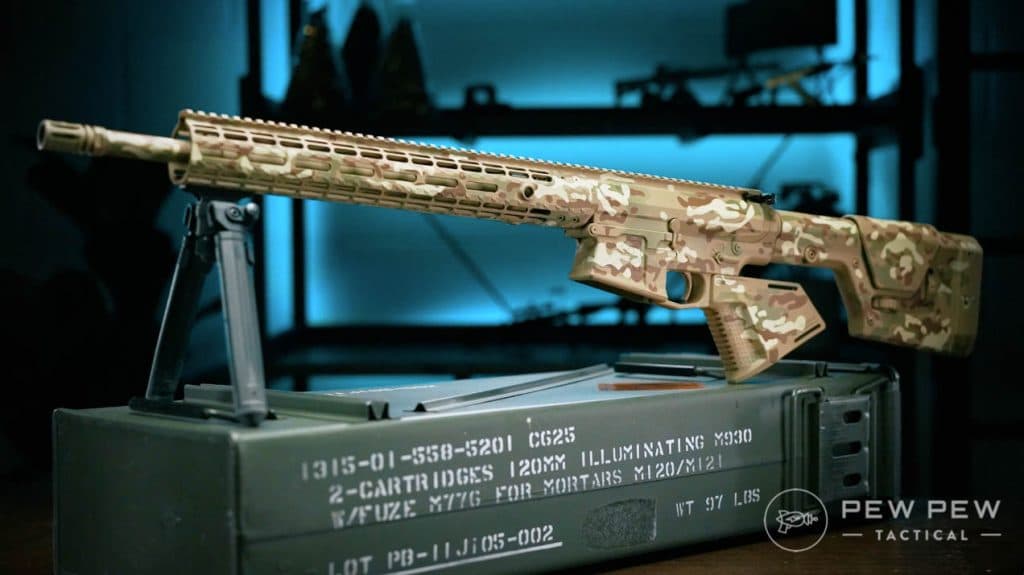
    Here is the finished result!

    Snake Skin Look
    The aforementioned Snakeskin look

    If you are interested in more advanced camo patterns, check out our article that specifically covers painting AR-15s using stencils!

    MultiCam AR Painting
    An AR-15 painted in Multicam using stencils.

    Common Mistakes to Avoid

    • Not letting the coats dry – Spraying over an existing wet coat of paint can cause unintended paint dispersion and mixing. You can typically avoid this by letting the coat dry for 1-3 minutes before applying another thin coat. You should wait 25-35 minutes between full coats.
    • Painting too close – If you hold the can too close to the rifle, you won’t get even coats. For best results, hold the can about 8-10 inches away from the rifle.
    • Not prepping the surface – Sometimes you can get away without surface prep, but it greatly depends on the condition of your gun. Even if your gun looks clean, we strongly recommend not skipping this step.
    Painted ARs

    FAQs

    Q: How long does a finished gun take to dry?
     A: It can be temperature-dependent, but waiting a full 24 hours gives the paint enough time to dry and harden for the best results.

    Q: Should I use clear coat?
     A: Clear coat isn’t necessary, but it can protect the paint job underneath if you have concerns about wear. If you use clear coat, apply 1-3 coats using a matte clear coat to avoid reflectivity.

    Q: Can I remove the paint later?
     A: Yes. Paint can be stripped off with a bristle brush and acetone, Citristrip (safer for plastic parts), Goof Off, or similar solvents. This can take a lot of time and elbow grease, so only paint the gun if you are sure you want to.

    Final Thoughts

    Repeat the steps above until you get the look you are going for.

    And remember, not everything has to be camouflage or FDE. There are tons of cool colors and patterns out there to choose from. You’re only limited by your imagination!

    Fin

    Have you painted an AR or something else lately? How did it come out? Let us know in the comments! And if you want more awesome ways to customize your AR-15, take a look at the Best AR-15 Upgrades!

    Latest Updates

    April 2024: Reworked entire article layout. Added Common Mistakes to Avoid and FAQs section. Removed discontinued products.

    The Best Gun Deals, Coupons and Finds

    Subscribe to Pew Pew Tactical's sales and deals email.

    38 Leave a Reply

    • Dave

      Model Master paint was discontinued some time ago. You can still find it on Amazon but a small, 1/2 ounce bottle now costs $18 - $25.

      August 14, 2024 6:38 am
    • Sempronnio

      I simply use lots of masking tape. Patching with stripes hand cutted. Extrems affixed with scotch tape and presto. Then can use large felt pen for any colour touch.
      Easy, no mess, and also easy for a new scheme design.

      September 25, 2023 11:15 pm
    • Patrick S Seekins

      Best "paint" I found is actually FLEX SEAL! I painted a stock to give a grip on smooth stock. A little overspray got on receiver. I could not get it off! I then used to coat several stainless guns to eliminate shine for hunting. Wears like iron and gives a dimpled surface that eliminates reflections! Waterproof and very durable. Better than paint or Brownells’ Aluma-Hyde. Limited colors though...

      June 27, 2023 8:01 pm
    • 173rd LRRP

      We just wrapped forestock of M16 with material from worn out Tiger Stripe trousers 1966-67 173rd ABN BDE LRRP. It we just put strips of brown or green 100 mile an hour take on stocks to break up outline.

      July 12, 2022 5:44 pm
    • Phillip

      I painted cars for 50 years answer all kinds of transition of product You're Now using polyurethanes. I'm going to do one of my AR rifles with polyurethane base coat clear and yes I know that the clear will reflect but I'm going for show rather than strictly functionality I'll post a picture when it's complete.

      May 18, 2022 7:39 am
    • Bemused Berserker

      At Walmart, you Gan get Jute rope and twine in various diameters. After the base coat, wrap the gun in twine, staggering the wraps, and spray your next color. Allow it to dry, then remove the twine and reward, varying the we pattern. Repeat until you reach the pattern you want. End result is a nice tiger stripe effect. Works great in the prairie grass in my area.

      March 31, 2022 4:43 pm
    • Evan Seelye

      "Painting" a gun is akin to painting a car with a paint brush. Or, it can be. I prefer to disassemble the gun into single components, being careful to tape, or coat with a release agent, those areas of tight fit (mag releases, trigger and hammer pins, etc.). If you don't, you might be in for a lot of scraping tiny holes and crevasses where parts need to fit tight.
      Forget regular enamel spray paint if you want a durable, hard lasting finish that will stand up to use, and cleaning. I prefer to use products that either require baking, the addition of a catalyst (hardener), or both. I've had excellent luck with Duacoat. I didn't do adequate preparation and got unhappy results with Ceracoat - my bad, not theirs.
      Color match is a trial and error. My experience was with Flat Dark Earth. If you're trying to match Magpul polymer Flat Dark Earth products, Duracoat was "the" match. Sadly Brownells "Magpul Flat Dark Earth" Aluma-hyde had a greener shade, and it was obvious. Paint remover easily removed the Aluma-hyde. Funny about color matches - Sig came out with a two-tone M-17 and M-18 P320. Wilson Combat came out with a much-improved grip module in "tan", but the WC module was actually Flat Dark Earth (matching the slightly green cast) - it didn't match the Sig module (not using it anyway), but was a dead ringer for the "tan" Sig Romeo 1 Pro red dot sight. Actually, a better match. The slide is Coyote, and my M-18 looks great in FDE/Coyote, with the upgraded module matching (exactly) the Sig Romeo 1 Pro. My point being, if you're looking to match colors, you'll probably need to try a few selections. If you don't care, going all one color, or a making a calidascope, there's a ton of products to try. And, it's fun. You can always strip it down and try it again.

      January 5, 2022 9:46 am
      • Billy Beaverbuster

        Painted a dozen guns with USASOC members. Spray it down with brake cleaner. Tape off muzzle, sights, throw a piece inside the ejection port, mask off trigger and serial. Go for it.
        Don’t make it too complicated. If it’s too pretty it’s obviously never been used.

        February 1, 2022 8:18 pm
        • W Anderson MD

          When I deployed w/ C/3/7 SFGA to Iraq in 2006, I was issued a full-up race M4 w/ all the shyte hung on it: Eotech Holosight, Surefire spotlight, ANPVS, etc. As a fighting firearm package, worth > $3,000 in 2006 dollars. It was painted w/ Krylon brown, tan, olive, some righteous scratches, and was perfect. I came home and painted my old stand-by the same way. I like to see other folks' artwork and attention to detail, but after I painted mine (outdoors in the brush) I set it down and came inside to let it dry. Went back out 30 min later and thought it had been stolen somehow! Took several heartbeats to find it where I left it. Hard to beat SF camo for both effectiveness and price....

          April 11, 2022 7:33 pm
    • Sean Paterson

      I've painted quite a few AR15s now, I started out just building but I needed more to do. The best thing to do is strip it down to individual parts, clean them as you stated, bake them at roughly 175 for an hour to get a proper dry. Prep/ and paint as desired. Then bake them at 175 for 90 min after each coat of paint or once finished painting if you're not inclined to do it several times. It hardens the paint and gives it a really great finish that will last much longer.

      September 3, 2021 6:09 pm
      • Tracy Martin

        Can you do this in your home oven or does it leave any smells or residue in the oven?

        November 10, 2021 9:41 am
        • T Tunget

          Yes you can do this in your home oven. Be absolutely sure there are NO plastic parts on the pieces you’re going to bake, so don’t do your grip or stock. I removed all parts that would cover anything. So remove the safety unless you want an unpainted spot when you flip the switch.

          June 22, 2022 8:38 am
          • CLAUD B

            And make sure your wife is not home.

            July 14, 2022 4:38 pm
            • Dale T

              Boy that is for sure!

              December 27, 2022 7:20 pm
            • KARL GUNN

              Bingo ..Or just buy go to used appliance place pick up a cheapo for doing this And powder coating Auto parts too That way you can do a Roast and bake your finish same time make wife happy at end of day .

              July 9, 2023 2:34 pm
    • Michael Johnson

      so the lesson is ... do not lay it down in the woods or against a tree for any length of time ... may not find it again

      March 31, 2021 8:07 am
      • JC

        I had to paint the bottom of my mags orange, they were getting hard to find after reloading on the move

        July 18, 2021 9:16 pm
    • Turd Ferguson

      I used Duracoat and it came out wonderfully! I just did Tactical White since I was going Space Gat themed, but I do like the idea of camo for my next build.

      February 25, 2021 4:17 pm
    • LCDR Fish

      If it's an unfinished lower - all shiny, but milled - is there anything that needs to be covered up, or can everything be painted - including the inner mag well? I was planning on matte black krylon plus matte clear over top. I already have an all-black upper.

      February 18, 2021 9:04 am
      • Jacob

        Don’t lay it on thick. If it’s a stripped lower then plug all the holes on it using cotton or paper. I’d apply a priming coat for aluminum before putting my first layer.

        February 19, 2021 5:01 pm
        • LCDR Fish

          Well it is aluminum I guess - what kind of priming coat would I need?

          February 23, 2021 3:29 pm
          • Turd Ferguson

            I used a Direct to Metal primer when I did my 80% lower.

            February 25, 2021 4:20 pm
      • Andrew Sparks

        Use a good self etching primer over bare metal bro. Also, keep in mind you’re adding thickness to the painted parts. Not enough to notice, but about your third coat you’ll start impacting function on some parts. For me, it was the safety selector that felt “tightened up” and the B5 adjustable stock became “fixed.”

        April 10, 2021 11:22 am
    • BUURGA

      Unfortunately, the first time gun cleaner comes in contact with it...........there goes the paint unless it the ceramic-based type.

      January 15, 2021 12:40 am
      • GT's Illegitimate Son

        Gun cleaner? Joke's on you, I never clean my guns! ;)

        August 19, 2021 8:37 am
    • JB

      Pretty tacticool bro

      January 11, 2021 6:26 am
    • Ray Friedman

      Disappointed there was no Hello Kitty treatment.

      December 20, 2020 6:42 pm
      • Get Got

        Haha when I build mine I'll make it hello kitty thanks to you loll

        March 25, 2021 2:23 pm
    • Steve

      Would it be wise to use Zinc Chromate Primer first?
      Cure it in oven than paint with top coat?
      Plan on using Brownells' Alum- Hyde as top coat.

      December 12, 2020 5:07 pm
    • Bull o' the Woods

      How does Brownells' Aluma-Hyde perform on the non-metal surfaces?

      August 14, 2020 5:11 pm
      • Fred Long

        Aluma-Hyde seems to be able to cover most things with no problem. If you follow the directions . The only real issue is curing time. Once your done you need to set it aside for a month or so while it cures.

        December 6, 2020 4:29 pm
    • Mikey

      I always thought you were supposed to lay color lightest first to darkest, since it's easier to cover a lighter color... (?)

      July 8, 2020 5:48 am
      • henry john knorowski

        To me it looks like ONE COLOR NOT BROKEN UP.

        April 15, 2021 4:32 pm
    • Dan

      Is using rattle cans the only option or can I shoot paint from a spray gun like automotive grade paint and clear coat? Does it need to be high heat paint?

      March 8, 2020 11:10 pm
      • David, PPT Editor

        Rattle cans are just the easiest way, I don't know if automotive grade paint would work also but it doesn't need to be high heat unless you plan on painting the barrel close to the chamber.

        March 9, 2020 10:25 am
    • Bull o' the Woods

      Great article! Excellent color choices for my neck of the woods, too. Only suggestion I have would be to use a spray can trigger handle that fits the brand of paint you are using. (Believe it or not, there is no "universal" rattle can nozzle configuration. Both Krylon and Rustoleum use proprietary nozzles that require different handles.) The granddaddy is called a "Can Gun." Using a Can Gun or equivalent provides consistent, uniform pressure on the nozzle, helping avoid orange peel, runs, and sags. In the words of Johnny Bench, "No runs, no drips, no errors."

      October 9, 2019 8:14 pm
    • Steve

      I really enjoyed painting my AR15. I used the standard Krylon Camo rattle cans. 4 colors. I did it differently than you had mentioned with my base coat. I used the light tan and then went darker with the stripes and foliage. It turned out great. I have since had offers to paint many other rifles since then. It was a little unnerving at first but the entire project took less than 30 minutes. My kids went into the woods and they picked out the ferns and maple leaves I used. They love sharing how they helped dad!!! I would love to share photos. Email me if interested.

      August 24, 2019 1:13 pm
      • Torin

        Could you send me some pics of your paint jobs? Doing my first.

        November 23, 2022 10:16 pm
    Join the community! Log in
    Please provide a valid email address.
    Password is required.
    or
    Register
    Please provide a valid display name.
    Please provide a valid email address.
    The password should contain at least 8 characters with at least one number or special character.
    Please accept in order to continue.
    By unsubscribing, you will not be able to access exclusive training courses in your profile. You will still be able to save and access your products and articles.
    or
    Trouble logging in?
    Type your email address and we’ll send you a link to reset your password.
    Please provide a valid email.
    Password
    Type your new password and hit button below to confirm it.
    Field is required.
    Account already exists
    We already have an account registered for email address () which is linked to your Facebook account.
    To log in type your Pew Pew Meter password below.
    Field is required.
    Account already exists
    We noticed that you have previously logged in with your Account which is linked to the same email address () - we can link both of your accounts together.
    In order to link your accounts, hit button below and log in to your Account with the same email as above.

    Account in Pew Pew Tactical means more.

    Login or create a free account to get the following
    Access and save hundreds of reviews, gun guides, and articles!
    Find the best daily deals on guns, gear, and ammo
    Manage your newsletter subscriptions and comments
    welcome mat background
    New Here? Personalize your experience.
    Select what level shooter you are!
    Level Up Your Gun Knowledge Thanks! We'll send you the latest guides and training tips geared towards your level.
    Welcome! You'll now receive newsletters of our best articles on techniques, guns & gear.
    targets
    YOU'VE GOT FREE PRACTICE TARGETS ($50 Value)
    YOU'VE GOT FREE PRACTICE TARGETS ($50 Value)
    YOU'RE IN! Click below to begin your download