
How to Grip a Pistol: Step-by-Step Instructions [With Videos]
Want to shoot better? You've got to have a proper pistol grip. We cover exactly what makes a good grip for both semi-auto and revolvers.
We review products independently. When you buy through links on our site, we may earn a commission to help support our testing. Learn more.
Want to shoot well? You've got to have a proper grip that minimizes recoil.
When a bullet leaves the barrel, there’s force that goes backward, and how you hold your handgun will make or break your control of that recoil.
So, follow along as I cover how to best absorb that force without giving yourself a booboo.
In this guide, we'll cover:
- What makes for a good grip
- Where all your fingers and hands go
- How hard to grip
- Best grips for both semi-auto handguns AND revolvers
By the end, you'll be shooting better in no time.
Table of Contents
Trending: Best AR-15s & CCW Guns Under $400
What You Need Before You Start
Before practicing your grip, make sure you have...
Must-Have Tools
- A handgun (unloaded and in a safe environment for dry fire practice)
- Eye and ear protection (if you're doing live fire practice at the range)
- A firm understanding of firearm safety rules
Nice to Have, But Not Required
- Hand strengtheners to improve grip endurance
- Dummy rounds for safe handling drills
- A training partner or instructor to provide feedback
Step-By-Step Instructions: How to Grip a Semi-Auto Handgun
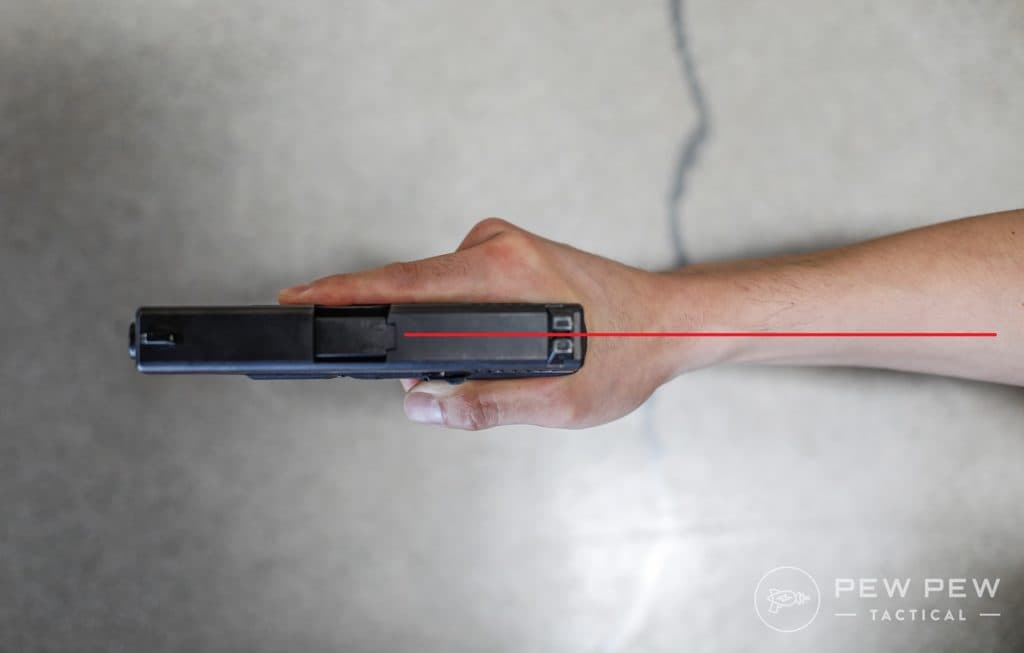
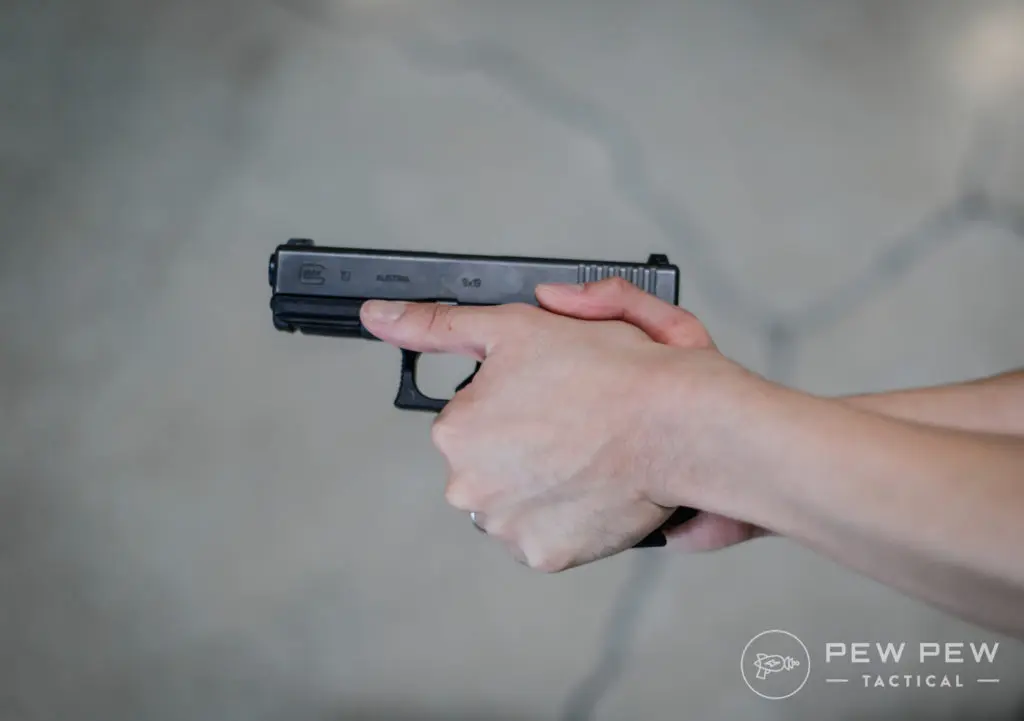
Step 1 - Get Aligned
If you're new and pick up a handgun...chances are you'll grip it at an angle that's the most comfortable for you.
But resist!
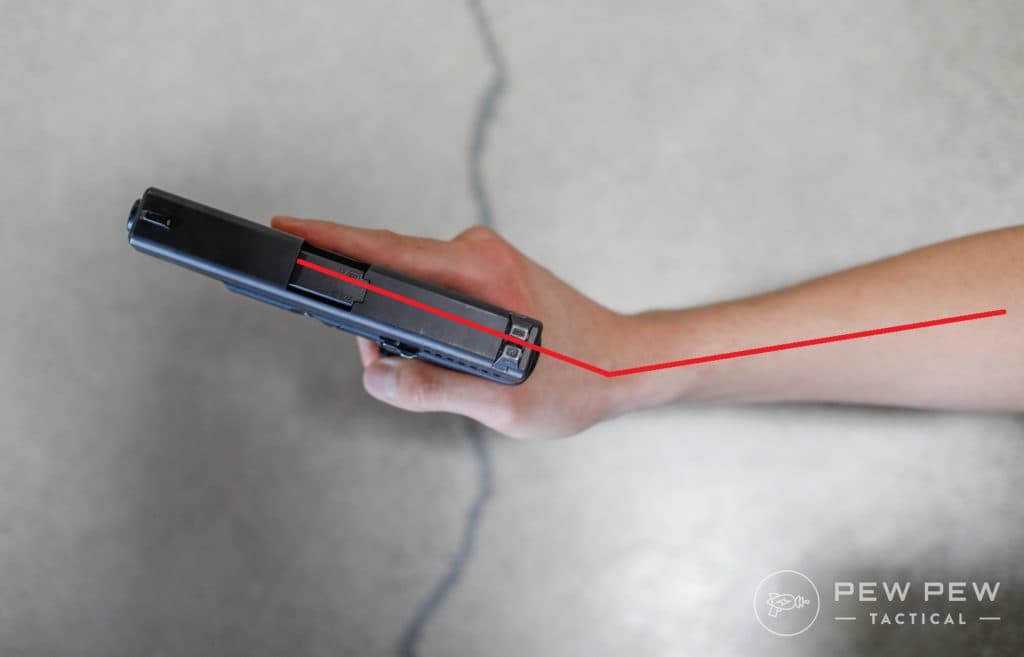
That recoil is going to go straight into your (weak) wrist. You'll want the gun turned so the recoil can go into your arm and locked wrist.
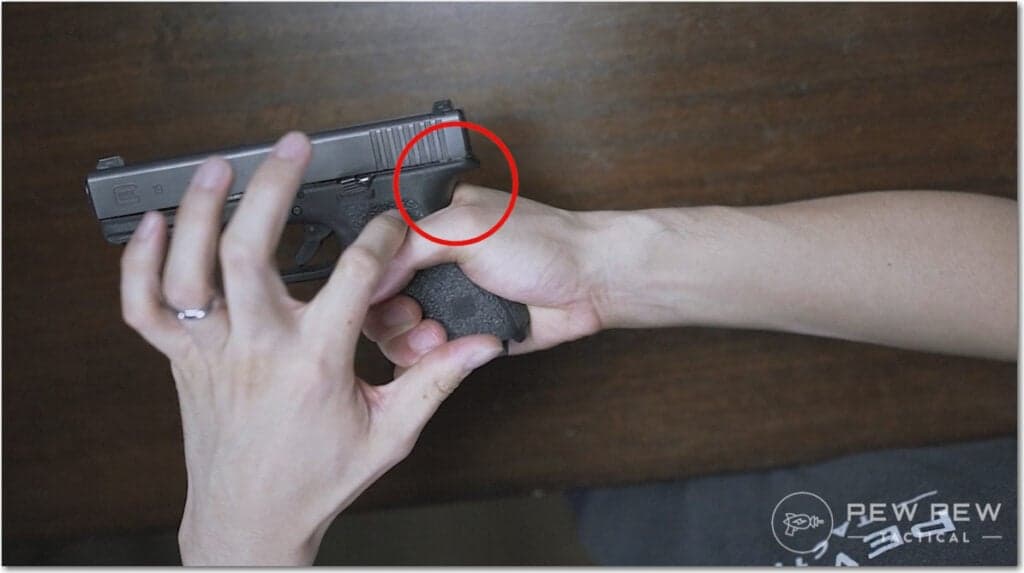
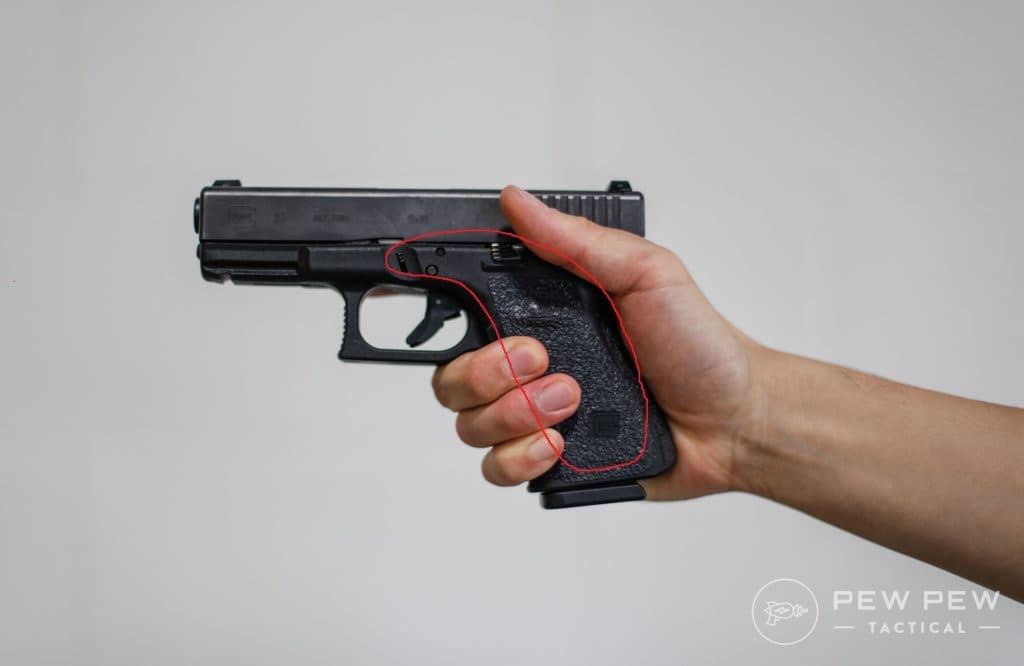
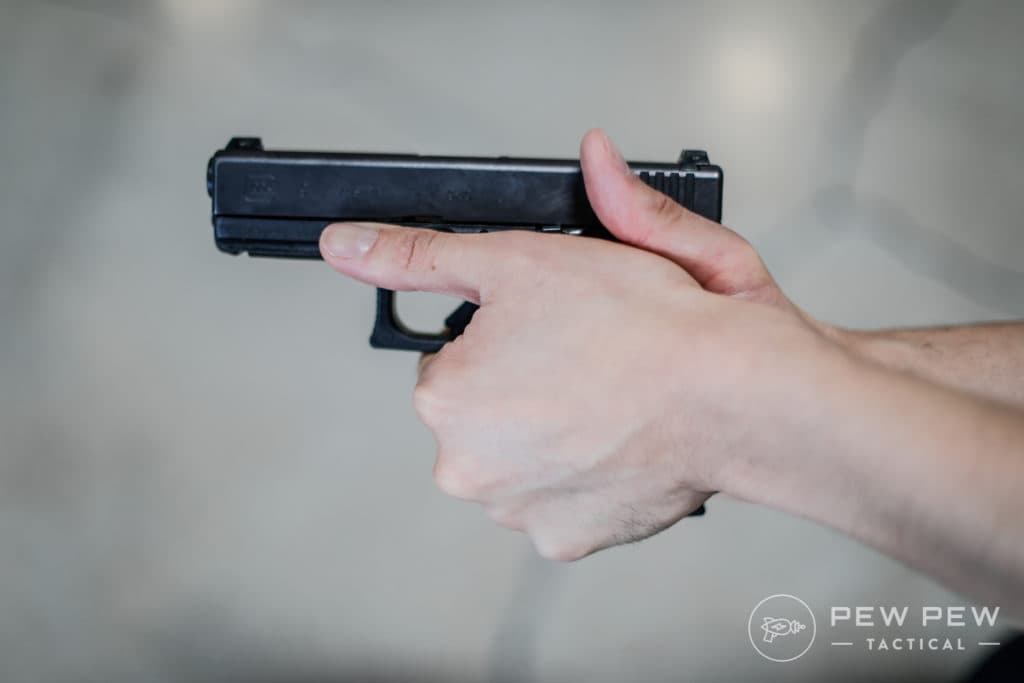
Step 2 - Get Your Dominant Hand High on the Grip
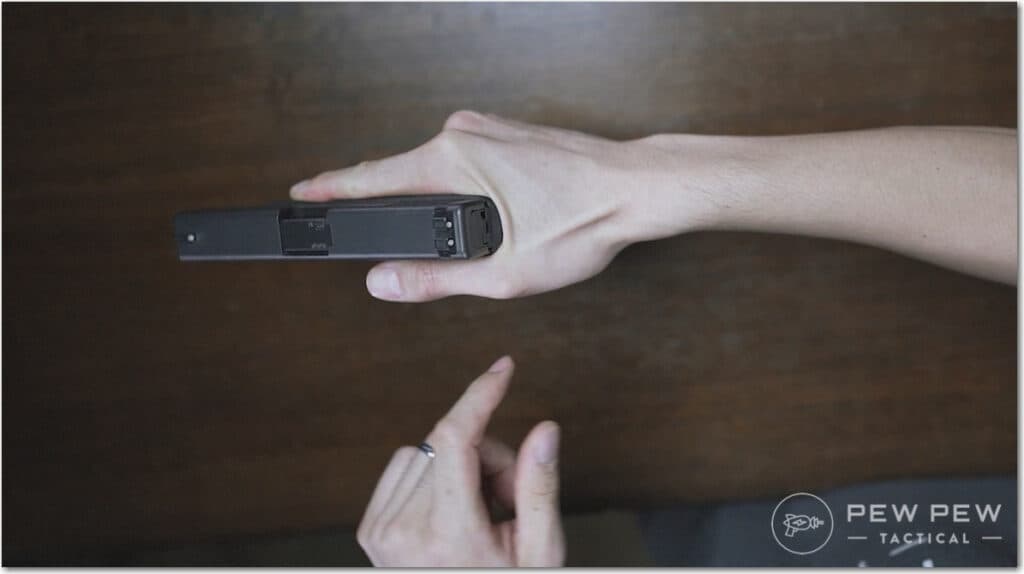
On to grip height...let's get it as high as possible without putting your hand in the slide's way.
Look at the empty space in the picture below...I want it gone!
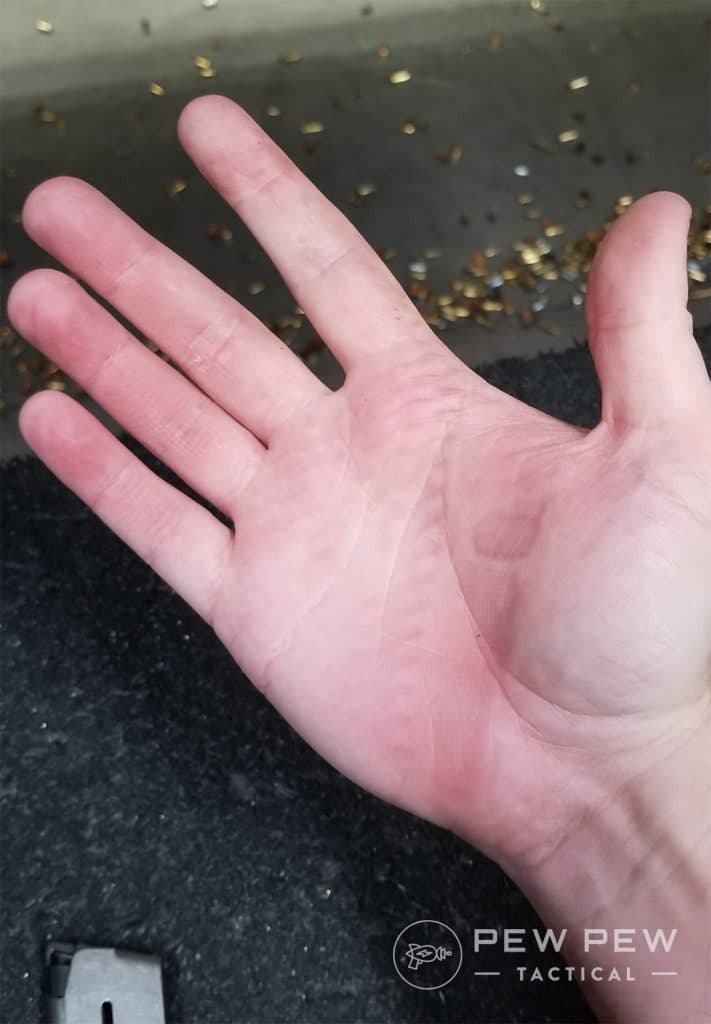
Take a look at the webbing on your dominant hand between your thumb and index finger.
Jam it up as high as possible on the grip without getting behind the slide.
It's going to feel weird at first, but you'll get used to it.
Keep your gun aligned correctly, and the right side of the gun (if you're right-handed) should look like this.
Keep your trigger index finger along the slide. Remember the safety rules...no finger on the trigger until you're on target and ready to shoot!
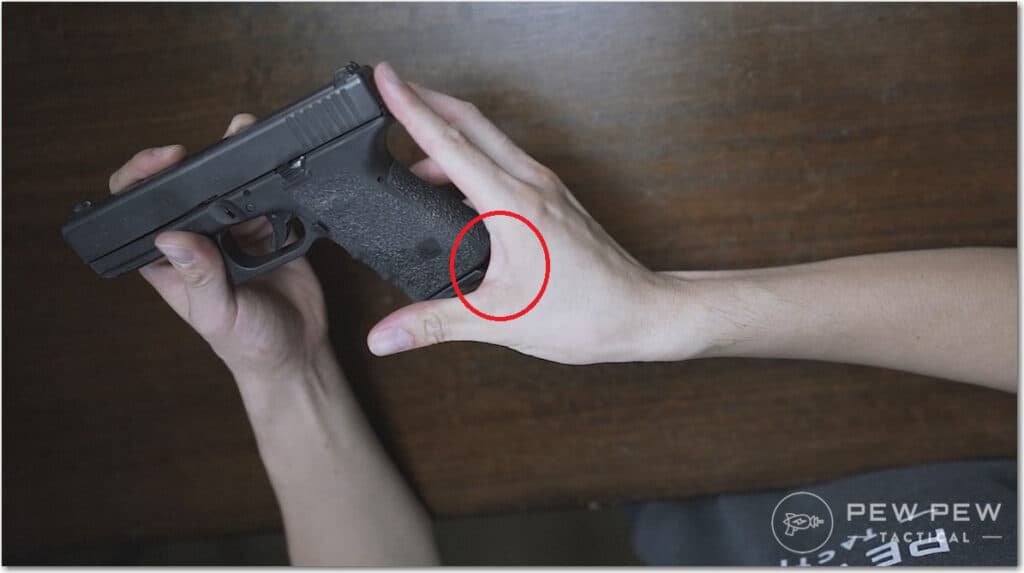
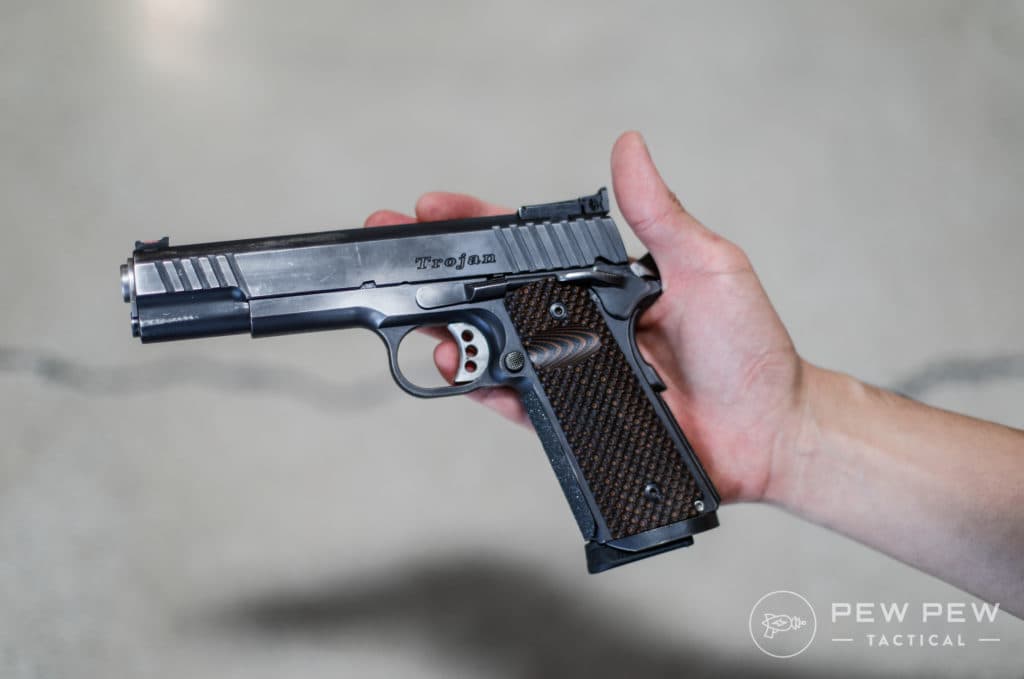
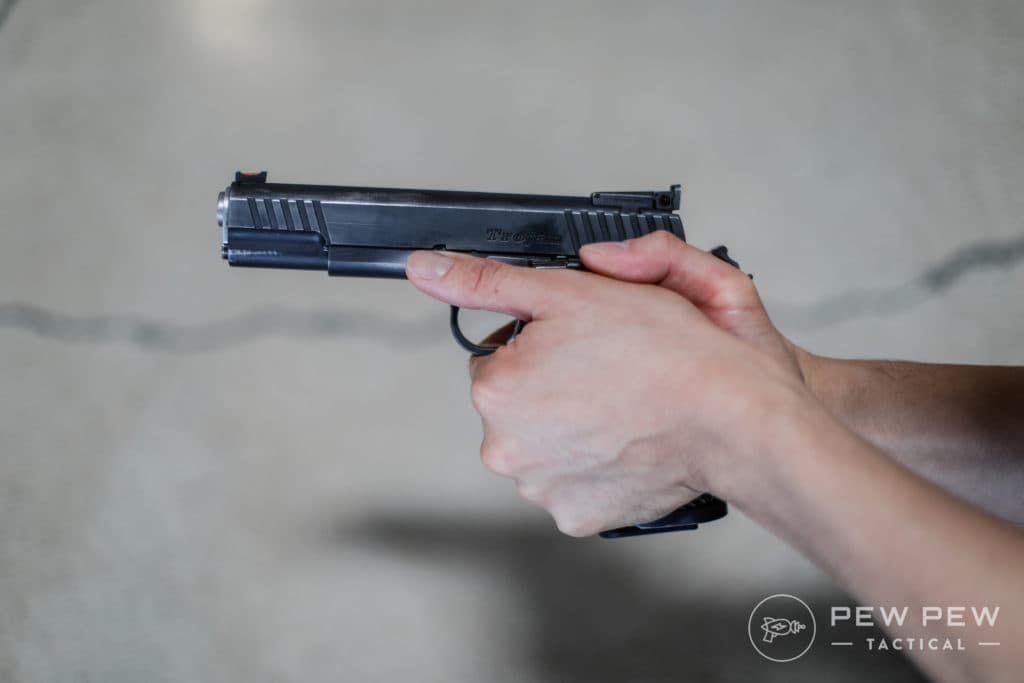
Step 3 - Placement of Non-Dominant Hand
You want to fill up as much of the empty space as you can on the remainder of the gun.
To do this, take your non-dominant hand, point it forward, then tilt it down 45 degrees.
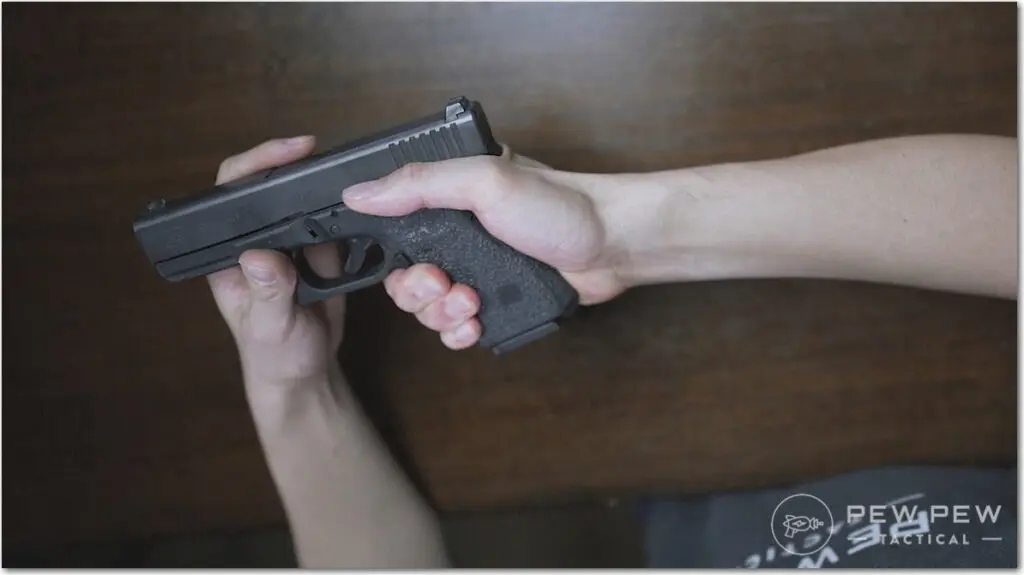
Wrap those four fingers around the knuckles of your dominant hand.
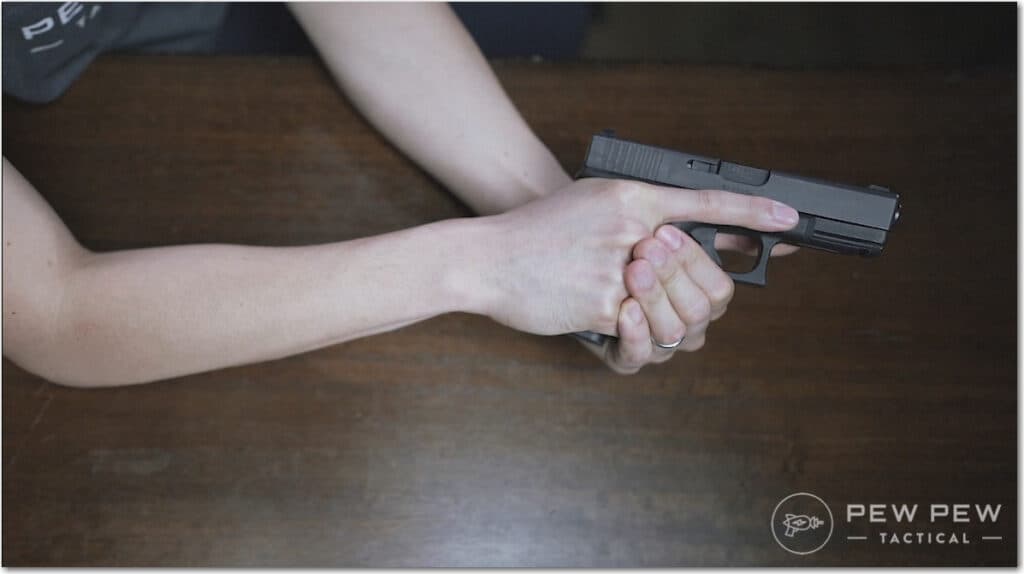
Keep that thumb pointed along the frame. Depending on your hand geometry, it might look different from my long fingers.
Again, it's going to feel very awkward at first.
And remember your dominant hand's thumb? You can have it down on your other hand or up...it's a personal preference.
If you're shooting a 1911 or something else with manual safety...I like to rest my thumb on it.
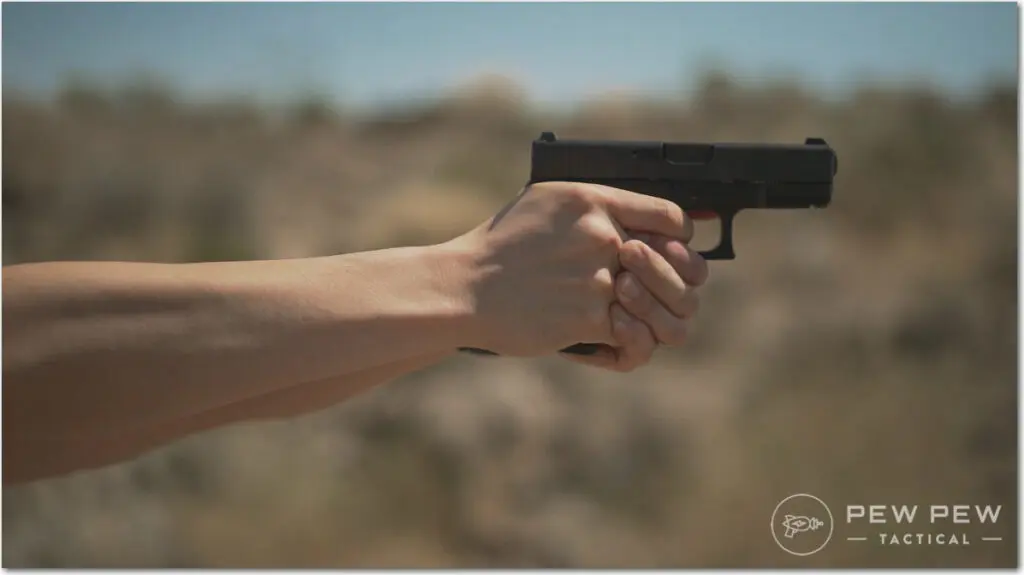
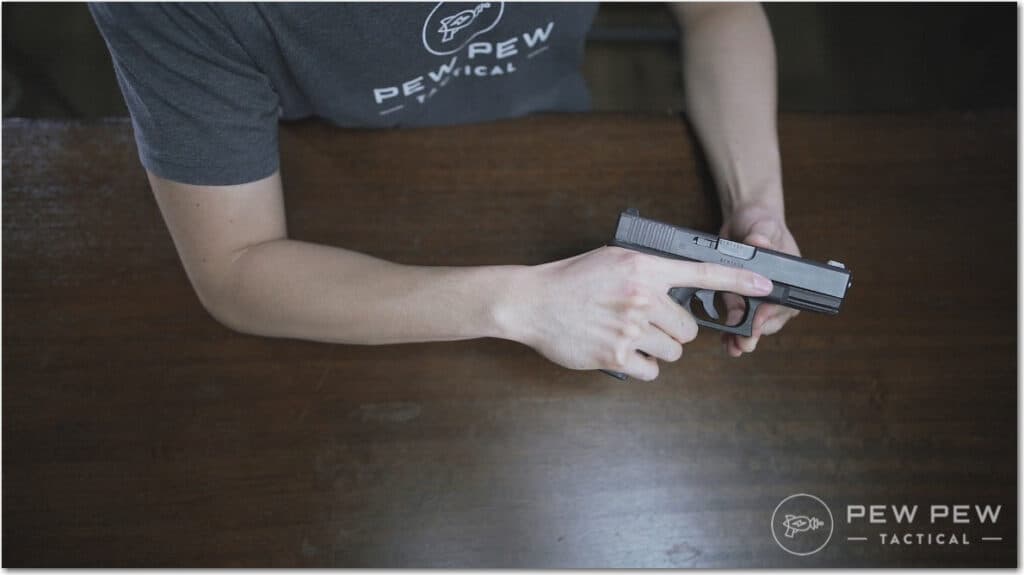
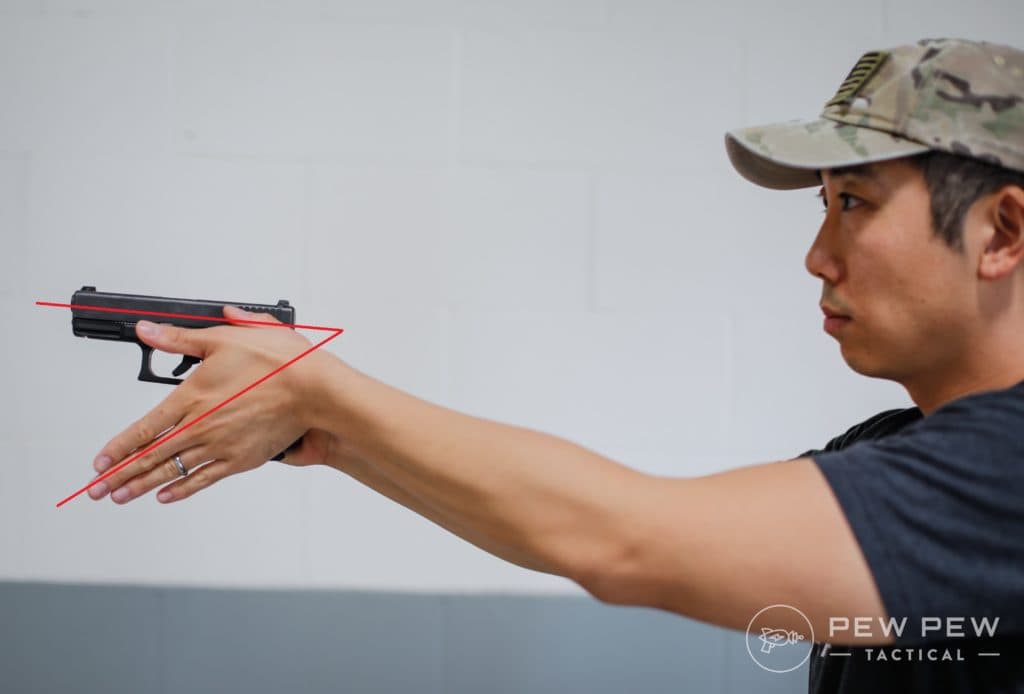
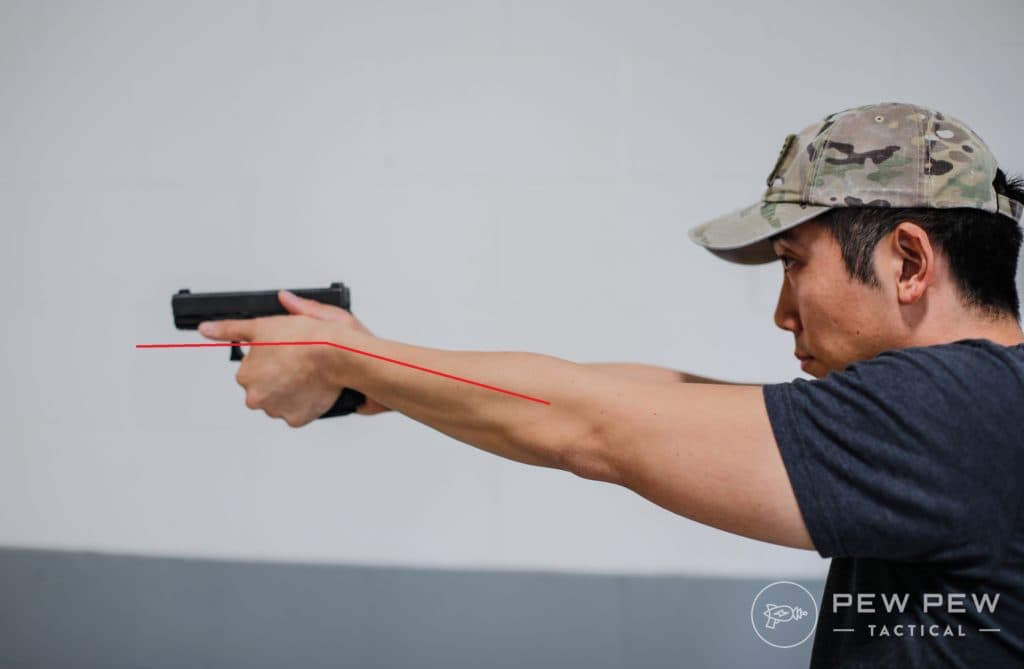
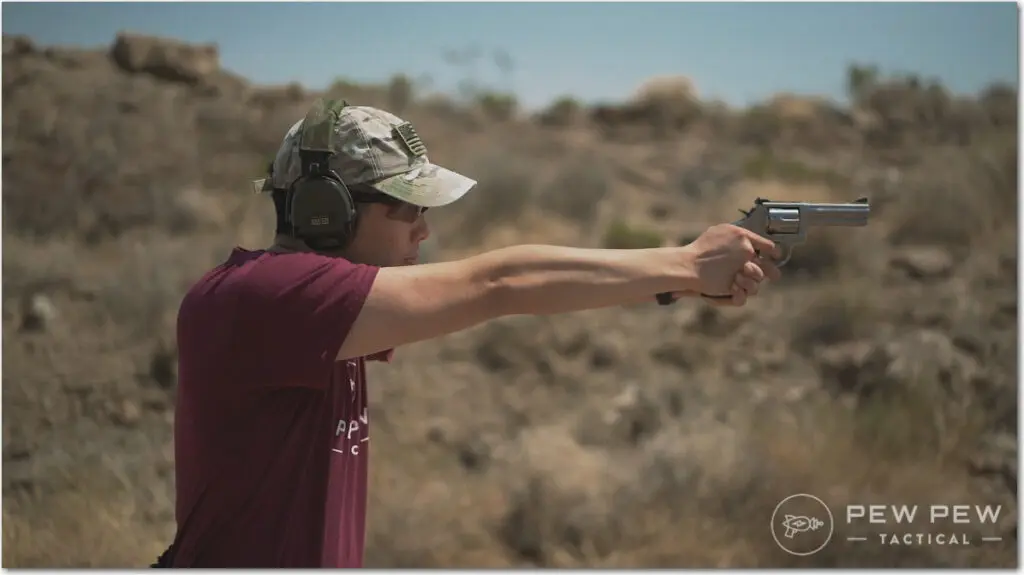
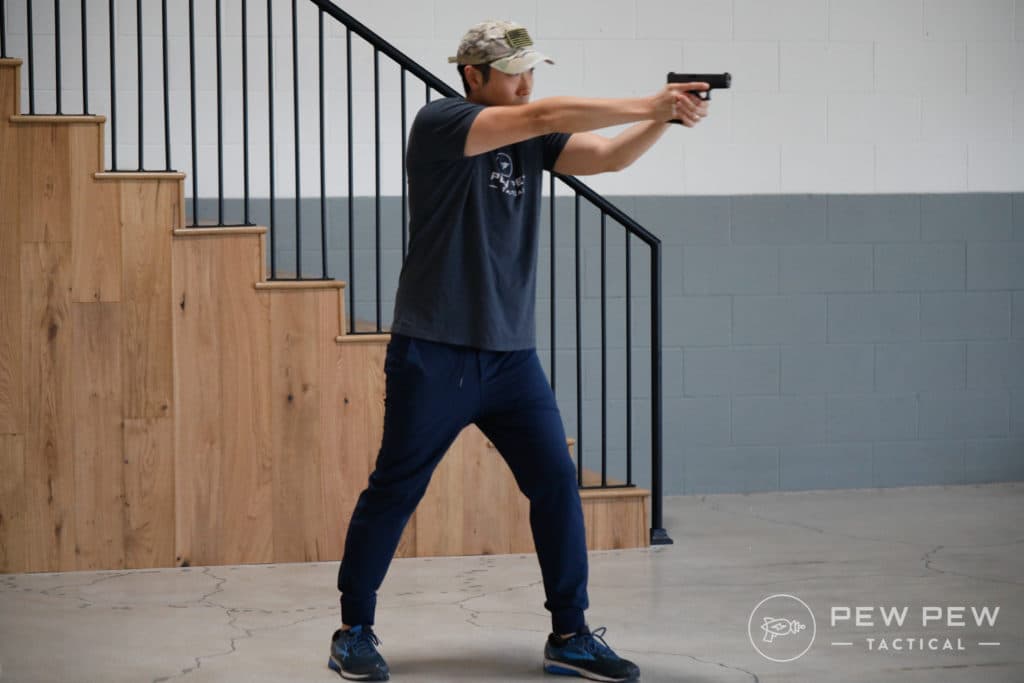
Step 4 - Get the Right Wrist Angle
Lastly, when you punch out with your gun, I like to set my wrist at an angle that keeps everything steady and prevents limp wristing.
Limp wristing refers to floppy wrists that mess with proper ejection and loading of the cartridges.
Step 5 - Grip Strength
You'll want to grip the pistol as hard as you can without losing full control of your trigger finger or having your gun shake.
Lately, I've been imagining my hands as a clamp that hinge on my fingers. And it's my job to clamp down the grip of the gun as much as possible.
Want to beef up your hand strength? Try a hand strengthener...they work!
Step-By-Step Instructions: How to Grip a Revolver
The basics are the same as the semi-auto handgun; however, you don't have to worry about a slide moving back and forth.
That said, a revolver brings with it a whole new set of other things! So, let's get into it.
Step 1 - Get a Proper Grip Angle & Wrist Alignment
First...get that angle correct. Same for all handguns. Now, you want your grip up as high as possible.
There's no more moving slide to worry about...but there's a hammer!
You want your hand high, but not so high that you get hammer bite. I wouldn't worry about this too much for modern guns...you'd have to be unnaturally high for the hammer to get you.
The dominant hand is the same...three fingers on the grip and keep your trigger finger along the frame.
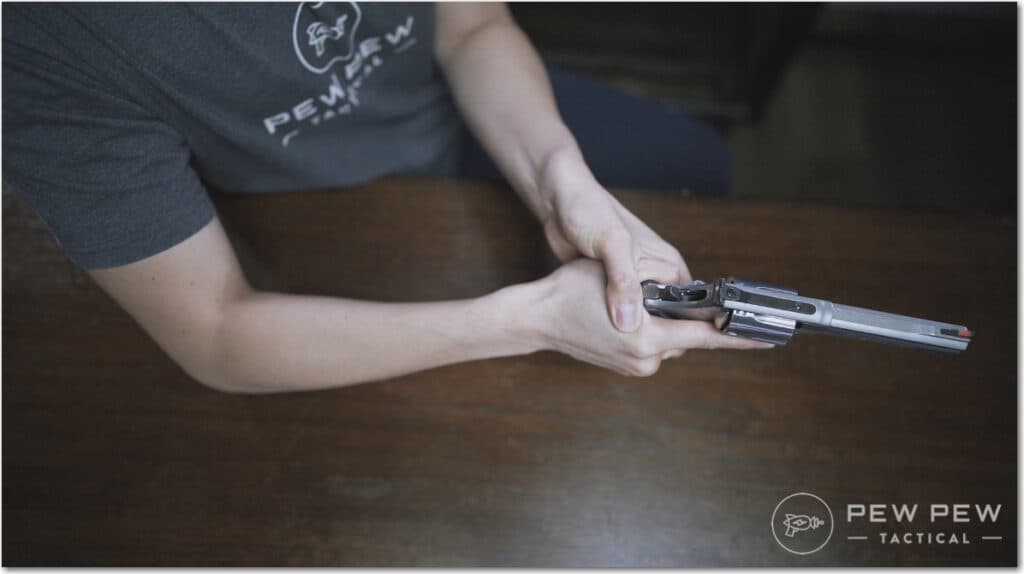
Step 2 - Non-Dominant Hand Placement

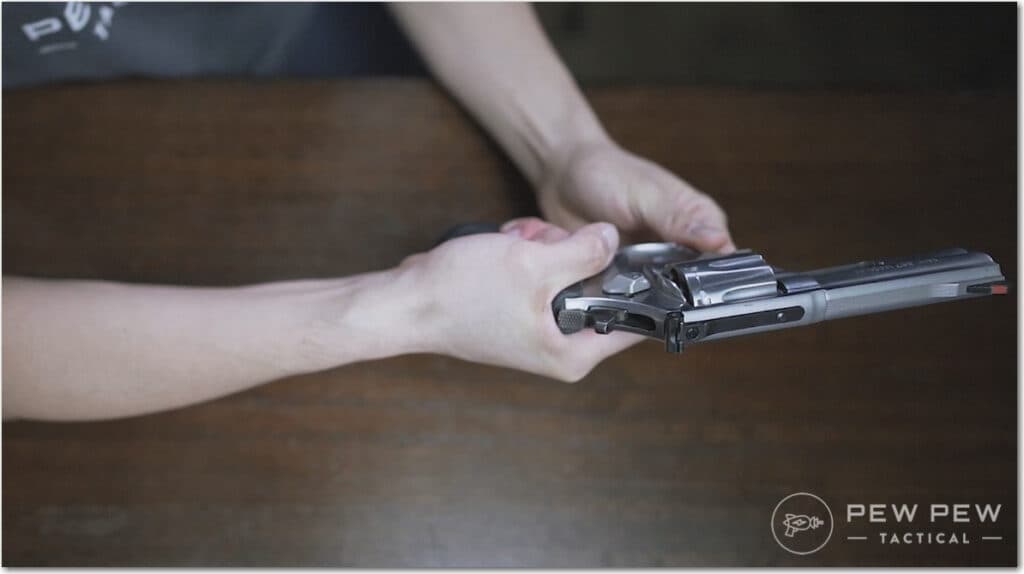
Your non-dominant hand is, again, going to fill in the empty space but watch out for the cylinder gap!

In revolvers, the cylinder gap is where all the hot gasses escape when you shoot a round. Depending on the gun and caliber, you can get a simple owie, a messed-up nail, or even some things missing.
To clear that gap, you'll have to modify your grip a little so you won't be near it.
Since I have long fingers, I adopt a thumb-tucked position instead.
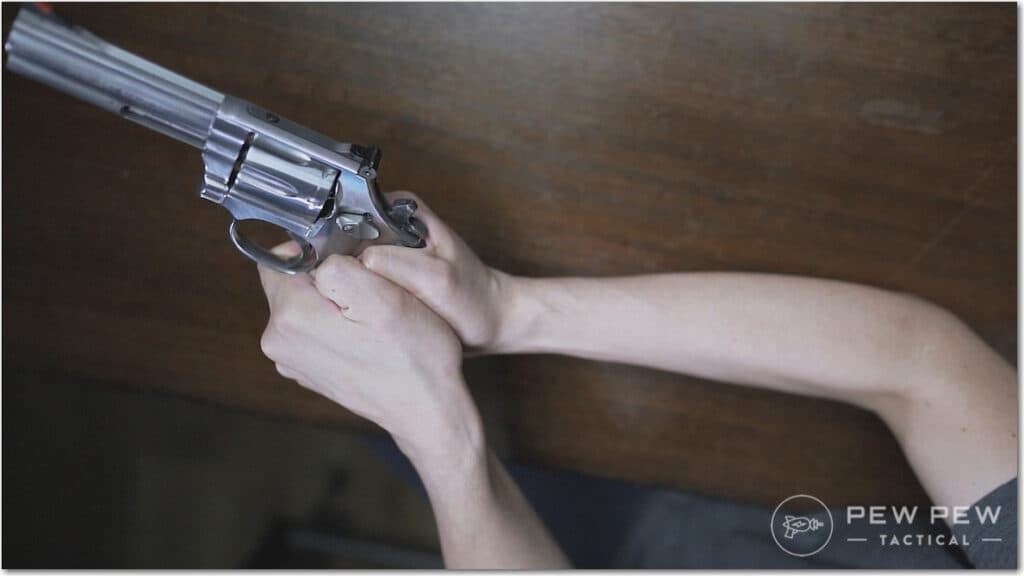
Or you can also try out a thumb-over position which helps a lot for smaller revolvers that tend to kick up and down more.
Common Mistakes to Avoid
- Teacupping - Popular in TV shows, teacupping (placing your non-dominant hand under the magazine of the gun) doesn't help with recoil at all.
- Gripping too low - This leads to increased muzzle flip and less control.
- Weak wrist alignment - Limp-wristing can cause malfunctions while shooting.
- Ignoring cylinder gap (revolvers) - Hot gases mean range boo-boos.
FAQs
Q: How hard should I grip the handgun?
A: You want to grip the handgun as firmly as possible while also maintaining trigger control and minimizing shake.
Q: Can I grip a semi-auto and revolver the same way?
A: Mostly, but be mindful of the cylinder gap in revolvers and avoid the slide in semi-autos.
Q: What’s the best way to improve my grip?
A: Practice dry firing with a focus on grip strength and alignment, and consider using grip-strengthening tools.
Final Thoughts
Keep your grip aligned with your arm, get a high grip with your dominant hand, and cover as much area with your non-dominant hand.
Remember the basics of recoil and how all the aspects of grip go to fight it.
And finally, grip it as hard as possible without affecting your trigger finger!
Want to shoot even better? Check out our Ultimate Guide to Shooting More Accurately. Better yet...want to learn everything in video in under 2 hours? Check out my Beginner Handgun Course.