
How to Install a Glock Extended Magazine Release

Install a Glock extended magazine release with only a screwdriver. We've got a complete walkthrough with video, photos, and tricks learned from our fails.
We review products independently. When you buy through links on our site, we may earn a commission to help support our testing. Learn more.
Looking to make magazine changes faster and easier? You’re in luck, because replacing the factory Glock magazine release with an extended mag release is one of the easiest and least expensive upgrades you can make.
And you can do it at home in just a few minutes without any special tools!
In this guide, I’ll walk you through five easy steps to install a Glock extended magazine release. Let’s go!

Table of Contents
Trending: Best AR-15s & CCW Guns Under $400
What You Need Before You Start
Must-Have Tools
- Glock pistol
- Extended magazine release
- Small flathead screwdriver
Nice-to-Have Tools
- Vise
- Surgical gloves
- Bright overhead light

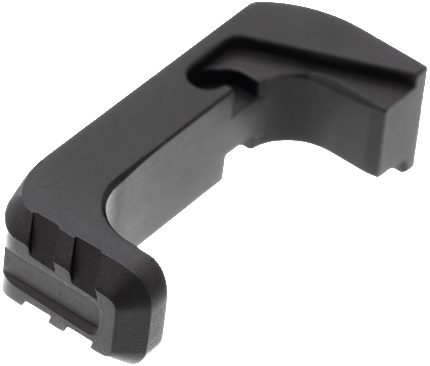
For this guide, I’ll be using a Glock 45 Gen 5 MOS and a Tyrant CNC extended magazine release. Regardless of which Glock and mag release you choose, the process will basically be the same. (If your pistol is set up for left-handed shooting, much of this will be reversed.)
Step-by-Step Instructions
Now that you have everything you need, let’s get started installing that extended magazine release!
If you don’t remember how to take your Glock apart, check out this video. For this job, you just need to separate the frame from the slide – don’t worry about going any further than that.
Step 1: Safety Inspection
Before you do anything else, make sure your Glock is unloaded and safe to handle.

To do this, follow these steps:
- Point the pistol in a safe direction.
- Remove the magazine.
- Lock the slide to the rear.
- Visually and physically check the magazine well, chamber, and breech face to make sure there is no ammunition in the pistol.

Once the pistol is clear, you can return the slide to the forward position for disassembly.

The Best Gun Deals, Coupons and Finds
Subscribe to Pew Pew Tactical's sales and deals email.
Step 2: Disassemble Your Glock
Unlike when you clean and lubricate your Glock, installing an extended magazine release doesn’t require you to fully field-strip the pistol. All you need to do is separate the frame from the slide.

With a clear pistol pointed in a safe direction, pull the trigger. It should stay to the rear when you take your finger off it.
Gently pull the slide to the rear about a quarter of an inch with one hand. While holding it there, use your other hand to pull down on the tabs on each side of the frame.
Manually move the slide forward until it comes completely off the frame.

That’s it! Easy, toolless disassembly is one of the things I love about Glocks.
Step 3: Remove the Glock Magazine Release
Secure the frame of your Glock in a vise or hold it with your left hand, keeping the front of the frame pointed to your left.

Insert your small, flathead screwdriver into the frame from the top and position it between the straight, metal spring and the side of the frame closest to your body.
Gently pry it away from you and to your right (toward the rear of the frame); the top of the spring should pop free and stick out into the empty space where a magazine would go.
Press your magazine release into the frame from the left side, and gently pull it out the right side of the frame.

I’m right-handed, but I think this method will give you the best view of the spring, even if you’re left-handed.
Step 4: Install the Extended Magazine Release
To install your extended magazine release, simply work in reverse order.

Insert it into the frame from the right side, being careful not to catch the spring and bend it.
Once the magazine release is in place, use the screwdriver to pry the spring away from you (to the pistol’s right) and into the notch in the frame and mag release. It should look exactly the way it did when you started.

Give the extended magazine release a few taps, just like you would during a reload. It should move freely, and bounce back into position when you release pressure with your thumb.
Our Most Popular Posts


Step 5: Reassemble & Function Check your Glock
Glock reassembly is even easier than disassembly. Return the slide to the frame starting from the front of the frame, push it all the way back, and return it to the normal forward position. Yeah, that’s really all there is to it.

Whenever I take a firearm apart and put it back together, I perform a function check to make sure everything works as it should.
Here are the steps Glock recommends in the owner’s manual:
- Safety: Attempt to pull the trigger without deactivating the trigger safety; the trigger should not move.
- Trigger: Pull the trigger as you would to fire; you should hear an audible click caused by the striker snapping forward. Keep the trigger pulled to the rear and rack the slide. Let the trigger out slowly; you should hear a click and feel it reset (video demo below).
- Slide lock-back: Insert an unloaded magazine and pull the slide to the rear; it should lock back in that position.
- Magazine release: Drop the magazine using your new, extended magazine release; it should drop freely on its own.
If all that goes to plan, your pistol is fully functional and ready to go!
Common Mistakes to Avoid
There isn’t much to mess up with this upgrade, but I will caution you about a few issues that could cause problems.

- Safety violations: First and foremost, safety has to come first whenever you handle a firearm. Separate yourself from any live ammunition and follow the four firearm safety rules for this job. Remember that disassembling your Glock requires you to pull the trigger.
- Compatibility issues: Glocks may all look basically the same, but they’re not. Before you buy an extended magazine release, double-check to make sure it fits your model (19, 17, 43X, etc.) and generation (Gen 4, Gen 5, Gen 6, etc.) of Glock.
- Not function-checking your Glock: It’s unlikely that anything will go wrong during this installation, but crazier things have happened. Make sure your Glock works properly while you still have the time and tools to fix it.
Final Thoughts & Next Steps
It probably takes less time to install a Glock extended magazine release than it does to read this article. Once you’re done, you can take pride in a job well done and enjoy a more pleasant shooting experience.

Is a Glock extended magazine release necessary? Of course not, but having one can definitely make reloading faster and easier, especially if you have trouble reaching the original magazine release.
Resources
- Best Glocks
- Best Glocks for Concealed Carry
- Best Glock Triggers
- Best Glock Magazine Extensions & Basepads
- Best Aftermarket Glock Magazines

What’s the best modification you’ve made to your pistol? Let us know in the comments. Looking for more ideas? Check out our guide to the Best Glock Upgrades!
Latest Updates
- April 2026: Complete overhaul with new instructions, photos, and supporting content.