
How to Build an AR-15 Upper Receiver: Ultimate Visual Guide

See how easy it is to build your own AR-15 upper receiver. Step-by-step with pictures, plus essential tools, recommended parts, tips/tricks, and two full builds.

PPT Founder. NRA Pistol Instructor. USPSA/3-Gun/NRL22 Competitor. 250+ articles
We review products independently. When you buy through links on our site, we may earn a commission to help support our testing. Learn more.
So you want to build your own AR-15 upper receiver?
We'll make it quick and painless for you with photos detailing every single step and tips/tricks we've learned through many builds.
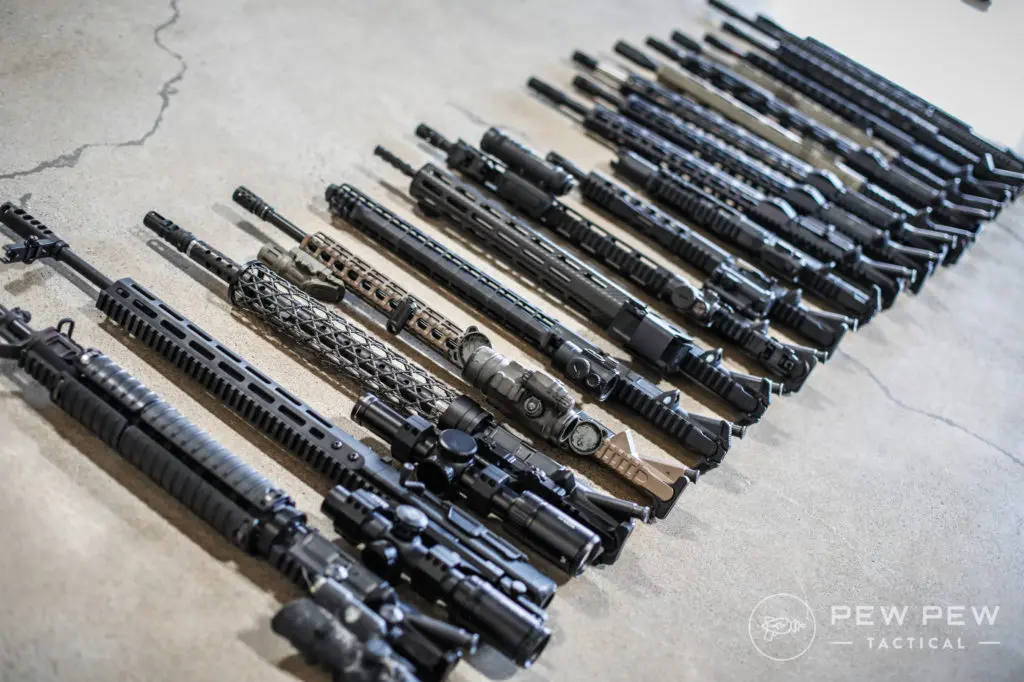
Plus, learn why we chose each individual part and which tools are really necessary for a successful build.
We'll go through two builds that should cover the major installation steps for gas blocks, barrels, and handguards. So, what are you waiting for... let's get started!
Disclaimer: This is for educational use only. If you don’t have the right tools or experience, please have this done by a professional or buy a completed rifle.
Trending: Best AR-15s & CCW Guns Under $400
What You Need Before You Start
The AR-15 upper receiver holds all the good stuff that will determine the weight, accuracy, and general performance of your completed rifle.

If you're not super familiar with the major parts of an AR-15, I recommend reading my most popular article, the Best AR-15 Buyer's Guide, which covers everything in detail.
If you're interested in building the lower receiver too, check out that article here.
● Required Parts
- Upper Receiver
- Forward Assist (if not included with upper)
- Dust Cover (if not included with upper)
- Barrel
- Bolt Carrier Group (BCG)
- Gas Block
- Gas Tube
- Handguard
- Muzzle Device
- Charging Handle
● Must-Have Tools
- AR-15 Upper Receiver Block ($38): You need to get this, or borrow someone's, so you can put on the barrel without crushing, bending, or scratching anything.
- Vise ($28): Best to have something more robust, but I've surprisingly made do with installing even stubborn barrels with just a clamp-on vise.
- Roll Pin Punch Set ($12): Roll pins are hollow, and roll pin-specific punches have rounded tips to ensure you won't damage any pins.
- Hammer ($20): Hammers with rubber or plastic ends still offer enough force to drive in roll pins, but won't mar your finish if you accidentally hit the receiver.
- 1/2" Torque Wrench ($37): Makes sure you get proper torque when installing the barrel nut
● Nice to Have Tools, But Not Needed
- Wheeler Torque Wrench ($50): This smaller torque wrench allows you to torque your gas block screws perfectly. It is also great for mounting scopes and red dots.
- AR-15 Combo Tool ($56): Not super necessary with the newer generation of handguards that give you a tool already, but can be useful for installing various parts on uppers and lowers.
- .223 Headspace Gauge ($30): There's a lot of debate on whether you really need to check if you buy your barrel and BCG from a reputable company. If you are worried, a No-Go Gauge will tell you if the headspace on your barrel is off.
- Feeler Gauge ($8): You're supposed to set the gas block .025" away from the barrel shoulder, and feeler gauges make it easy. Otherwise, you can use two business cards.
AR-15 Upper Receiver Build List
This build is targeted towards competitive 3-gun shooting.
Here is an overview of each specific part used in this build:
- Aero Precision Stripped Upper Receiver ($80): I chose a stripped upper (missing the forward assist and dust cover) so I could show you how to install them. However, unless you want something custom there. Assembled uppers usually only run about $20 more.
- Ballistic Advantage Barrel ($150-$250): I went with a 16" light-weight profile mid-length gas chambered in .223 Wylde.
- Midwest 12" G-Series Handguard ($175): This build uses a G3 handguard, but Midwest Industries is now on the G4 series. These rails are super light, strong, thin, and easy to install.
- Rubber City Titanium BCG ($319): Since this is a competition gun, I went with a titanium BCG to cut down on overall weight while reducing recoil by lowering the reciprocating mass.
- Superlative Arms Adjustable Gas Block ($90): The gold standard for gas blocks. You don't need to remove your handguard to adjust the gas, and it has a bleed-off system that vents excess gas forward and away from your hands. I went with the clamp-on model for ease of installation.
- BCM Gunfighter Charging Handle ($75): These feature extended latches that are much easier to grab and rack. I prefer the medium size as it strikes a good balance between being easy to grip, but not so large that it snags stuff.
- DPMS Miculek Compensator (discontinued): Designed by machine gun fingers himself, Jerry Miculek. It’s a simple, but the very robust design that is perfect for Practical and Factory rifle competition.
- Spike's Gas Tube ($15): Although they are just metal tubes, I go with a name I trust. This particular build uses a mid-length tube.
Step-by-Step Instructions
Step 1: Install the Forward Assist
The first two steps are for a completely stripped receiver. If you bought a receiver that already has the forward assist and dust cover installed, skip to step 3.
First, place your upper receiver in the vise block and locate the two forward assist pieces.
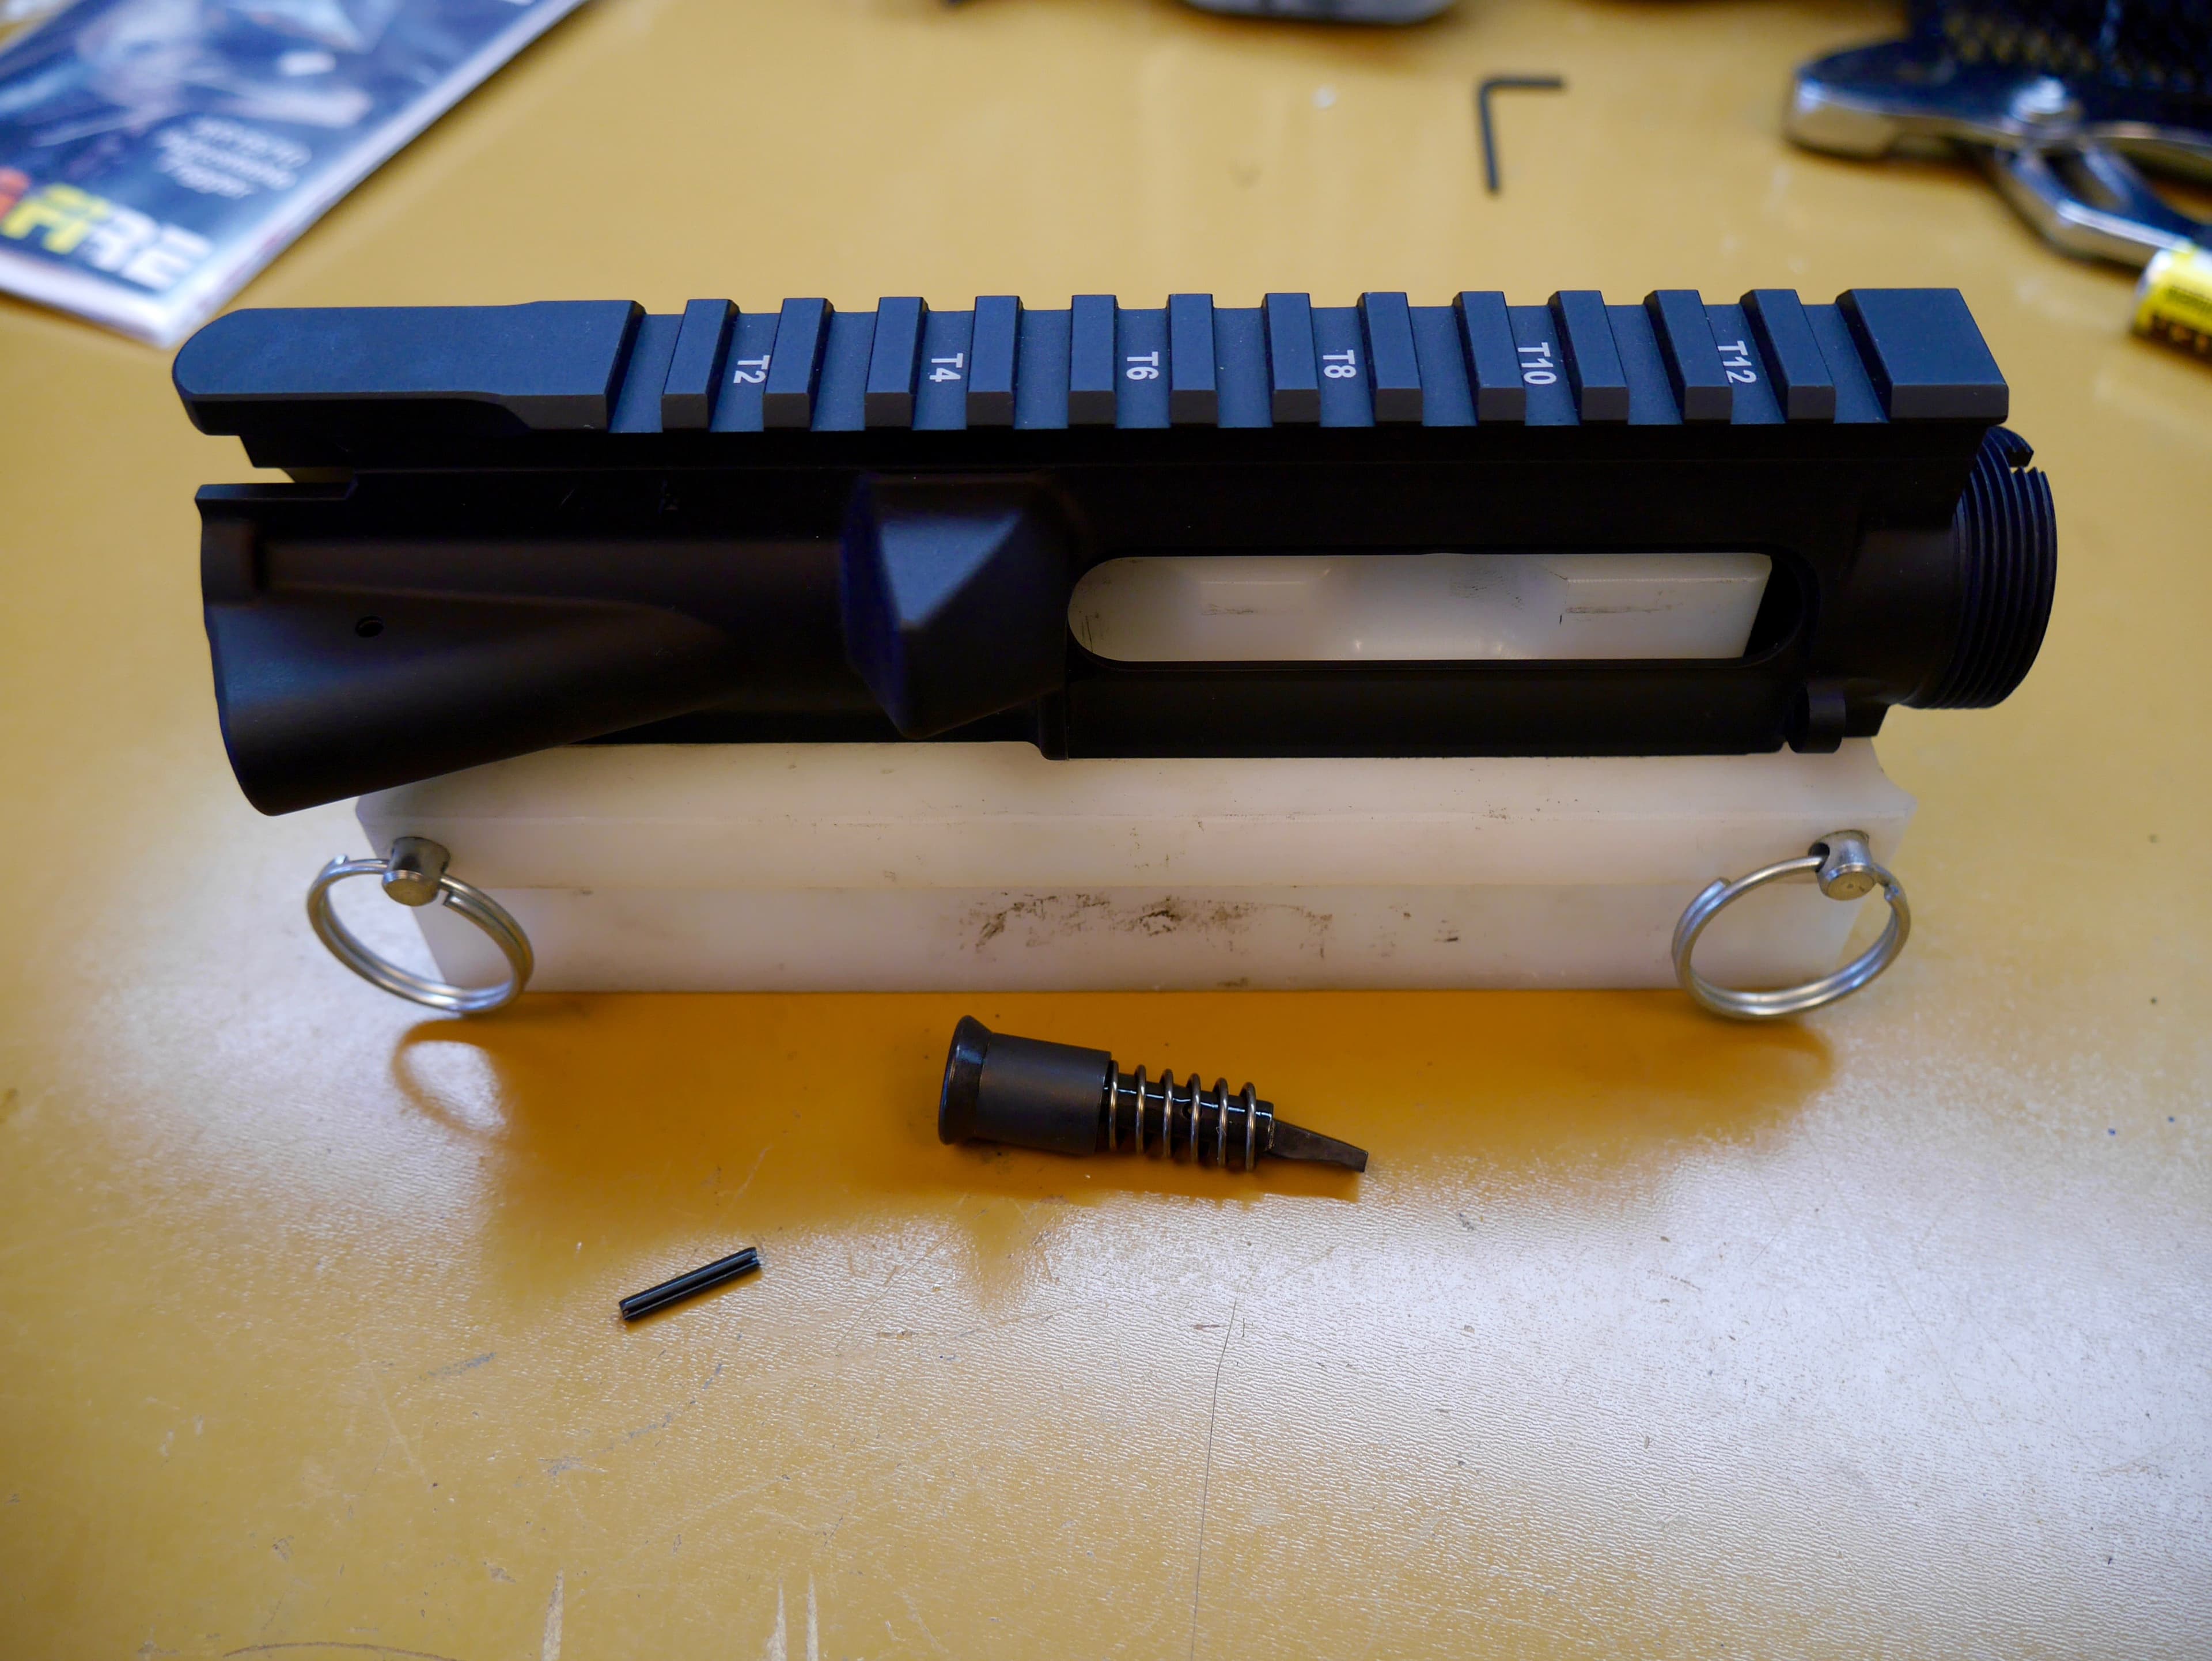
When we install the forward assist, make sure that its "tooth" is facing in towards the receiver. This tooth is what catches the serrations of the BCG to make it go forward.
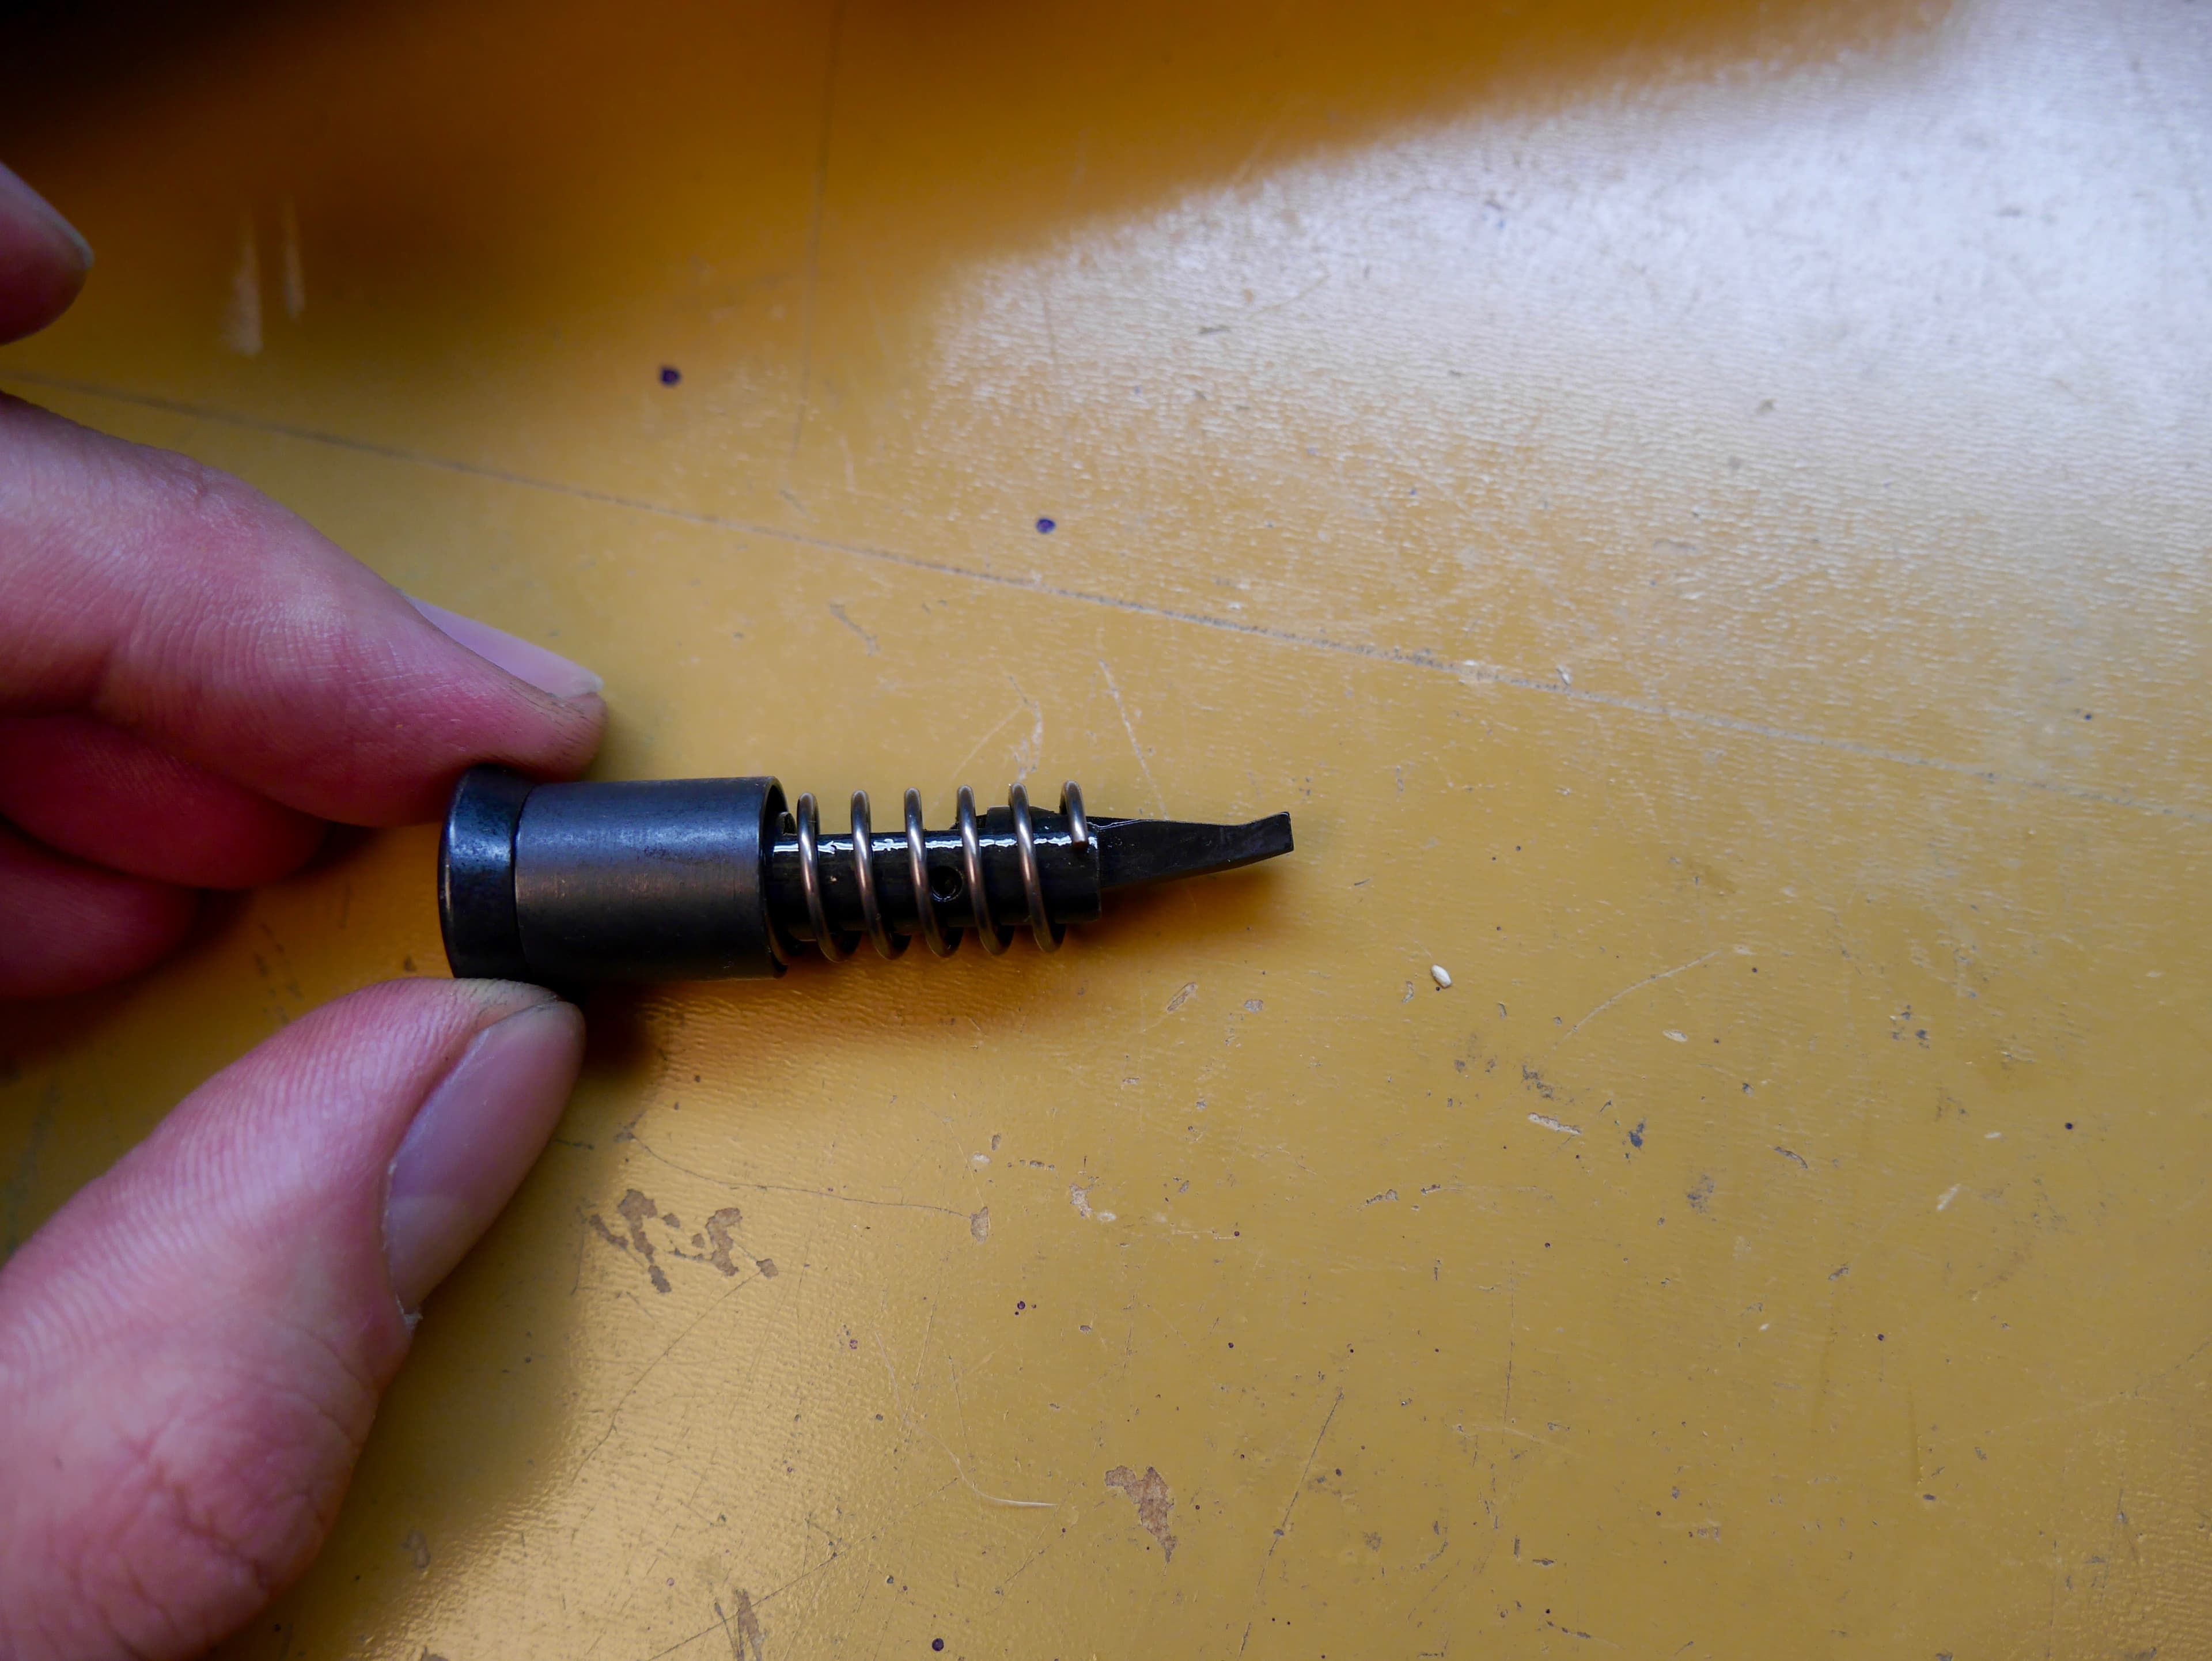
Lock your vise block in the vise, and put the forward assist into the appropriate slot using the orientation above.
Install the forward assist roll pin in the top hole. You will want to get it started just a tad bit using a punch and a hammer. Do try and drive the pin all the way in yet.
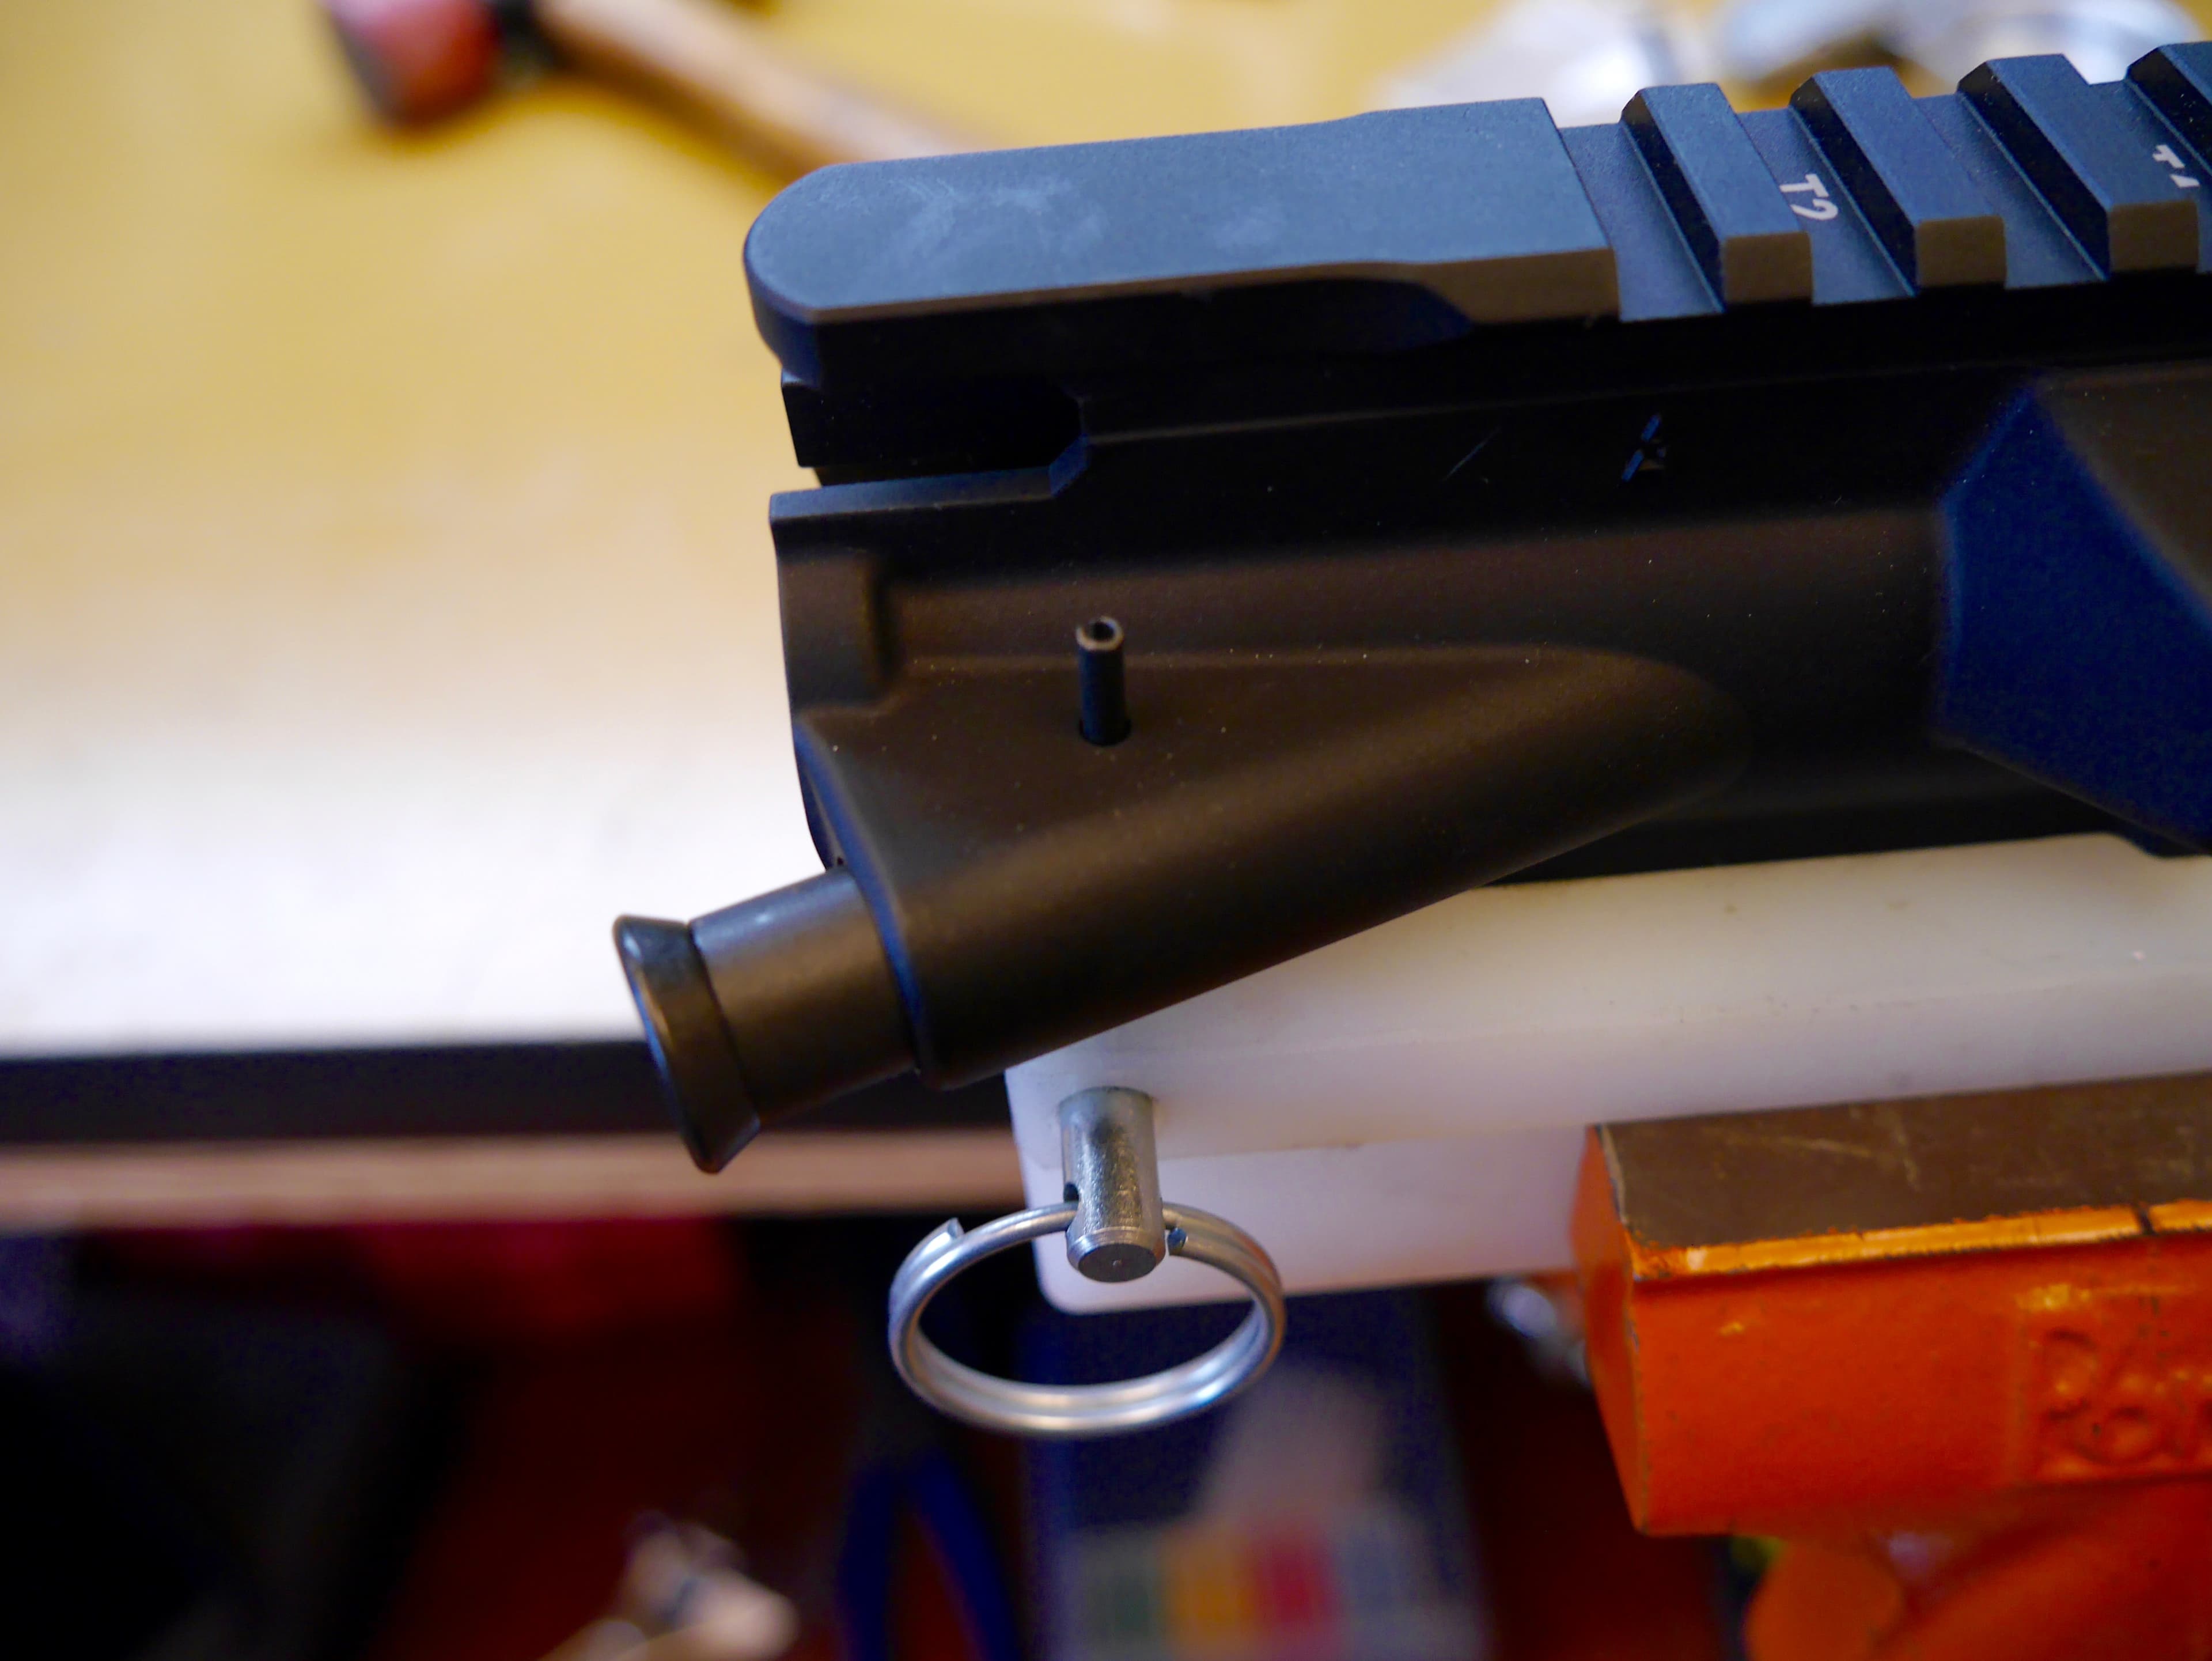
To install the pin the rest of the way, you will need to press the forward assist inward. With the forward assist depressed, gently use the hammer to tap the pin in enough so the forward assist cannot back out by hand.
Once the forward assist is captured, finish driving the pin in with the hammer and punch.
Step 2: Install the Dust Cover
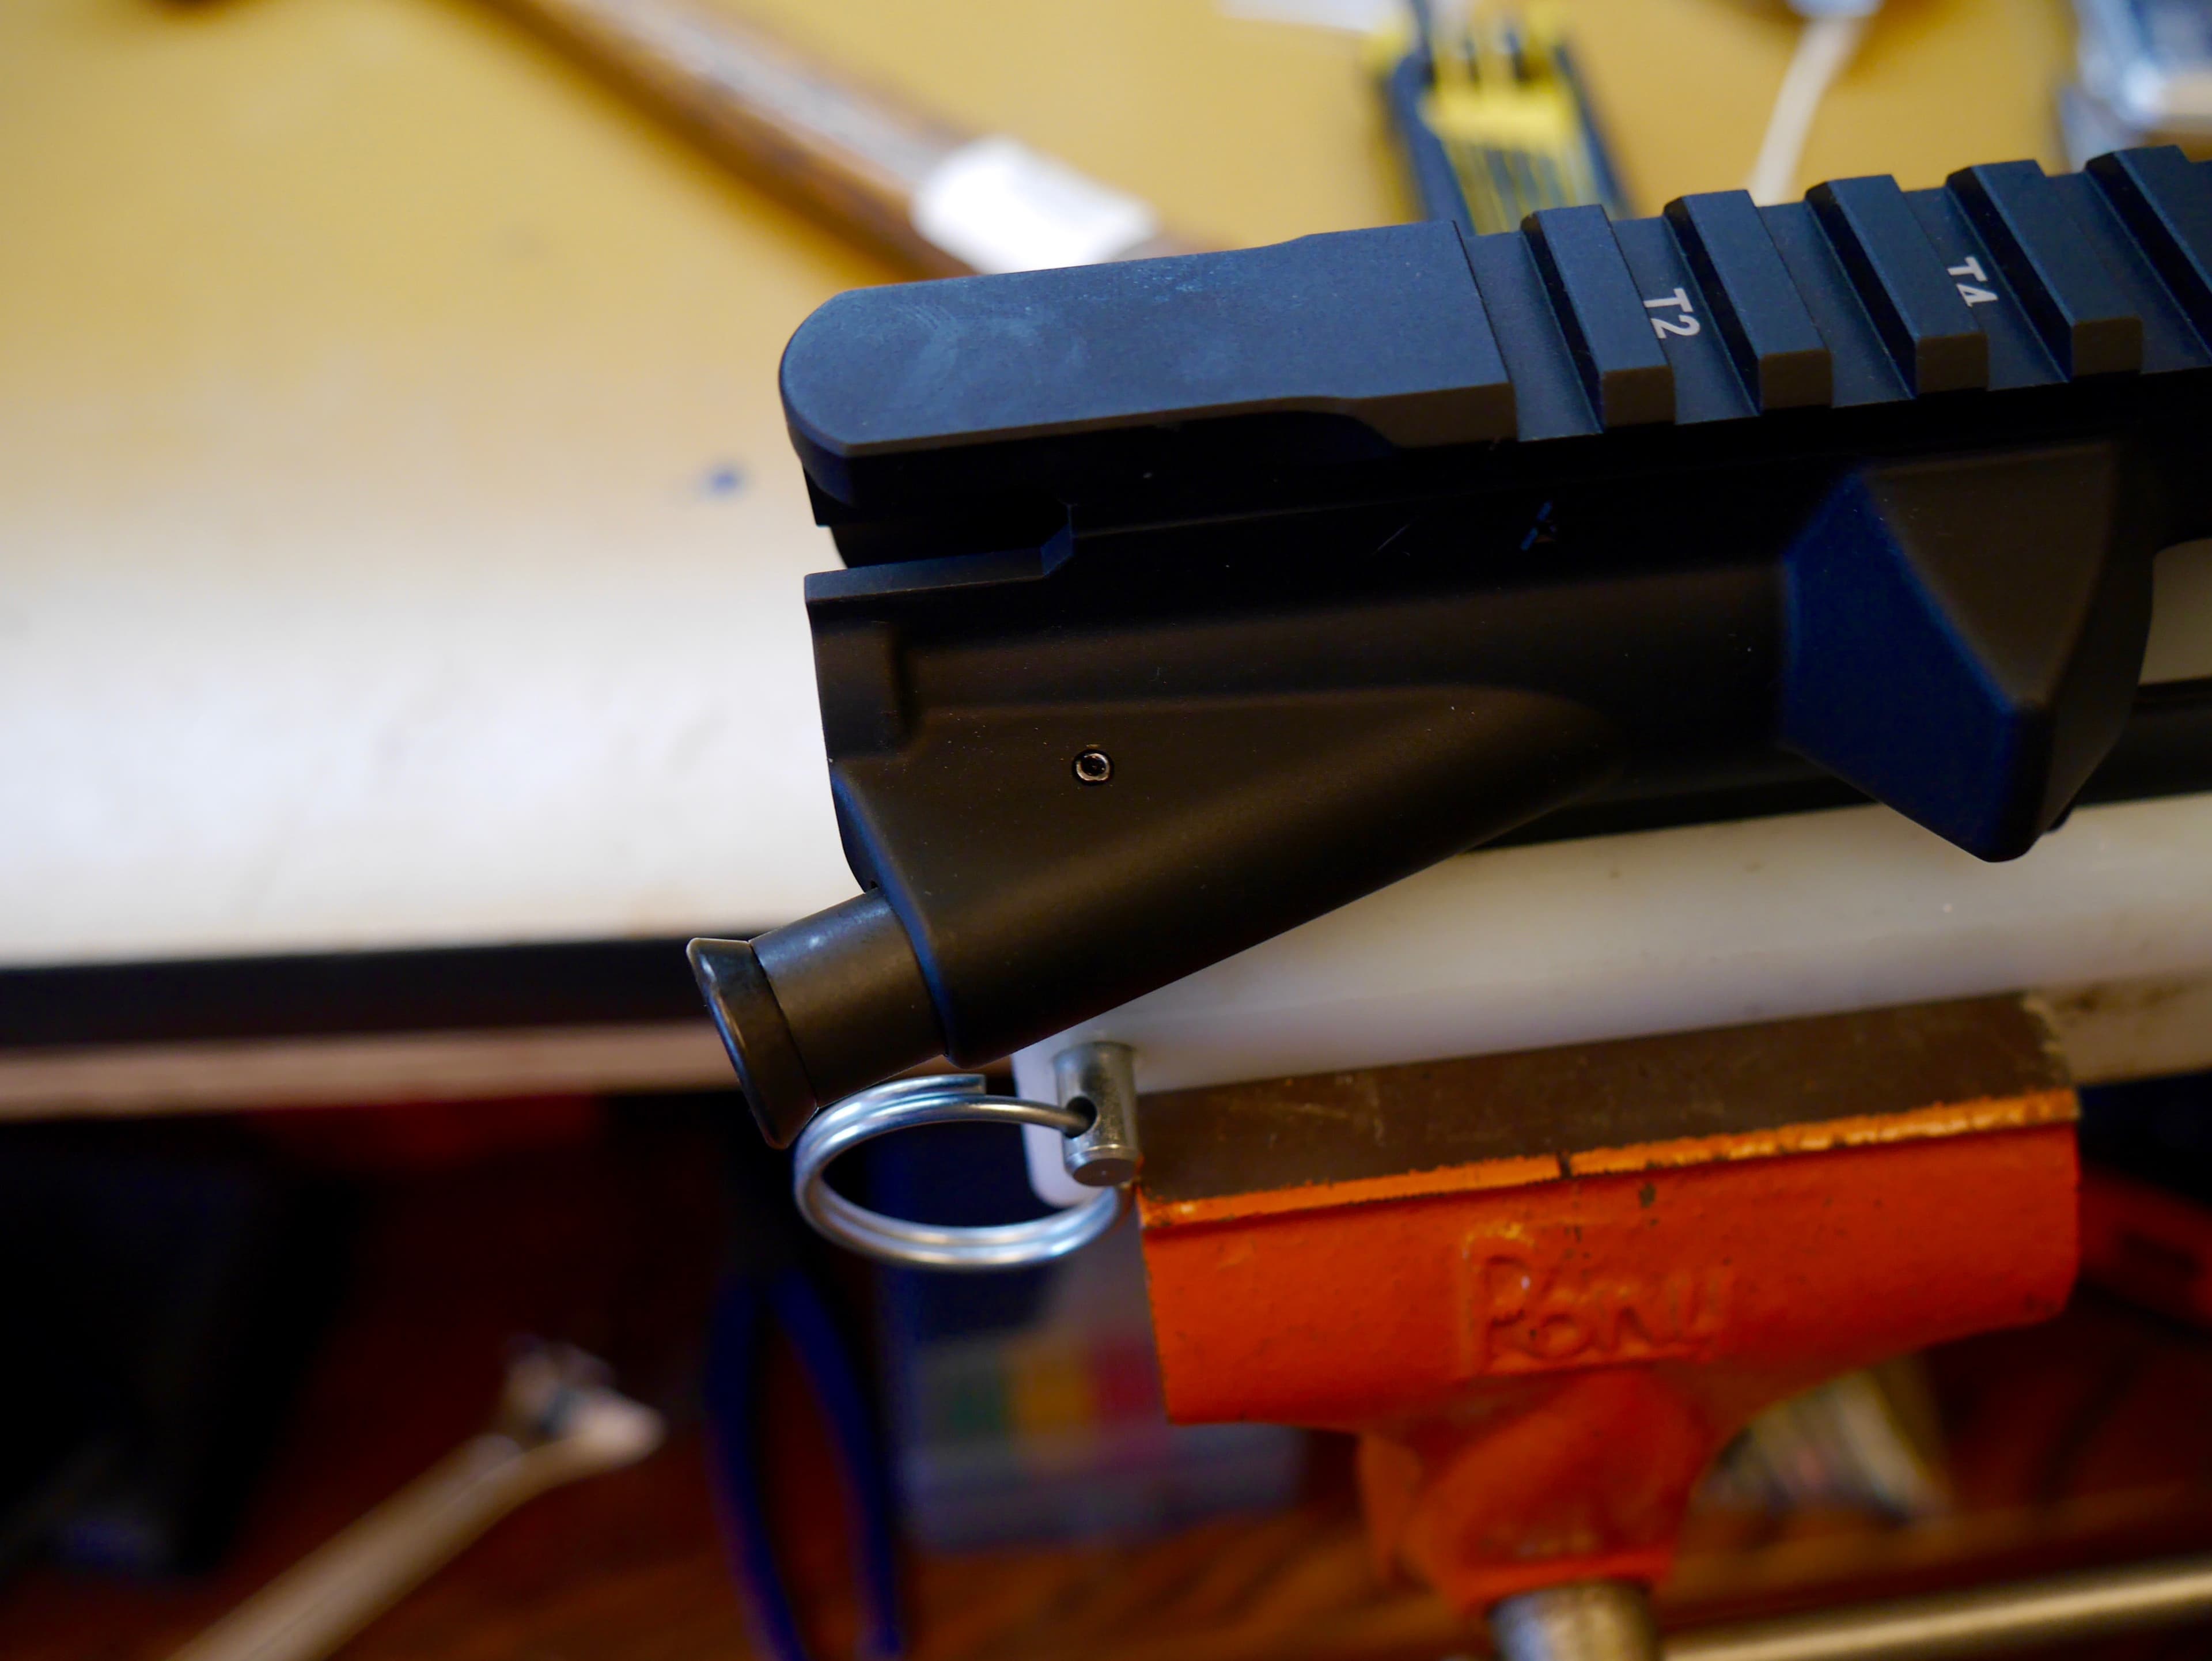
First, you will want to ensure the ejection port hinge pin has the C-shaped snap ring installed. Some hinge pins will have these pre-installed.
If yours does not, you will want to position the snap ring above the small cutout on the hinge pin. Using some needle-nose pliers, you should be able to compress the snap ring over the cutout in the pin, and it will snap into place.
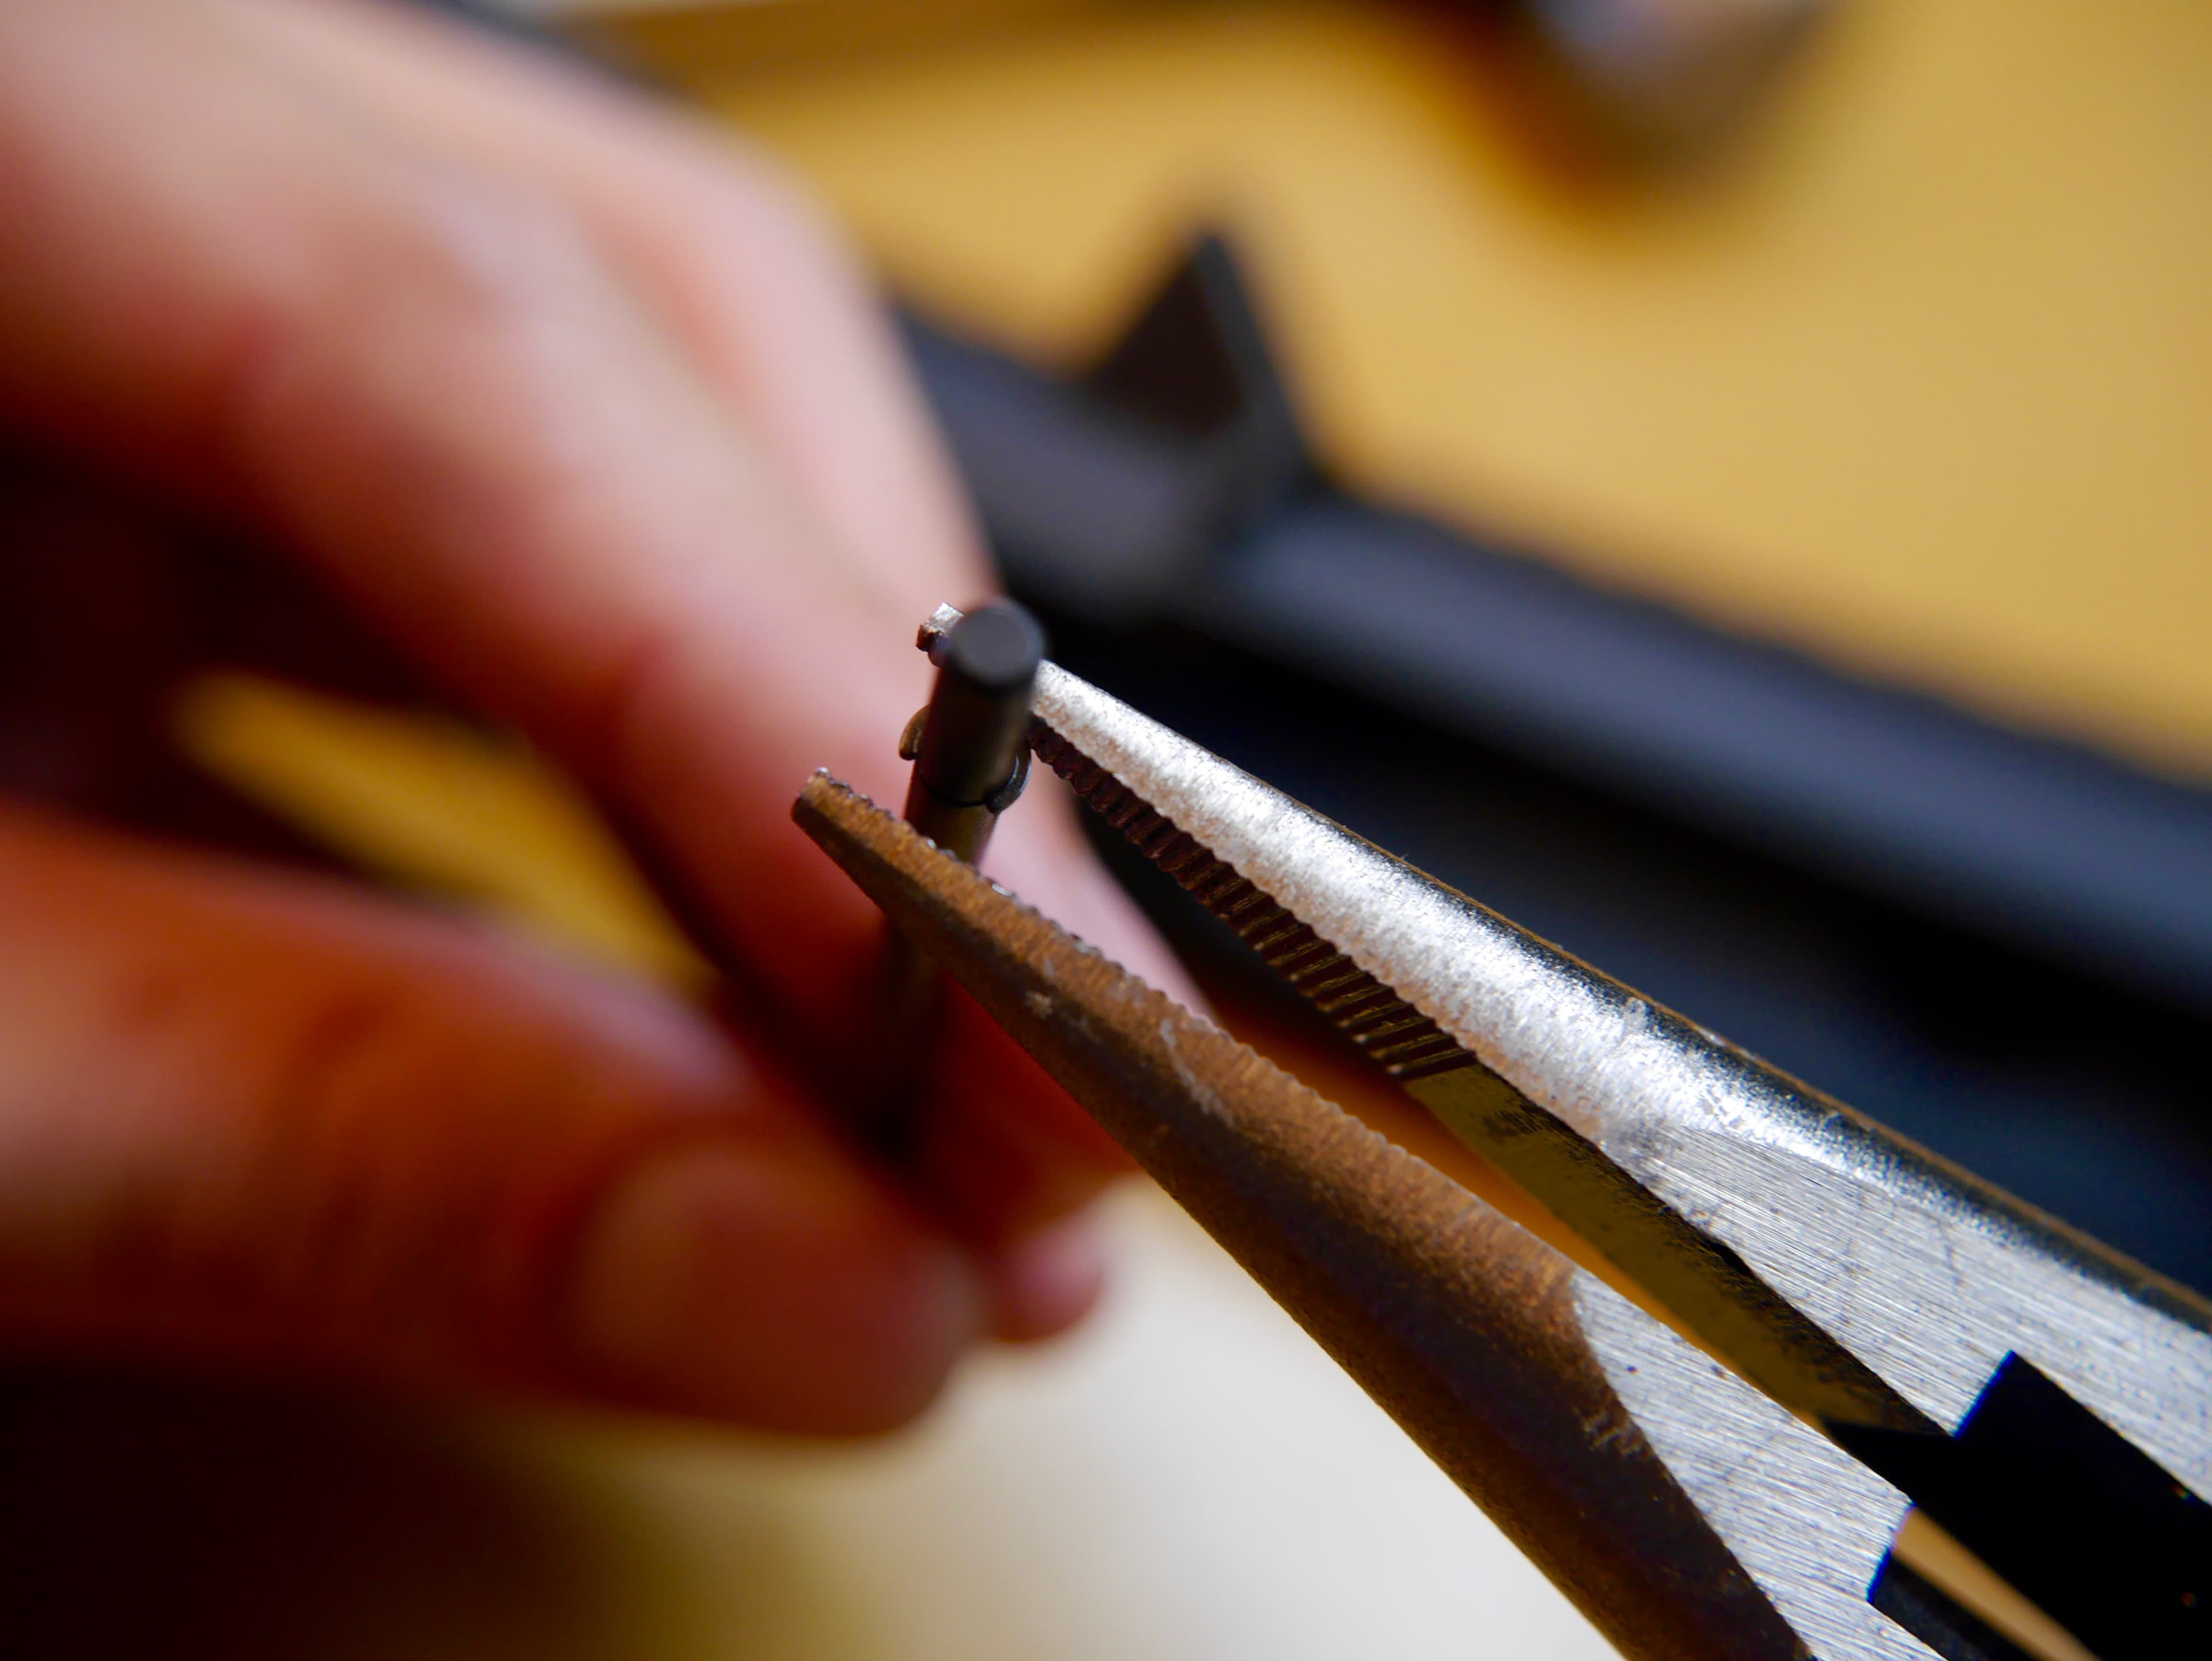
Be extra careful to avoid crushing, bending, or launching the snap ring off into oblivion. It is a very small part and is easy to lose.
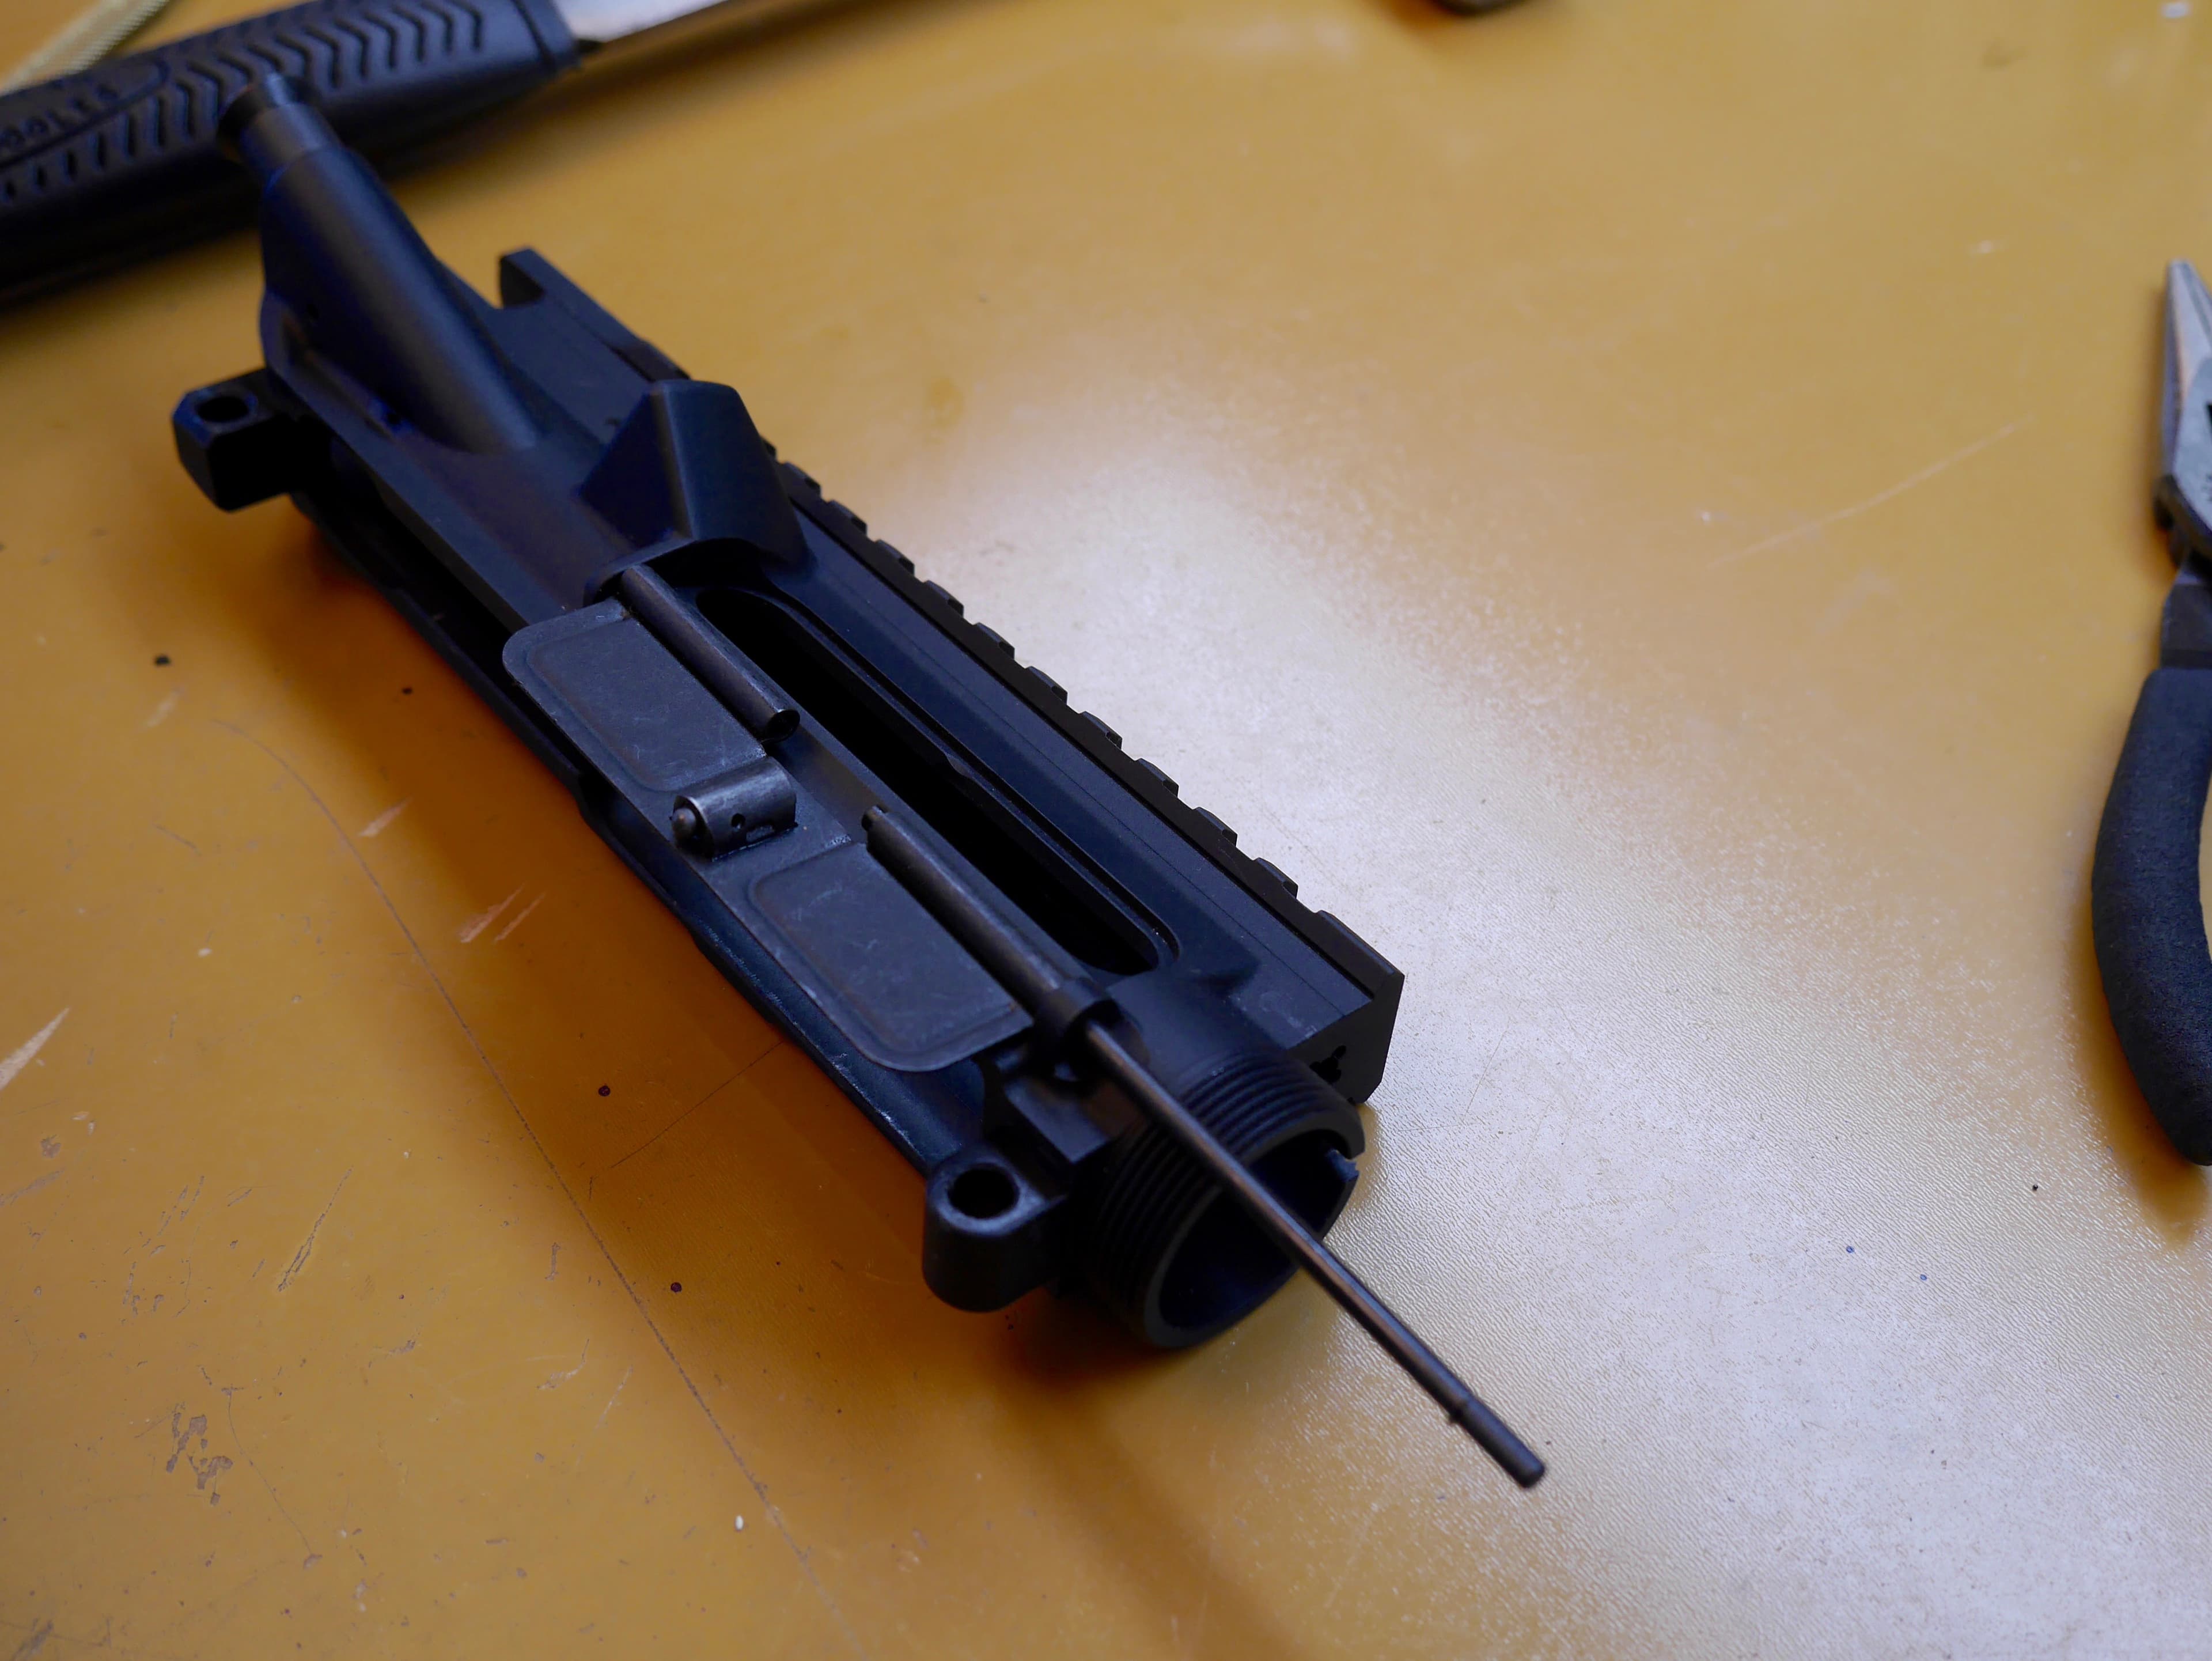
Next, place the upper on its side with the ejection port facing up. Position the dust cover so that the wholes line up with the hole on the side of the receiver.
With the snap ring facing the front of the receiver, slide the hinge pin into the hole just below the ejection port. Push the hinge pin in just enough so that the middle gap of the dust cover is exposed.
Next, you will place the dust cover spring into the gap in the dust cover with both legs facing up. The longer leg should be on the side closest to the front of the receiver.
Using your thumb, hold down the left side of the spring. Using a pair of pliers, grab the long leg of the spring and twist it 180 degrees until the leg fits in the slot on the dust cover.
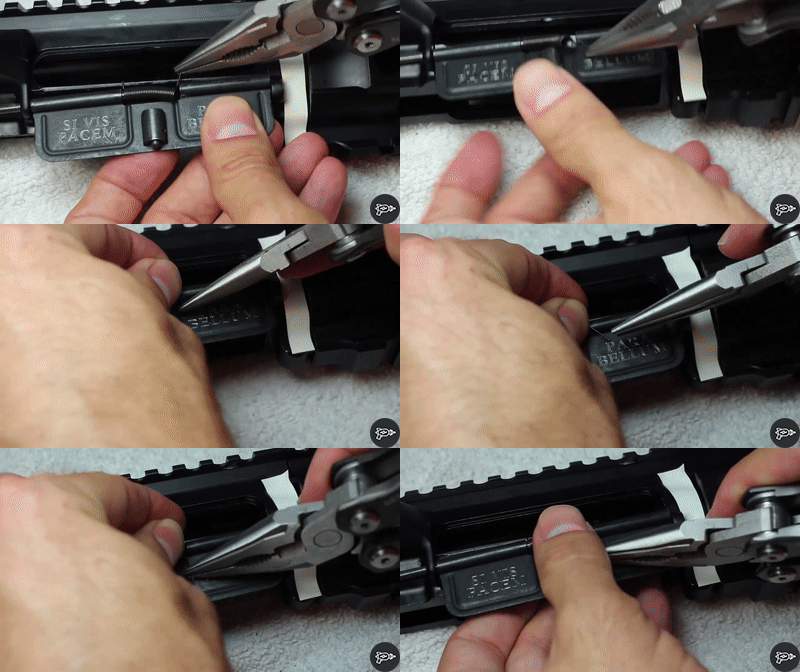
Keeping your thumb on the spring to keep it in place, and use your other hand to push the hinge pin through the spring and the other side of the dust cover. You may have to jiggle things a bit to get it all lined up.
Step 3: Install the Barrel
Take your barrel and press it into the receiver. There is an index pin that fits into a notch in the threaded part of the upper receiver. I use a light layer of gun oil to make it slide more easily.
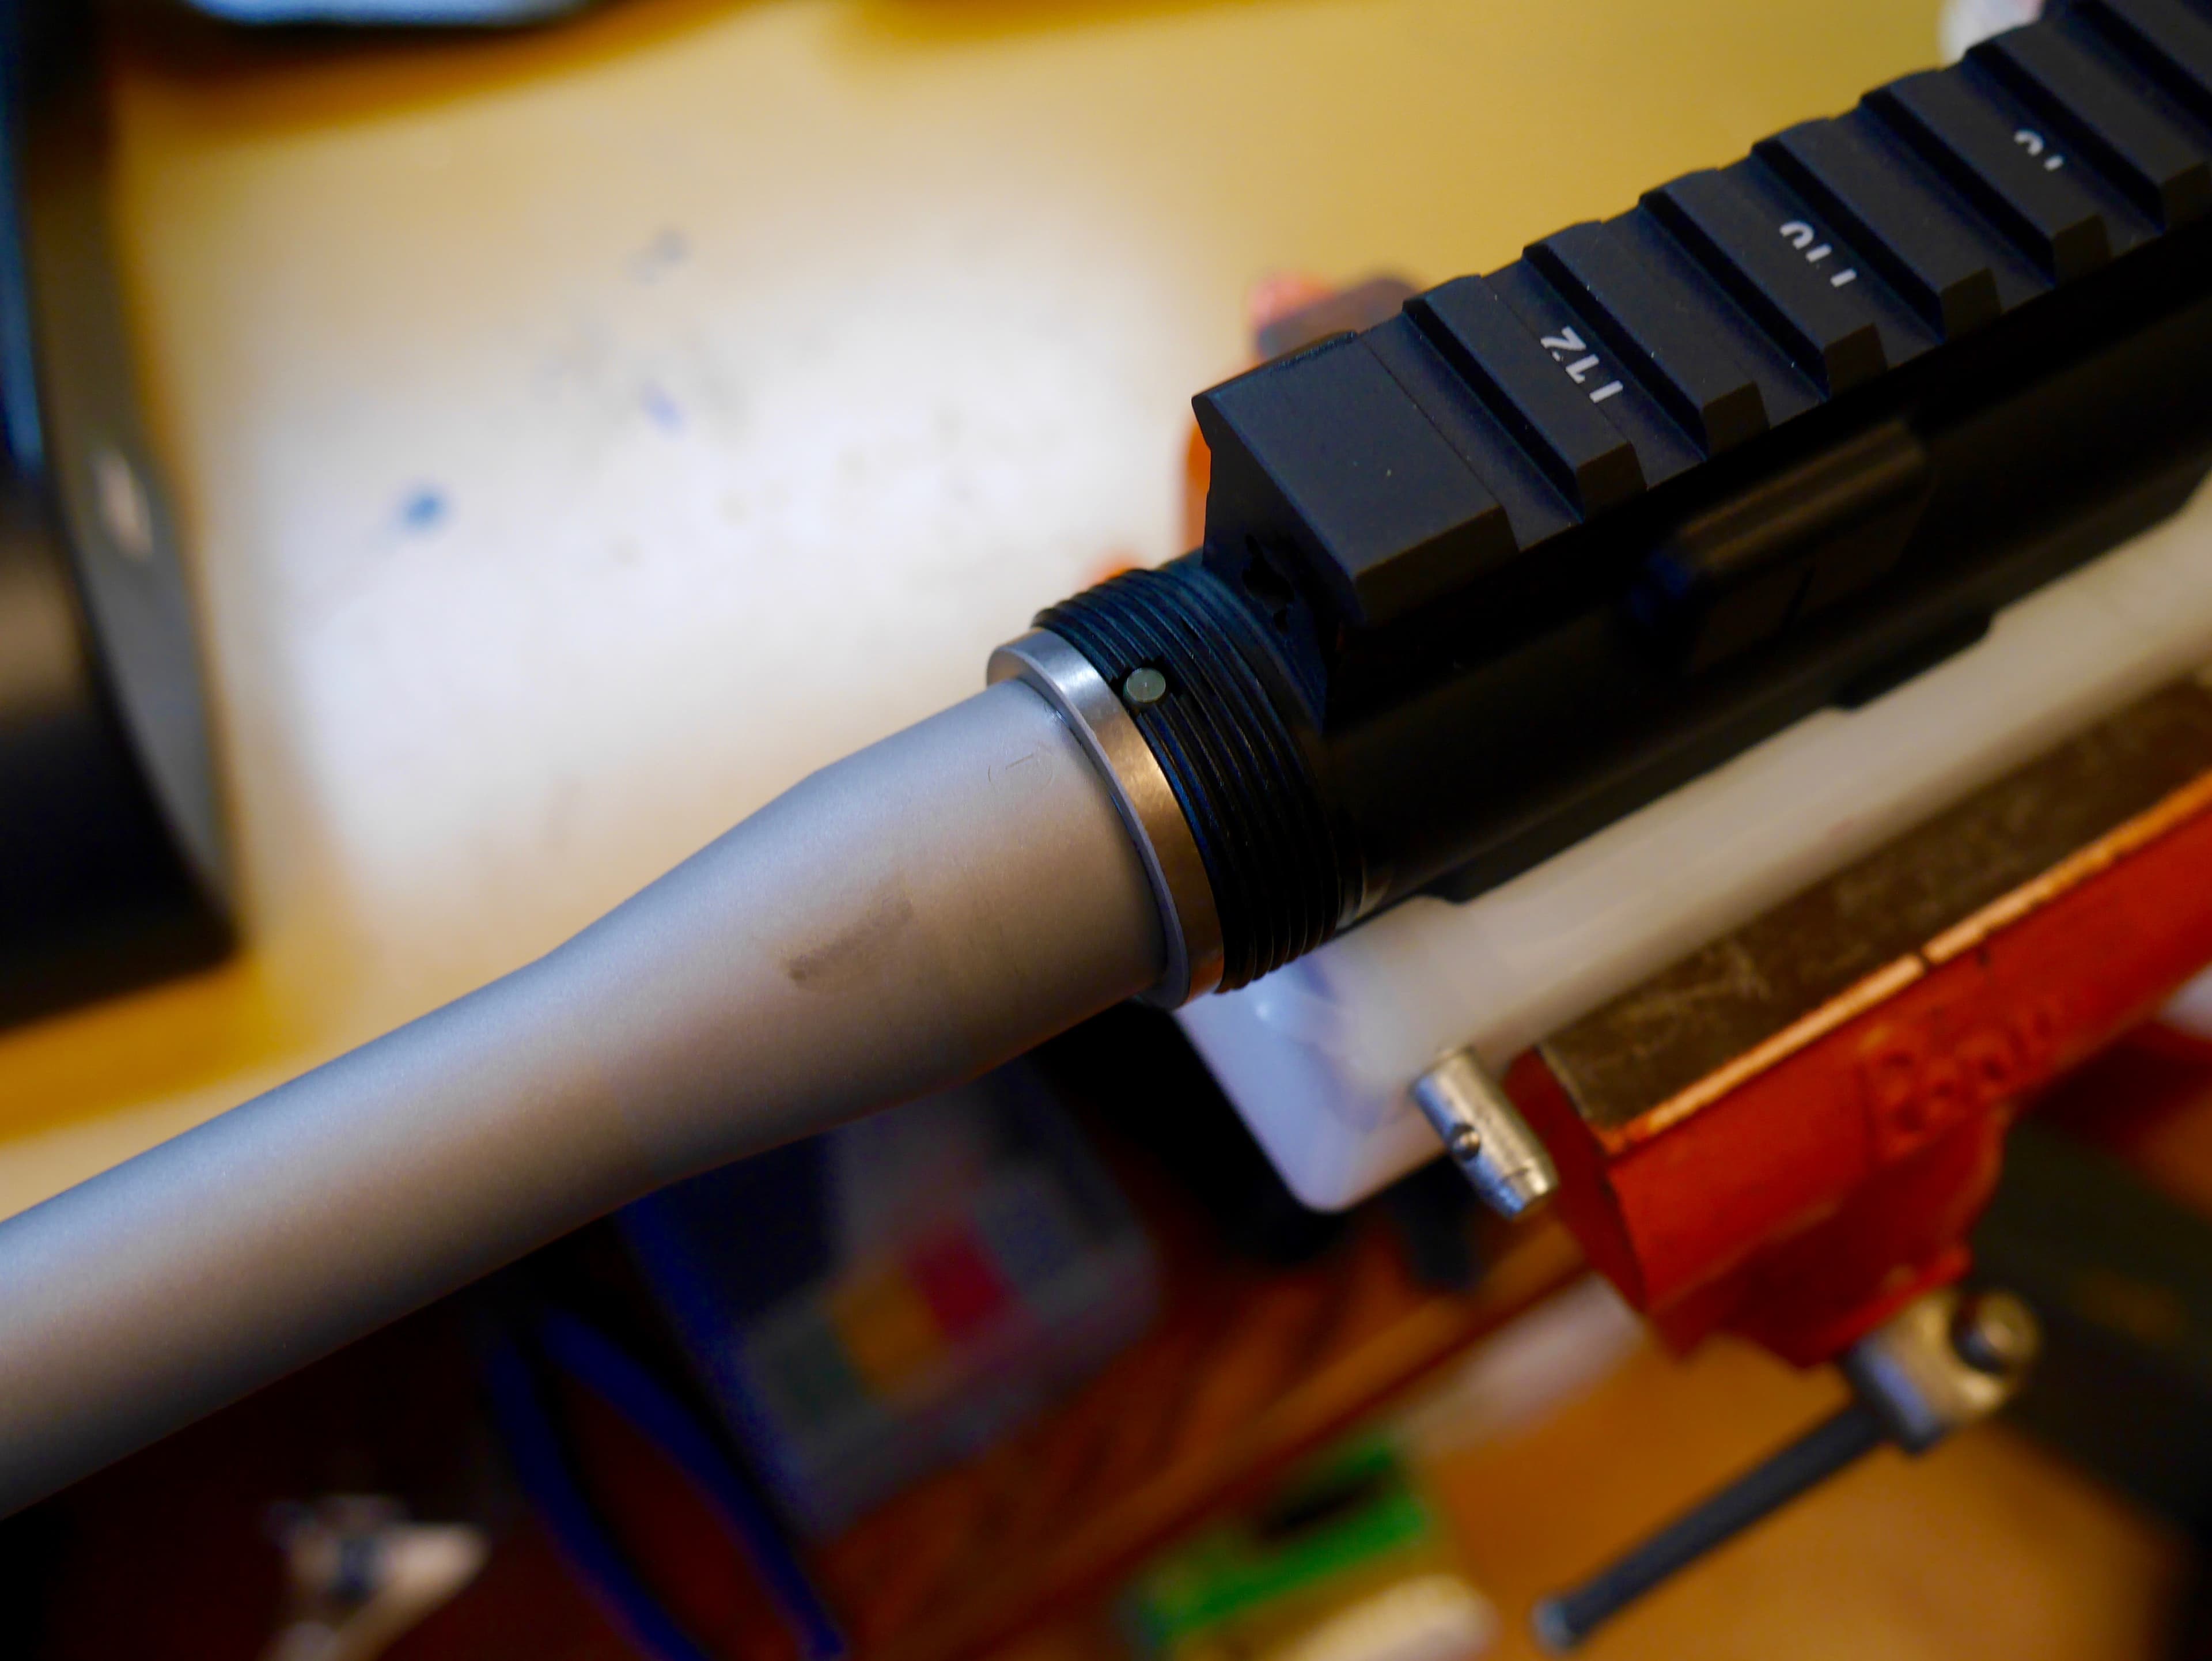
Next, find the barrel nut and slide it over the end of the barrel until it mates with the receiver threads. Spin the barrel nut on the threads until it is hand-tight.
I like to grease or oil the threads here to make the surfaces mate up more easily.
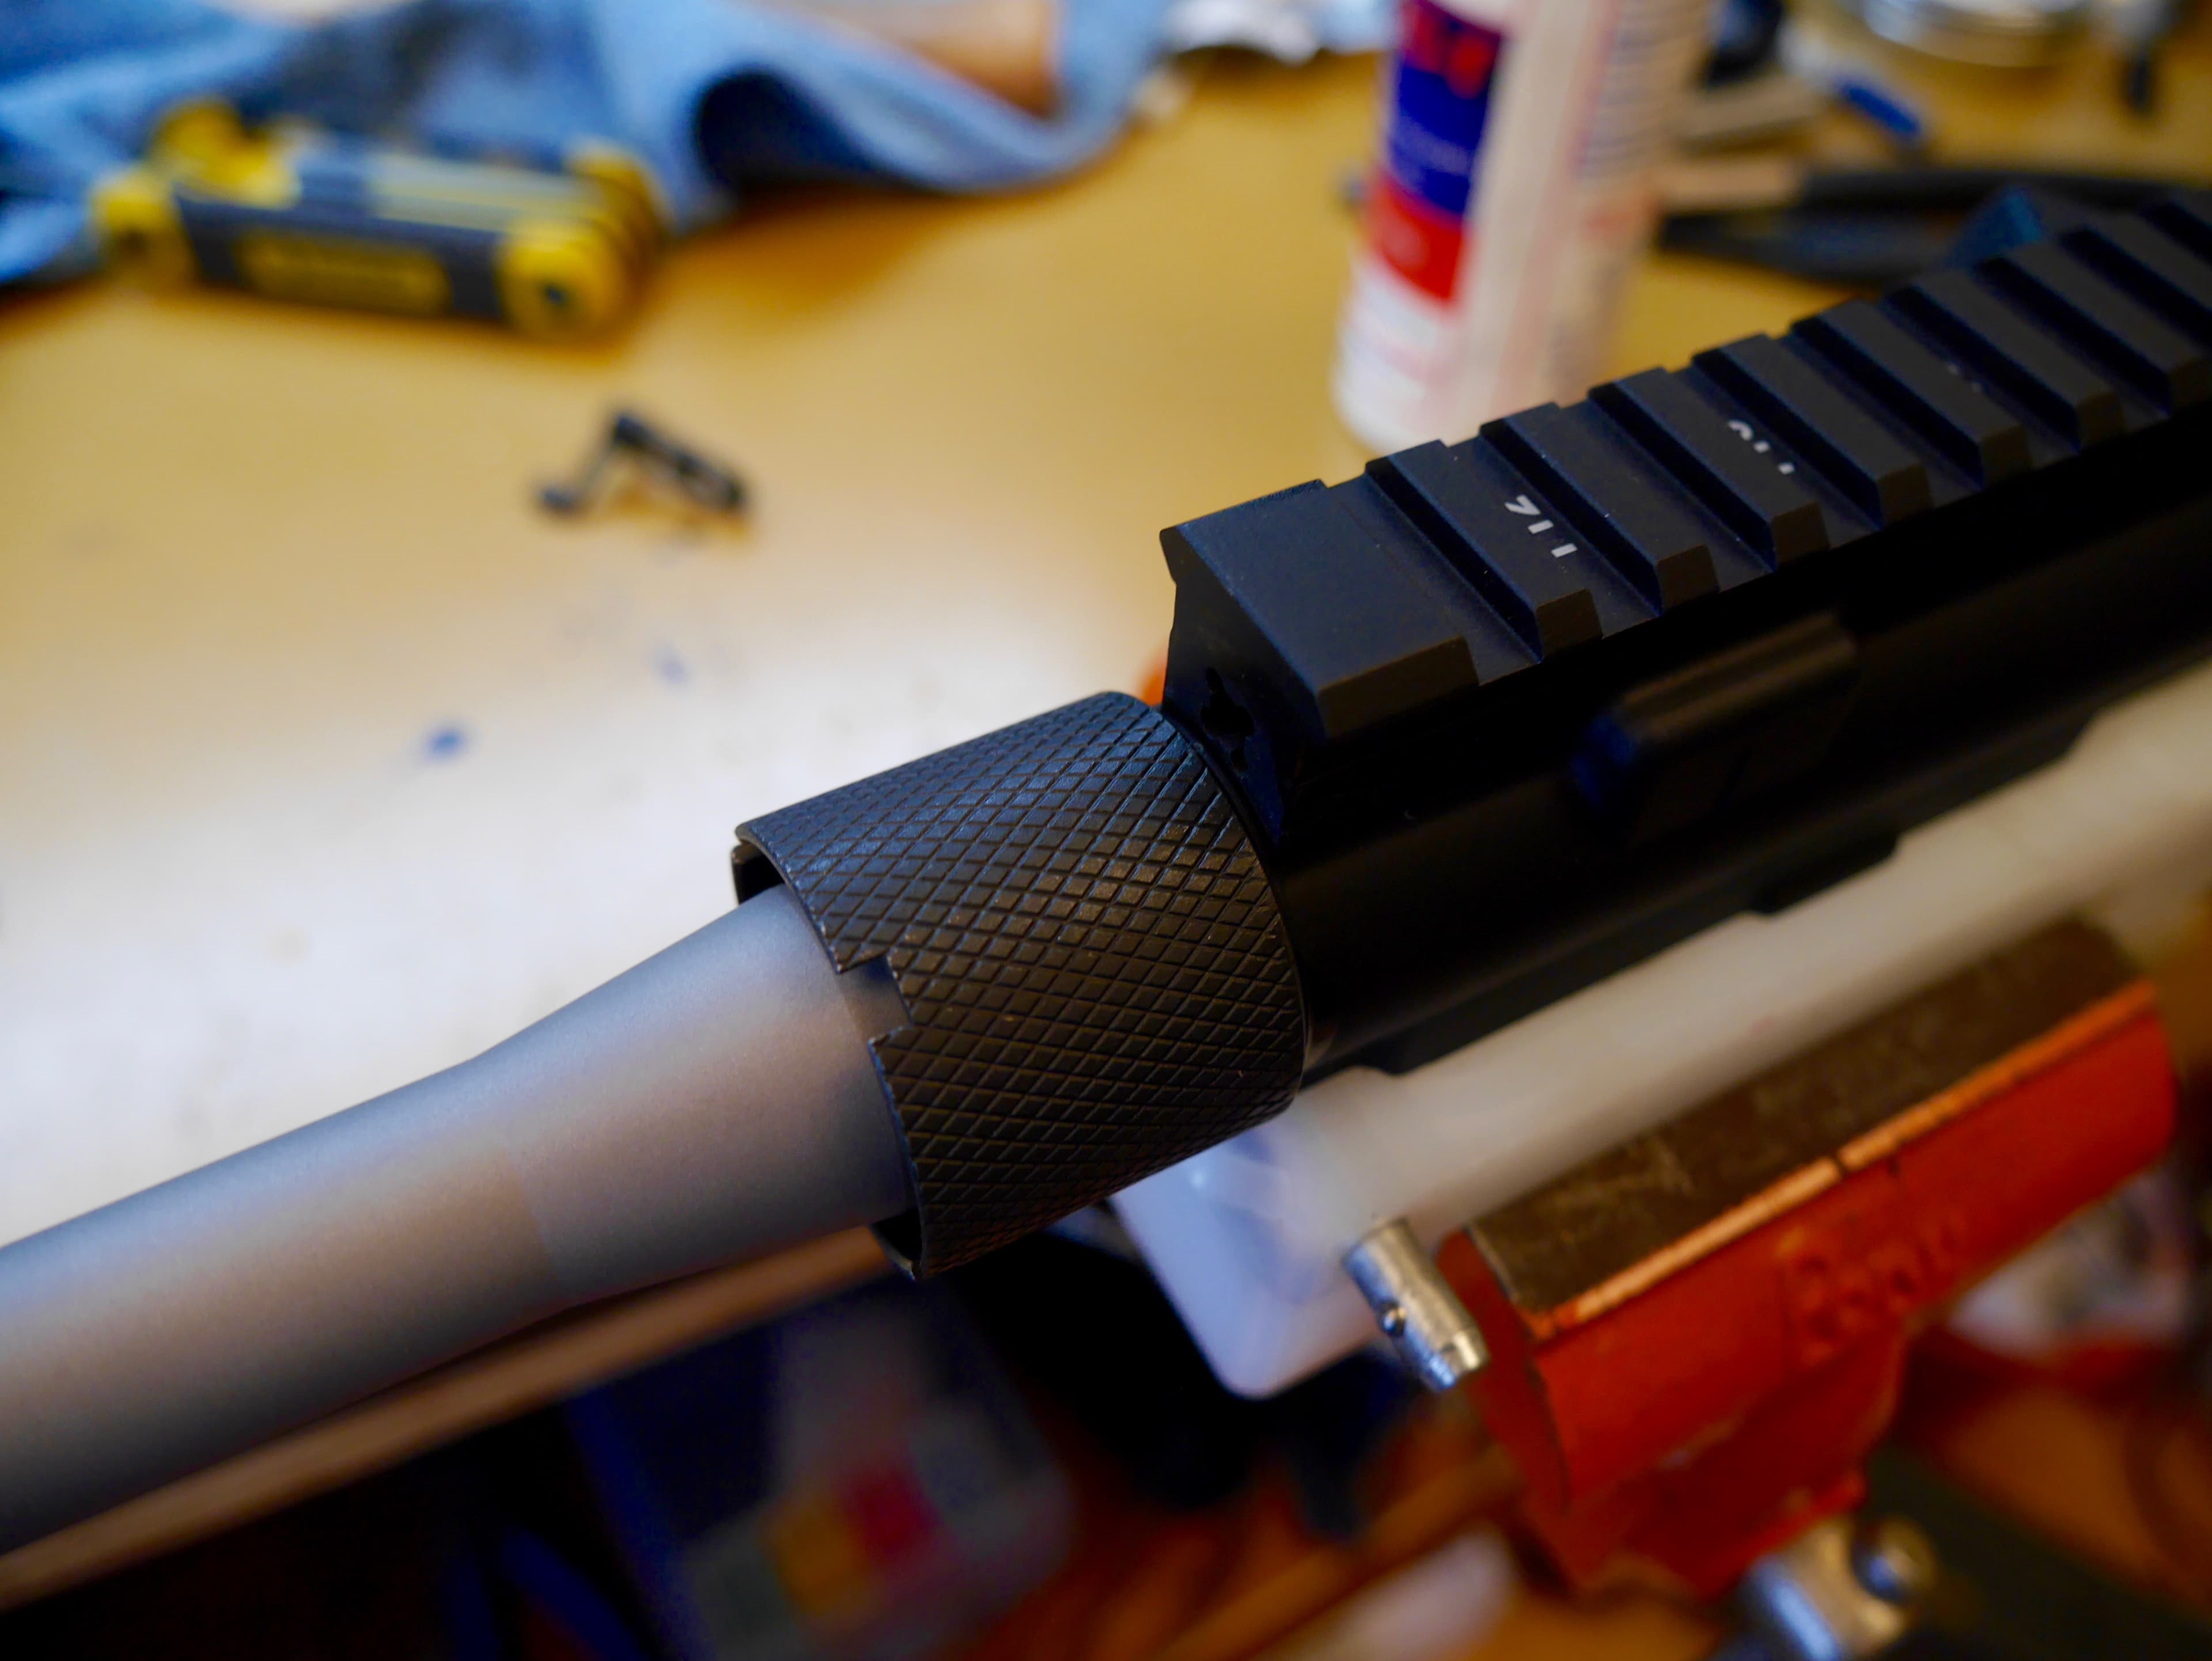
Now it is time to tighten the barrel nut to spec. To tighten the barrel nut, you will need to either use an AR armorer's wrench or use a torque wrench in conjunction with the provided wrench head that came with your handguard.
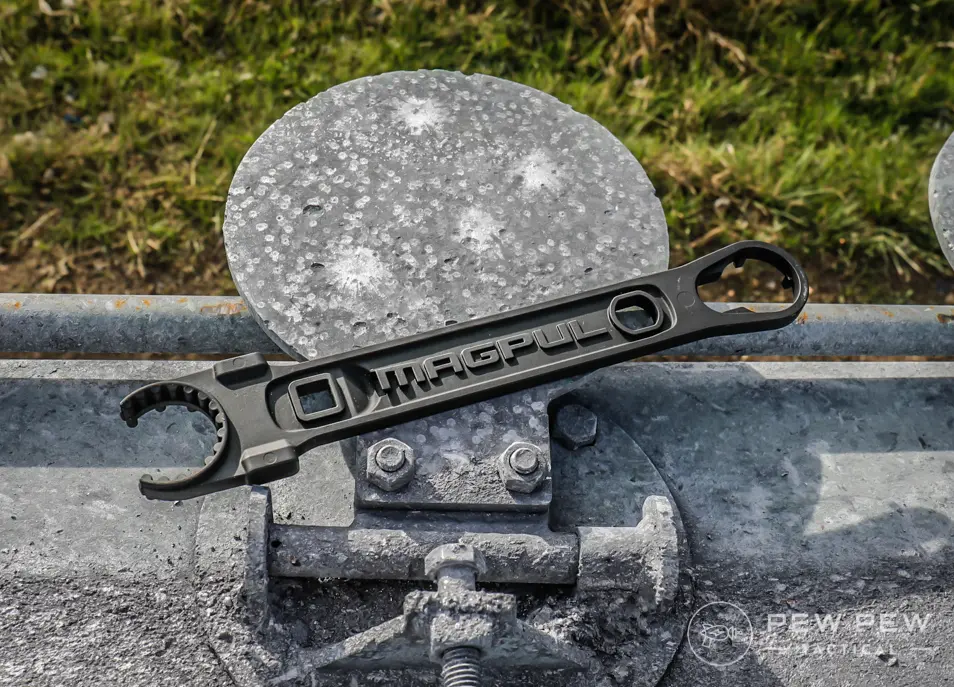
Below are a few examples of the tool heads that come with most modern handguards and will fit into the barrel nut. A torque wrench goes into the square hole (1/2") of the included tool.
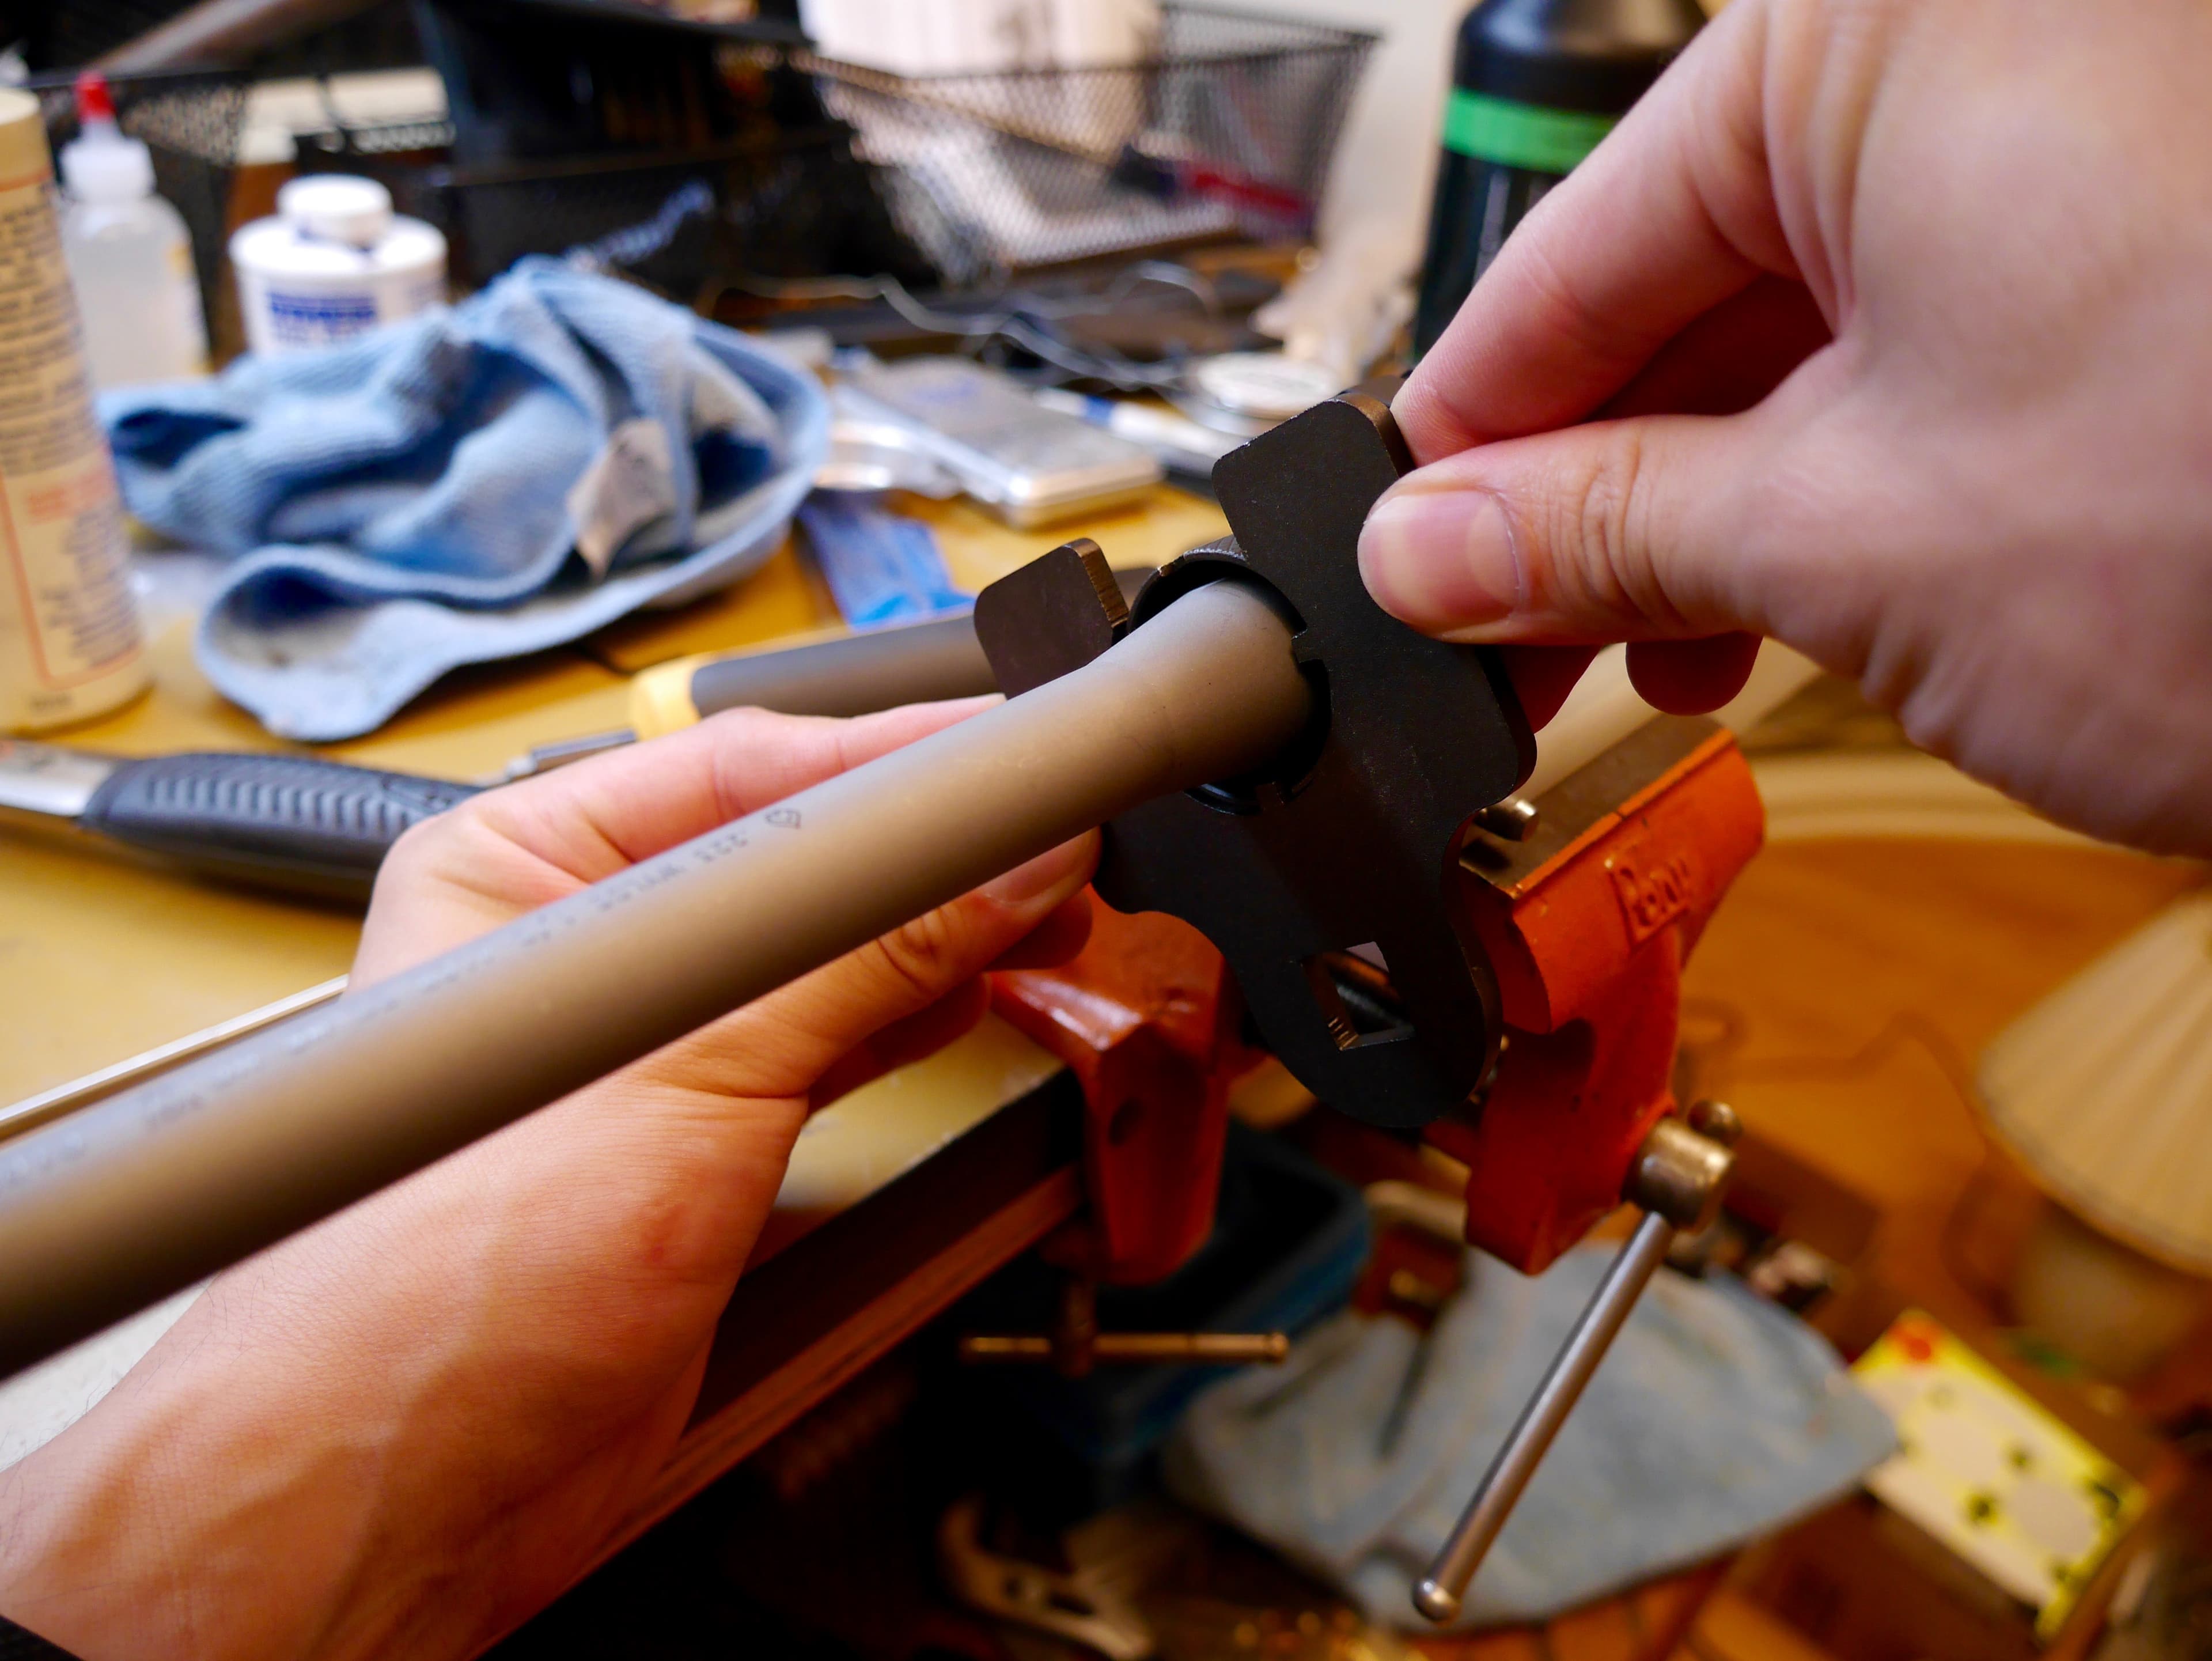
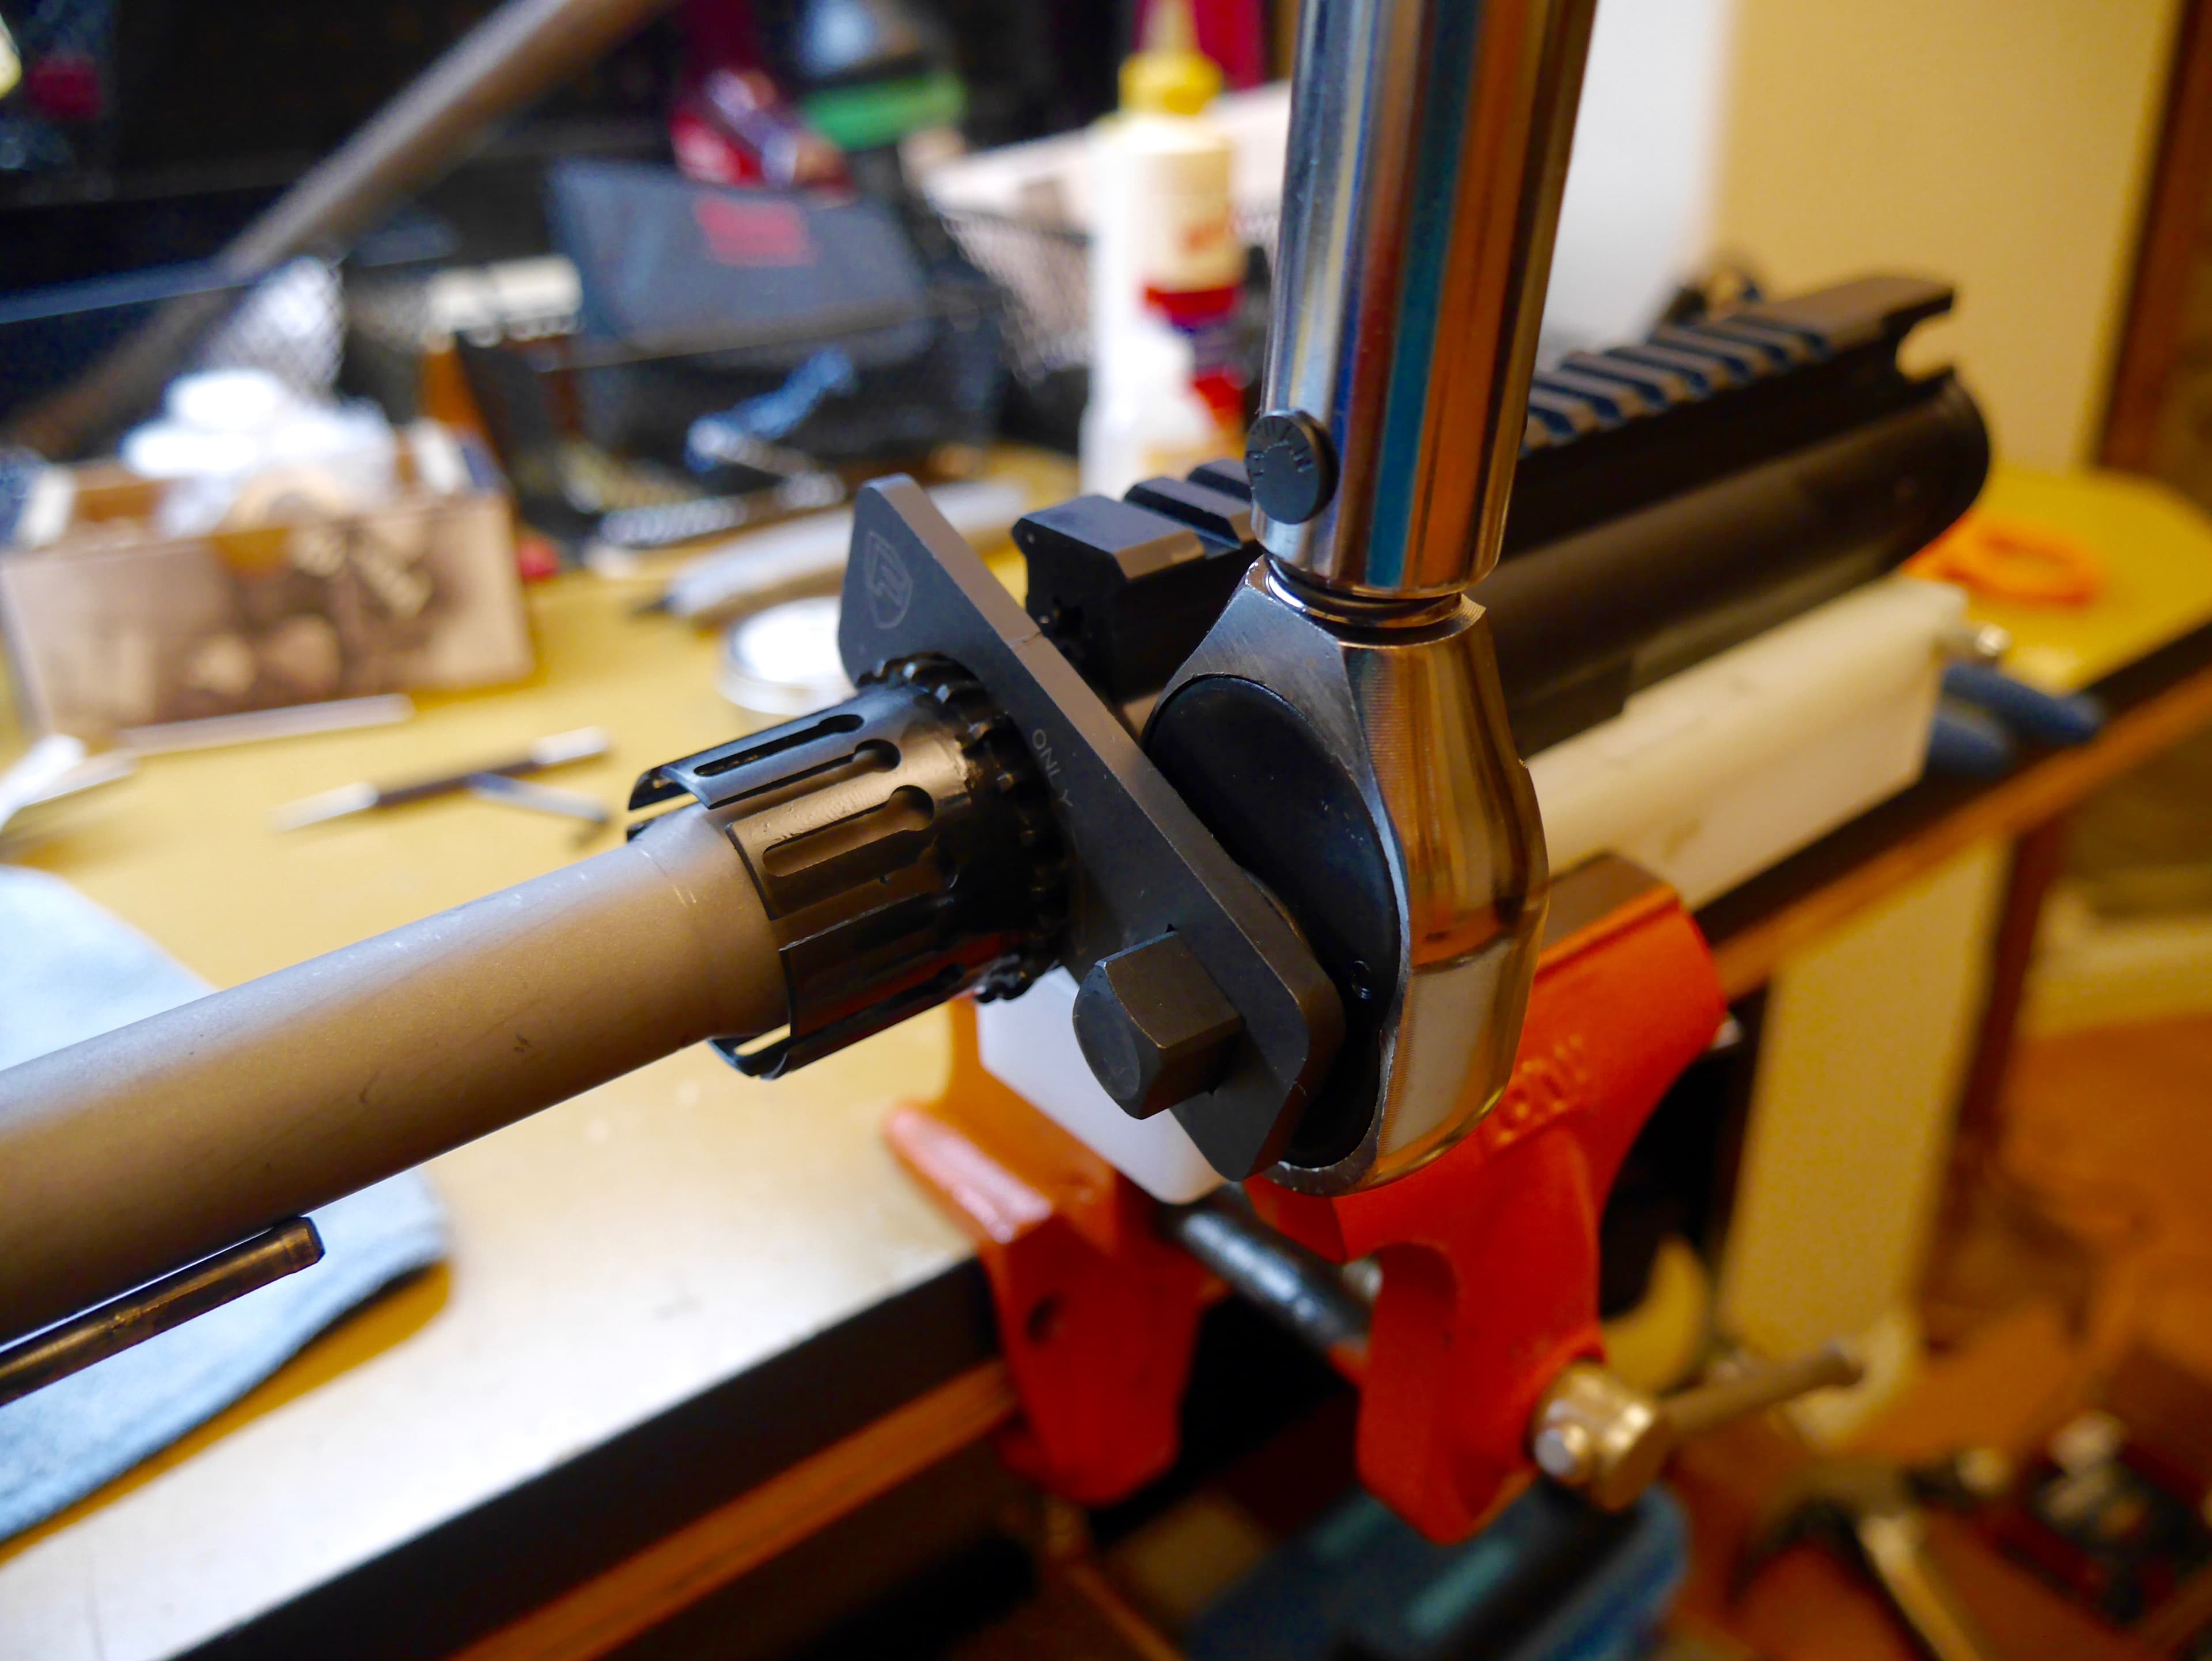
Unless the handguard specifies otherwise, set the torque wrench to 35 ft-lb and tighten the barrel nut. Once it is tight, loosen it and tighten it once or twice more. This ensure they two surfaces seat together better.
If you're using an armorer's tool instead of an adjustable torque wrench, don't worry. Most barrel nuts can be torqued between 30 and 80 ft-lbs, which gives you a wide margin of error. Just make sure it is nice and tight.
Note: Some barrel nuts have the dreaded gas tube alignment notches. When tightening this style of barrel nut, test-fit your gas tube to ensure it seats and is completely straight between the alignment notches.
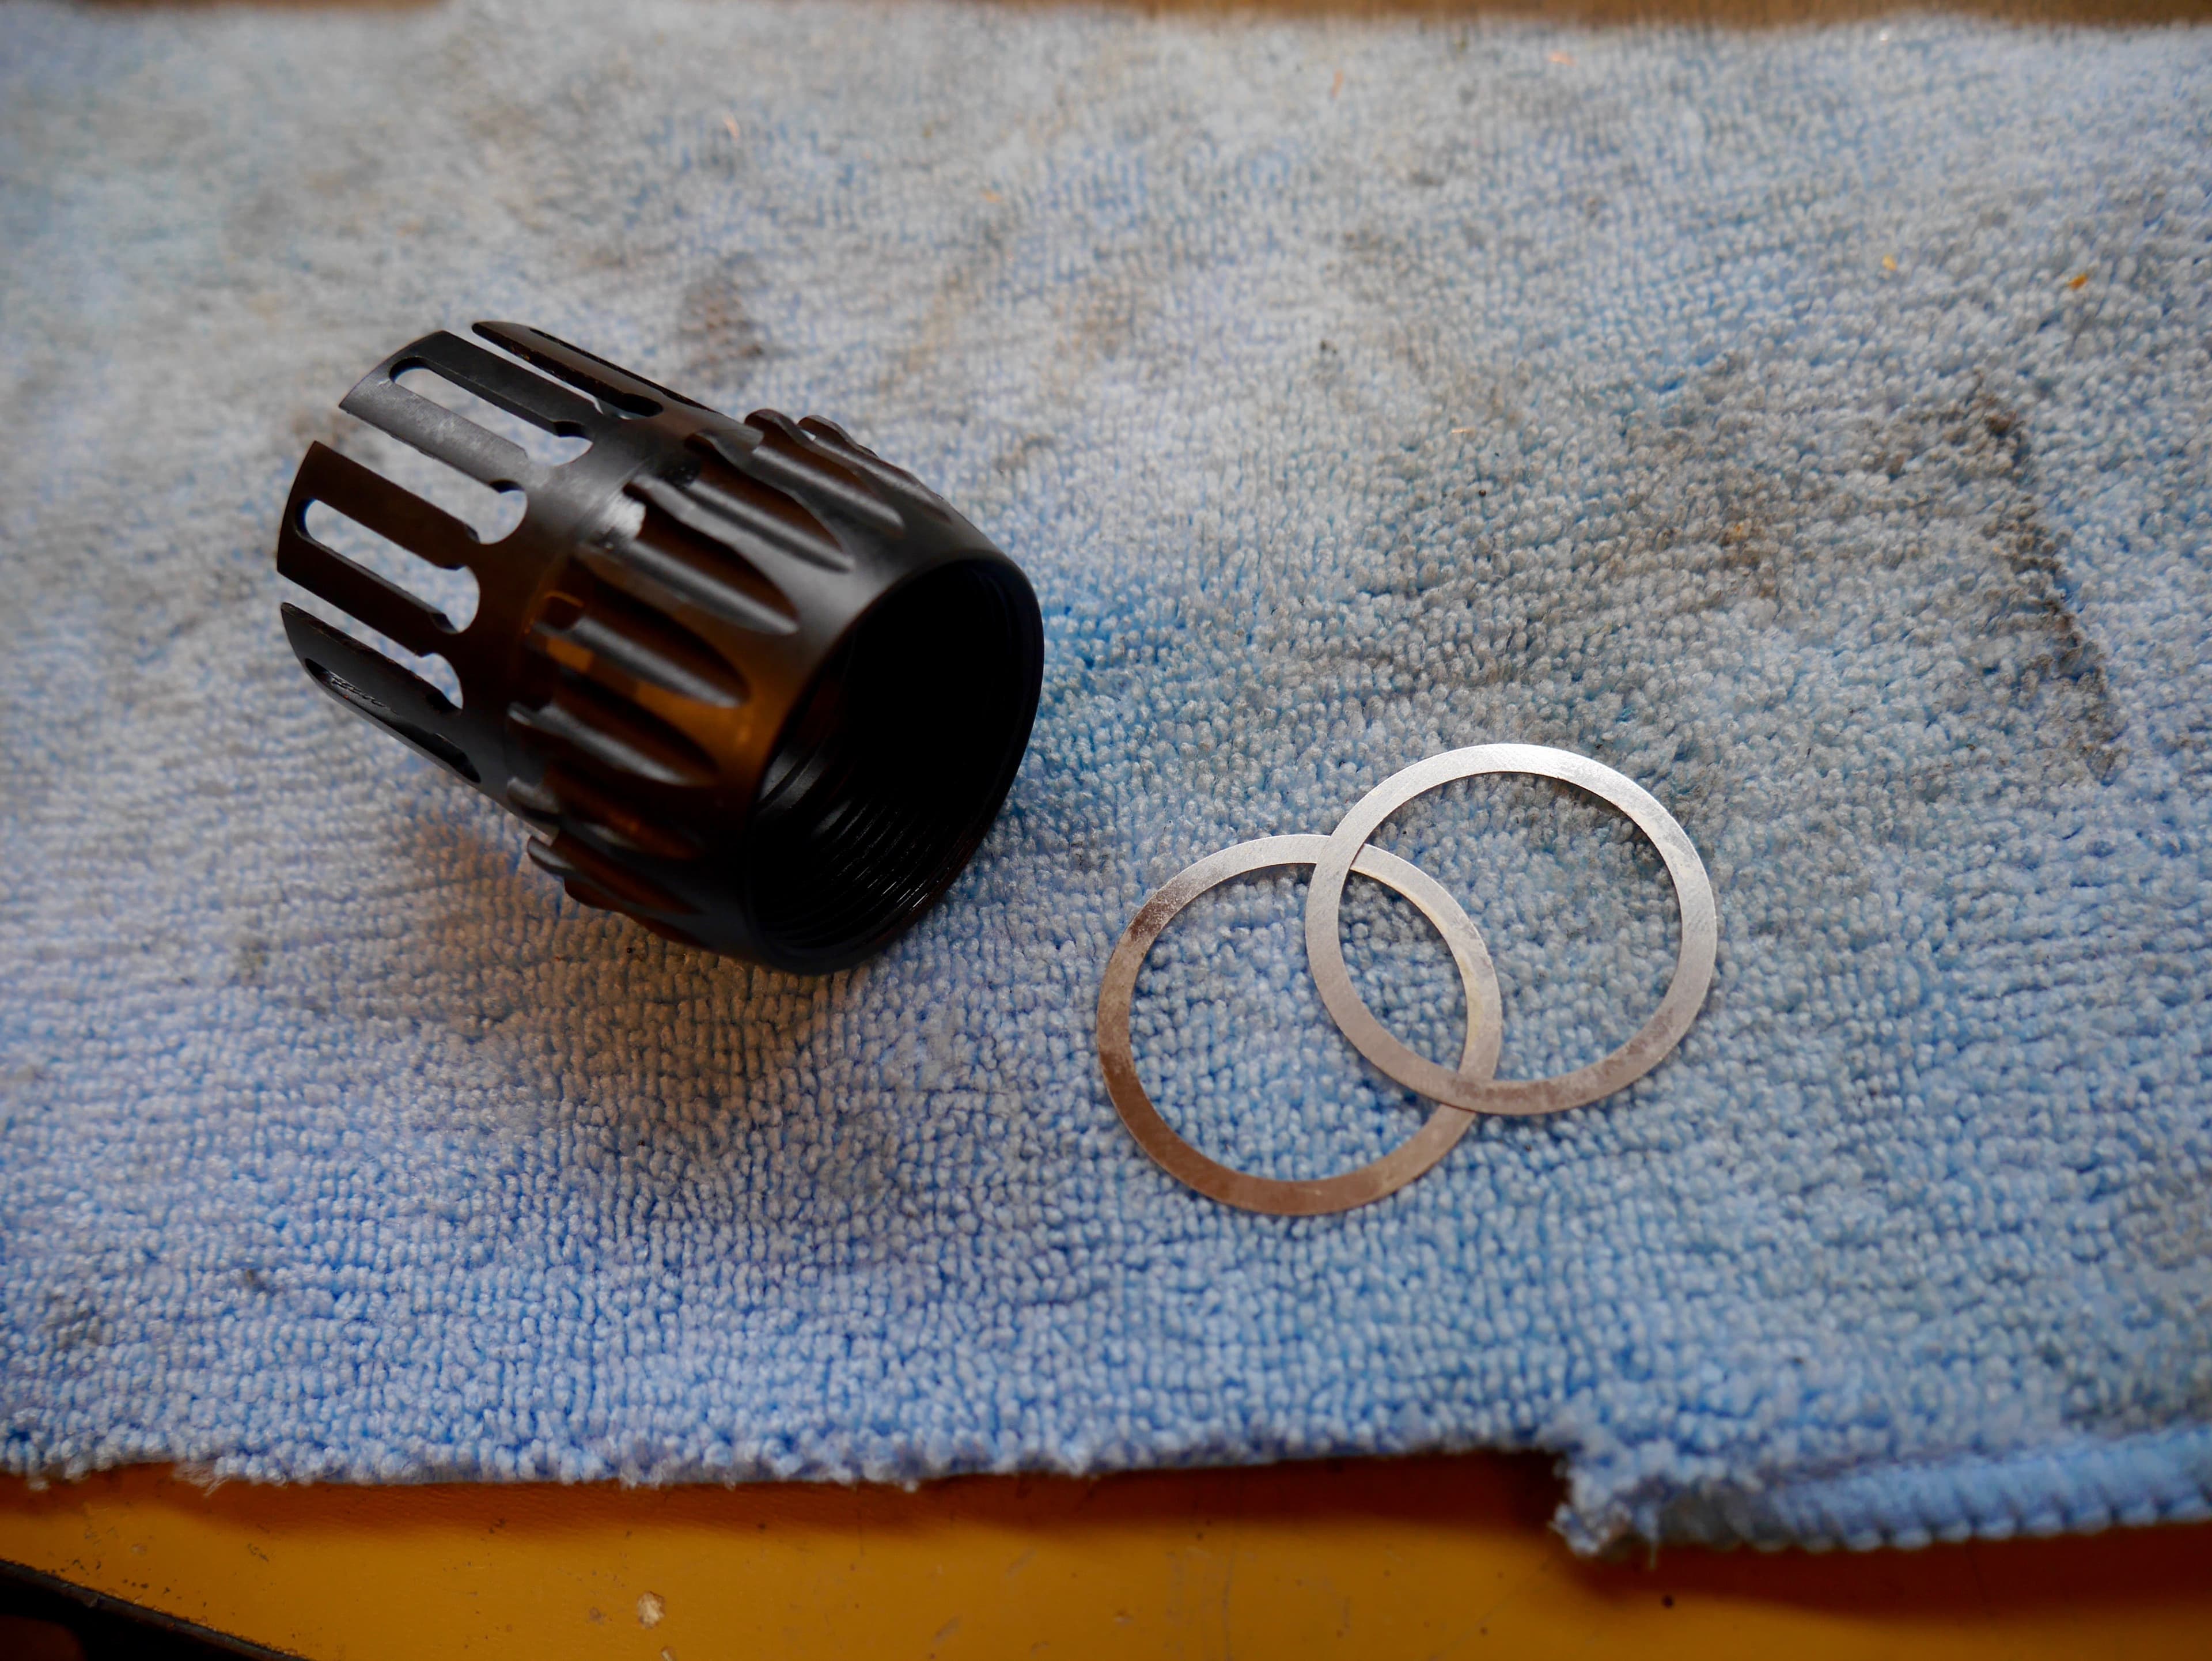
If you have to go over 80 ft-lb or under 30 ft-lb to make it work, you will need to use barrel nut spacers. Simply slide those over the barrel in between the barrel nut and receiver, and the thickness difference will make it work.
Step 4: Install the Gas Block and Gas Tube
Get your gas block and gas tube out. The side of the gas tube with the larger hole needs to face down when it goes into the gas block.
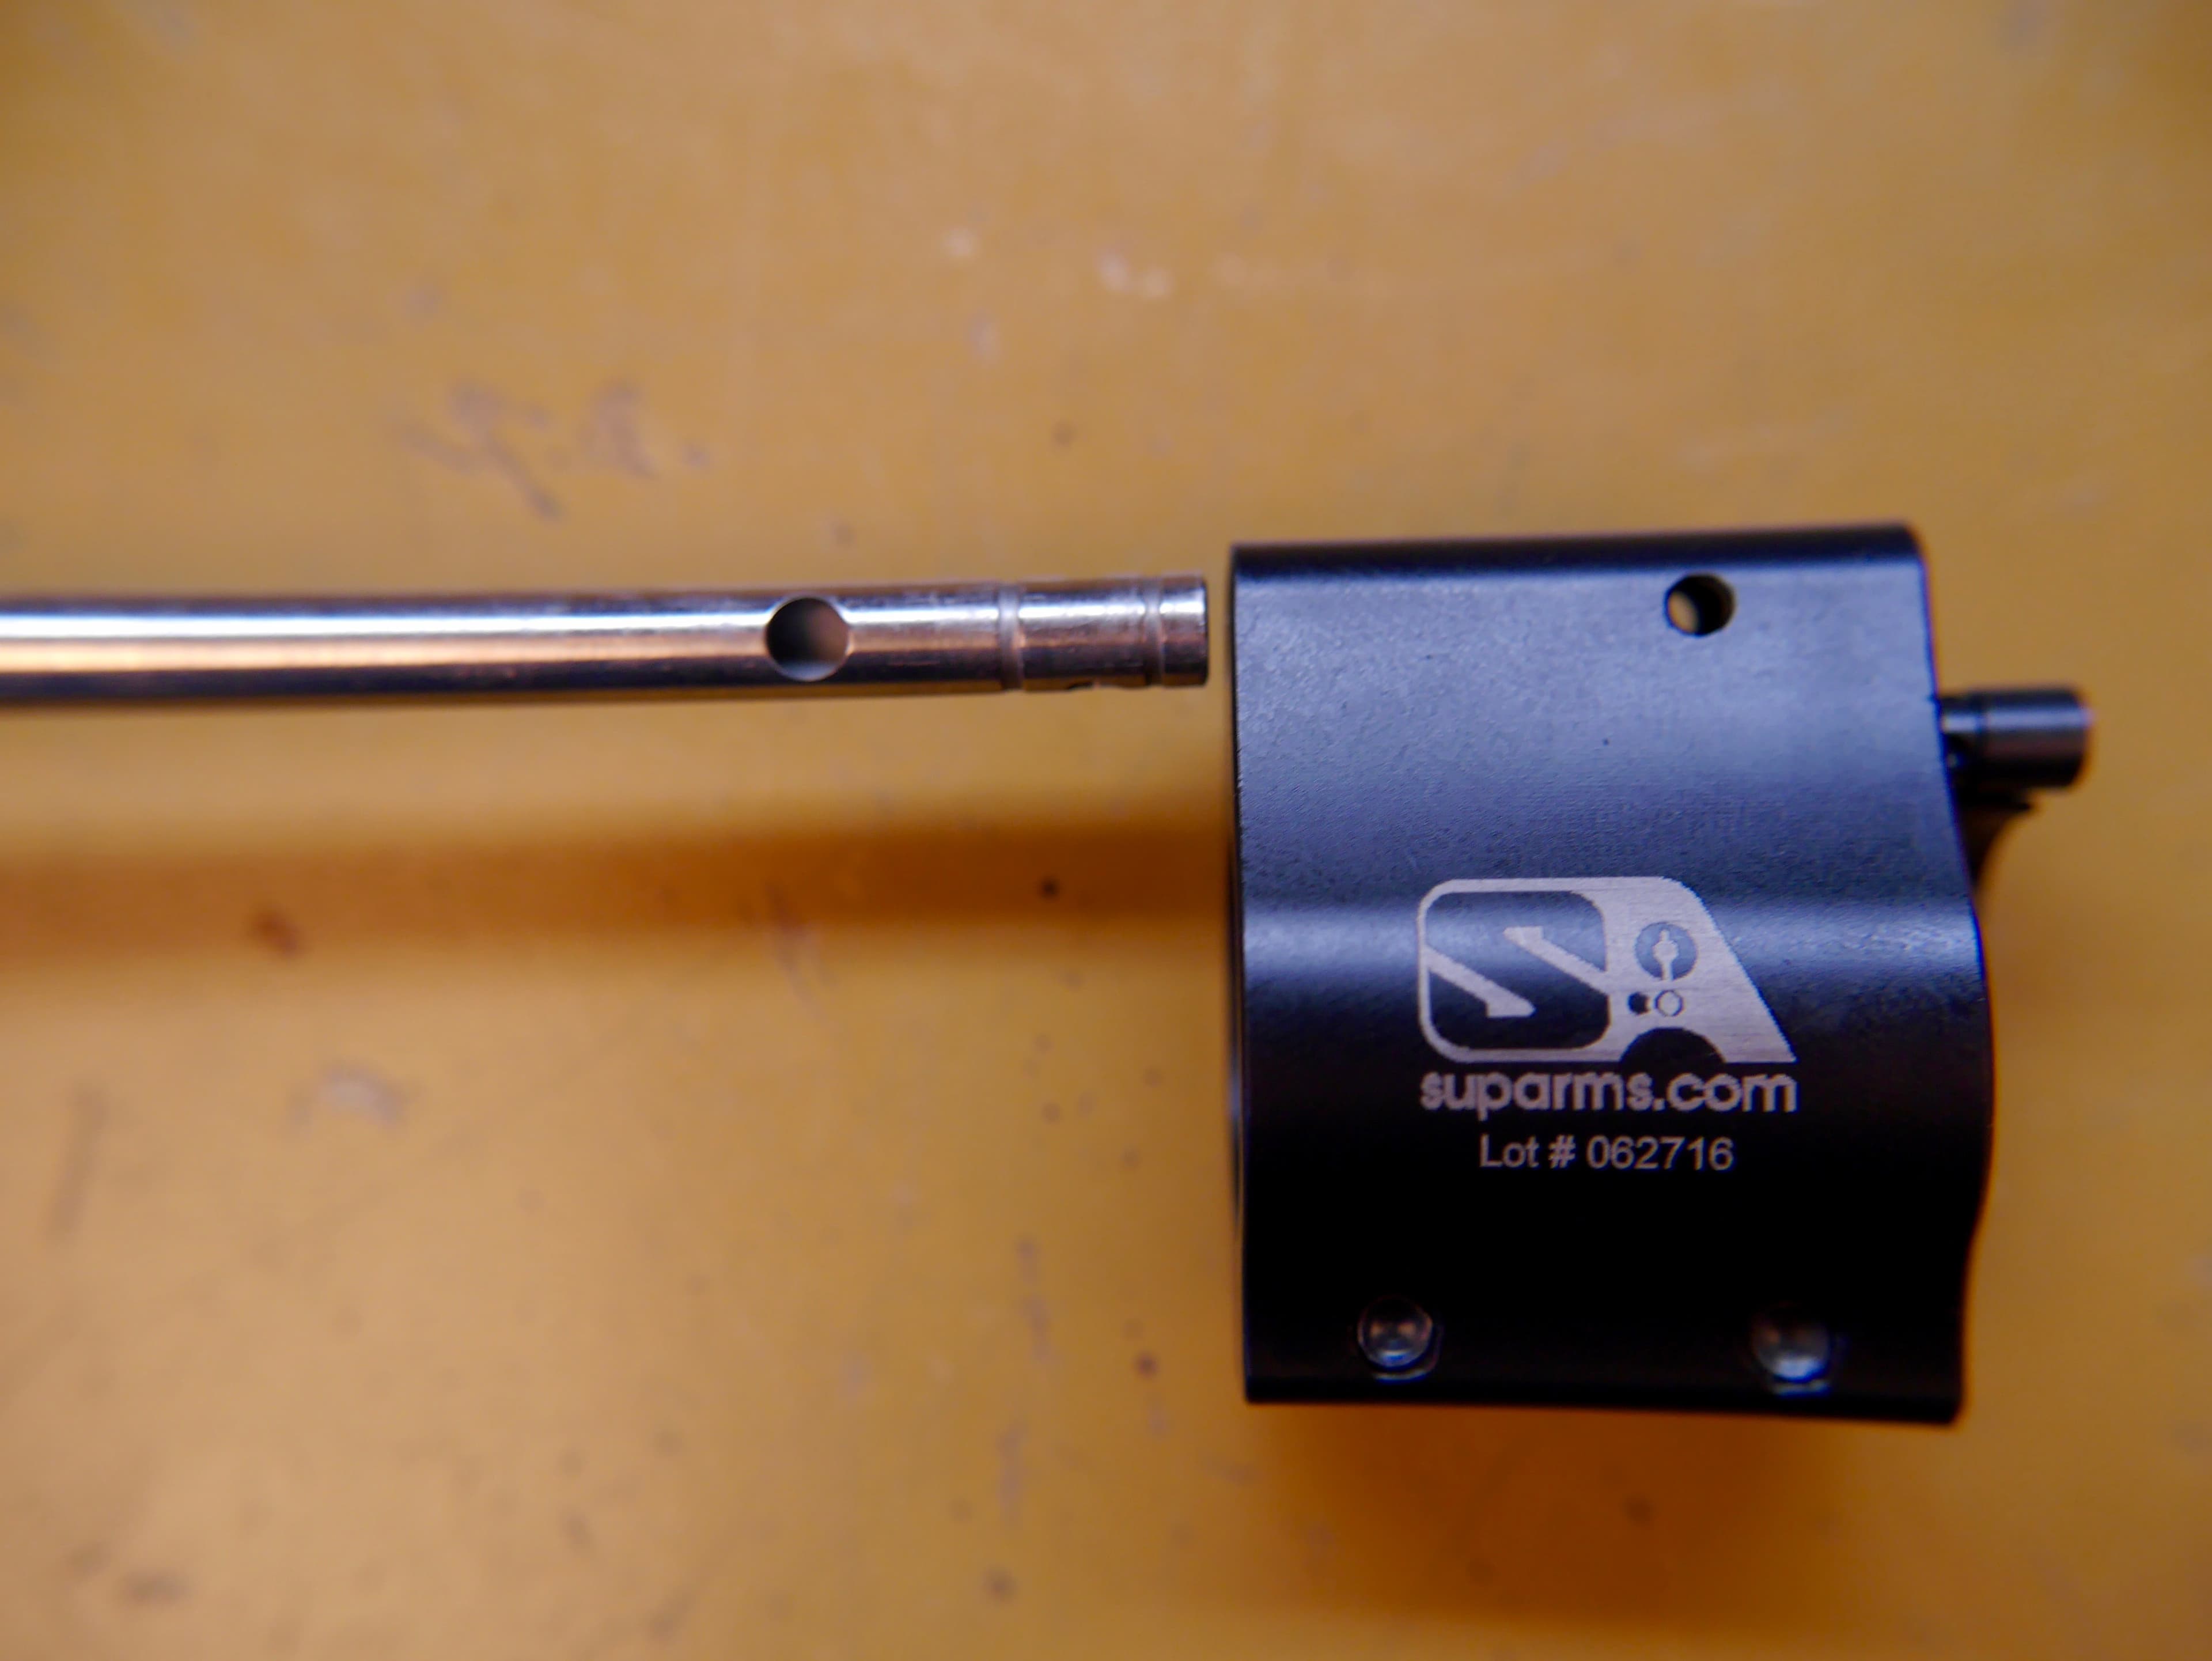
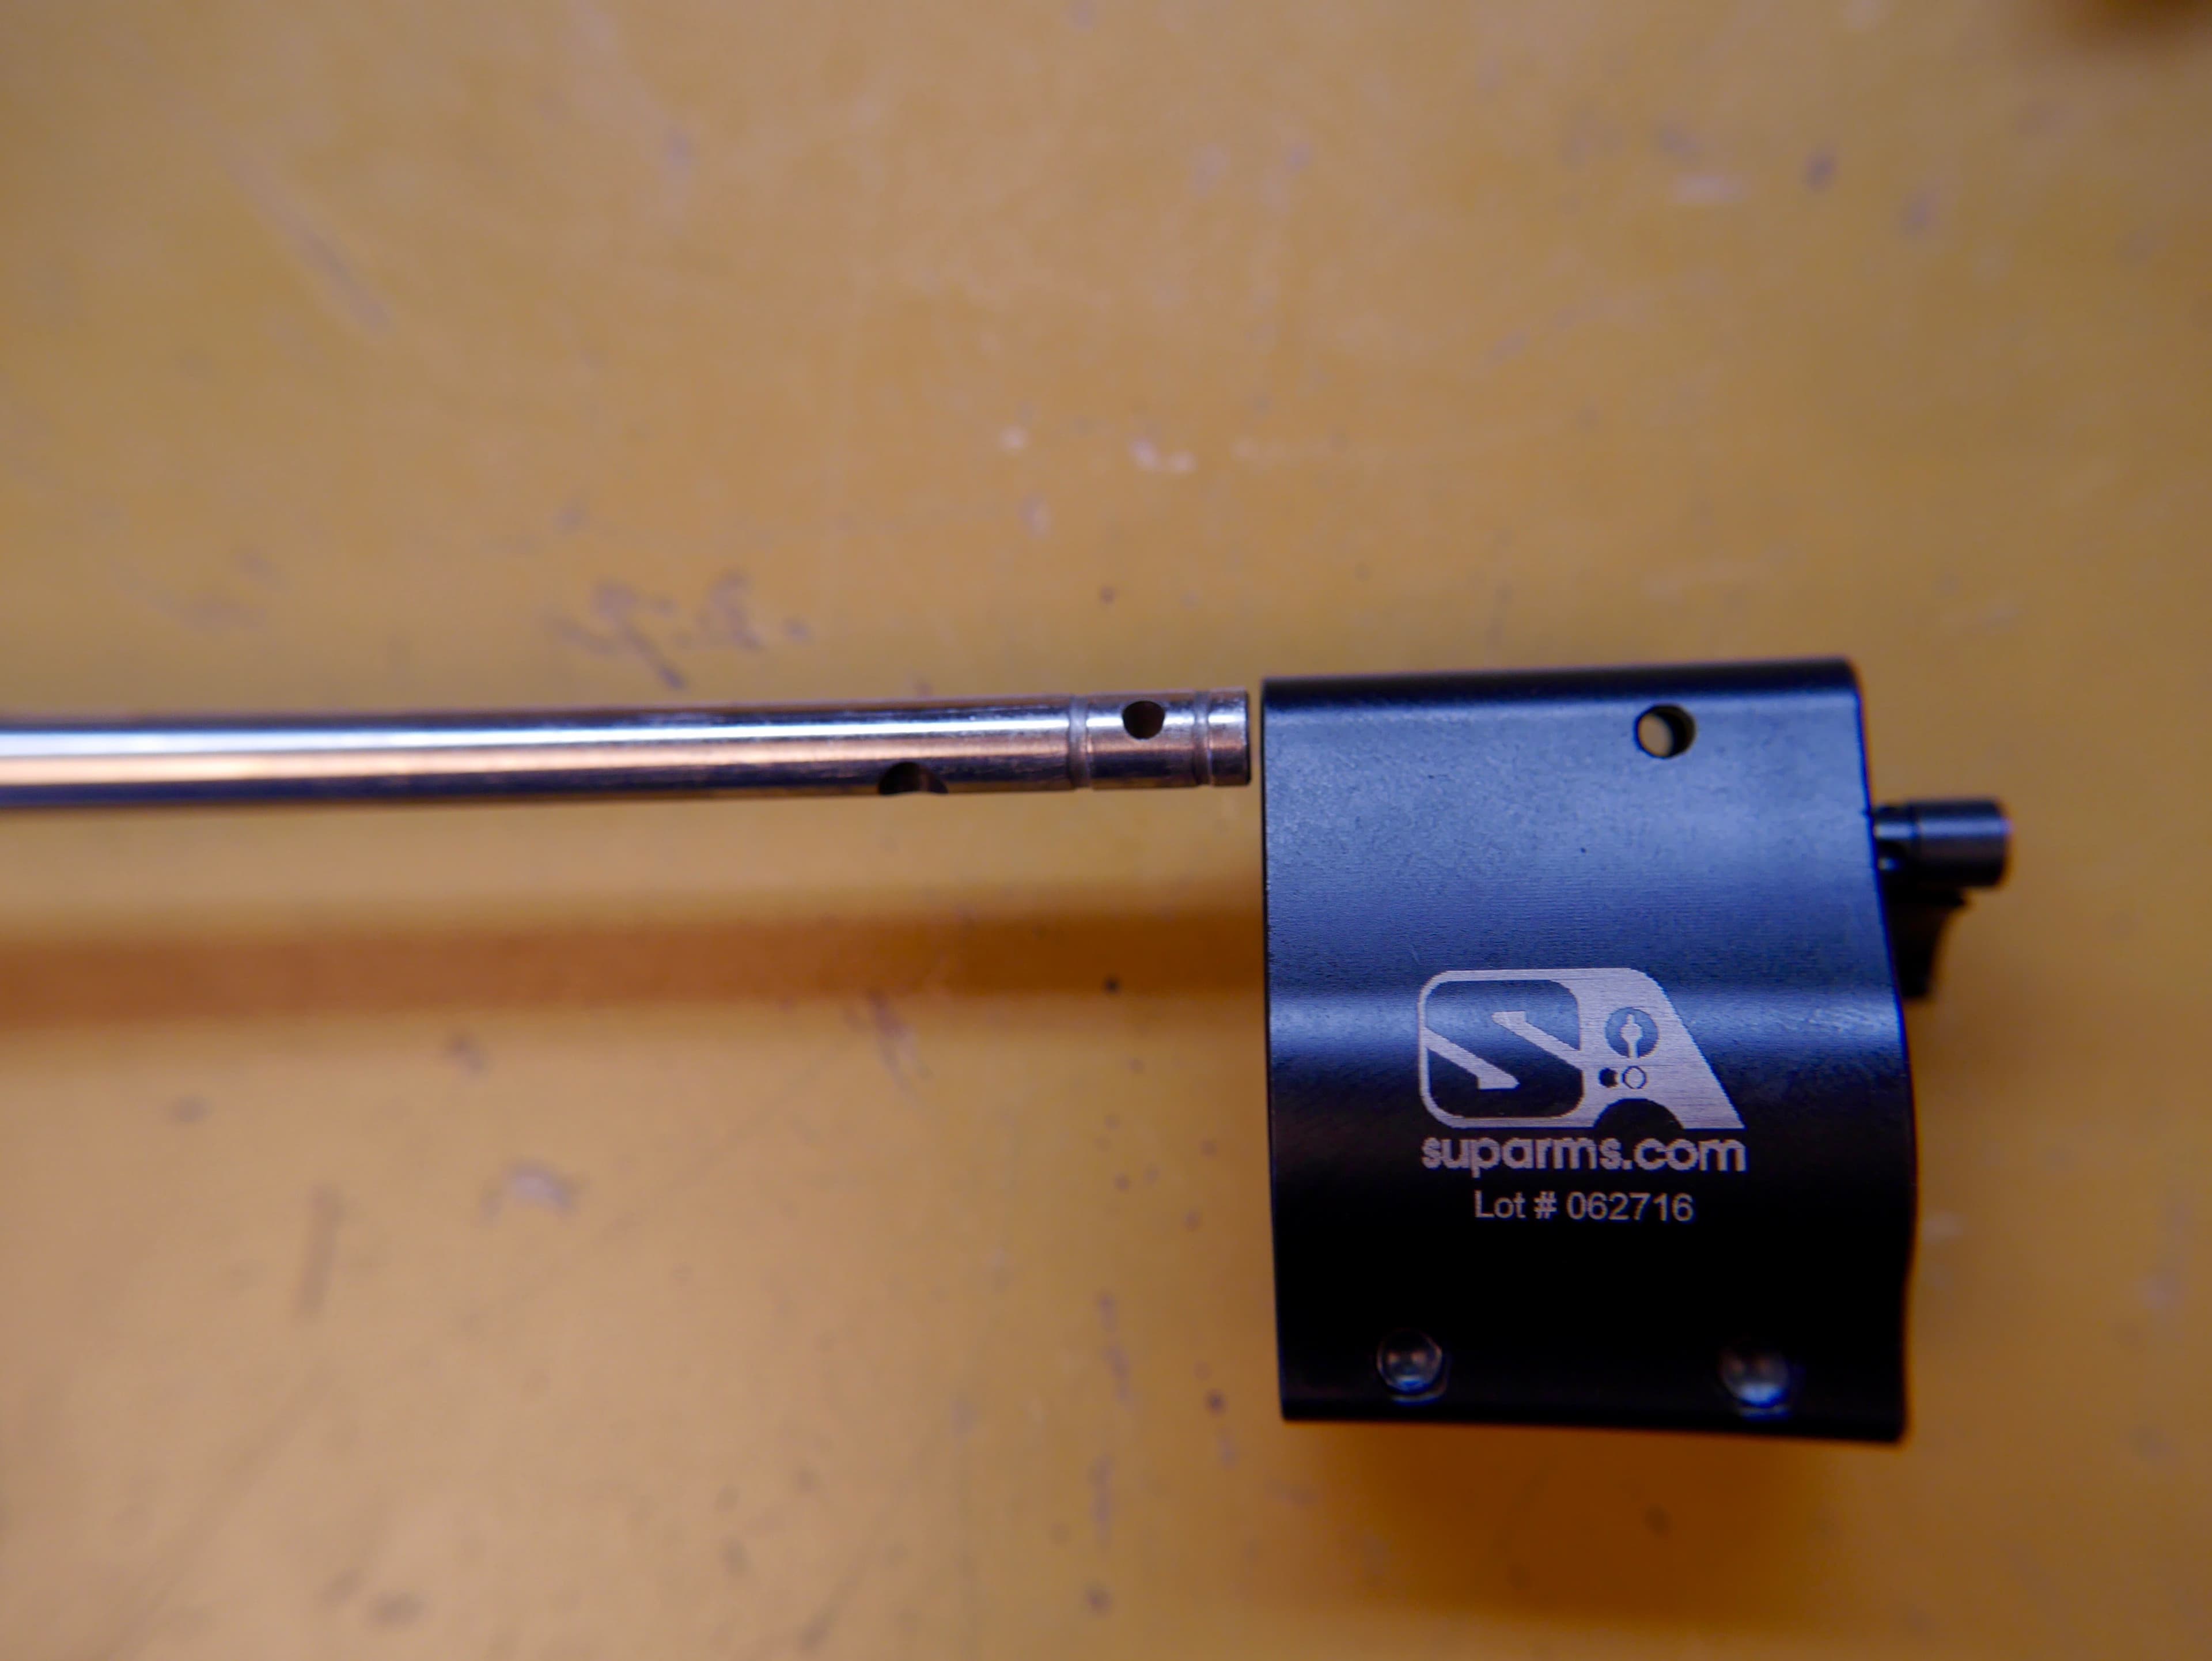
You can see the bigger hole is facing down, while the smaller hole will match up with the holes on the side of the gas block.
Next, you will start driving the roll pin into the side of the gas block, but not all the way. I like to scrunch up one end with pliers so it has a smaller point, and then lightly tap it in so it just grabs onto the gas tube.
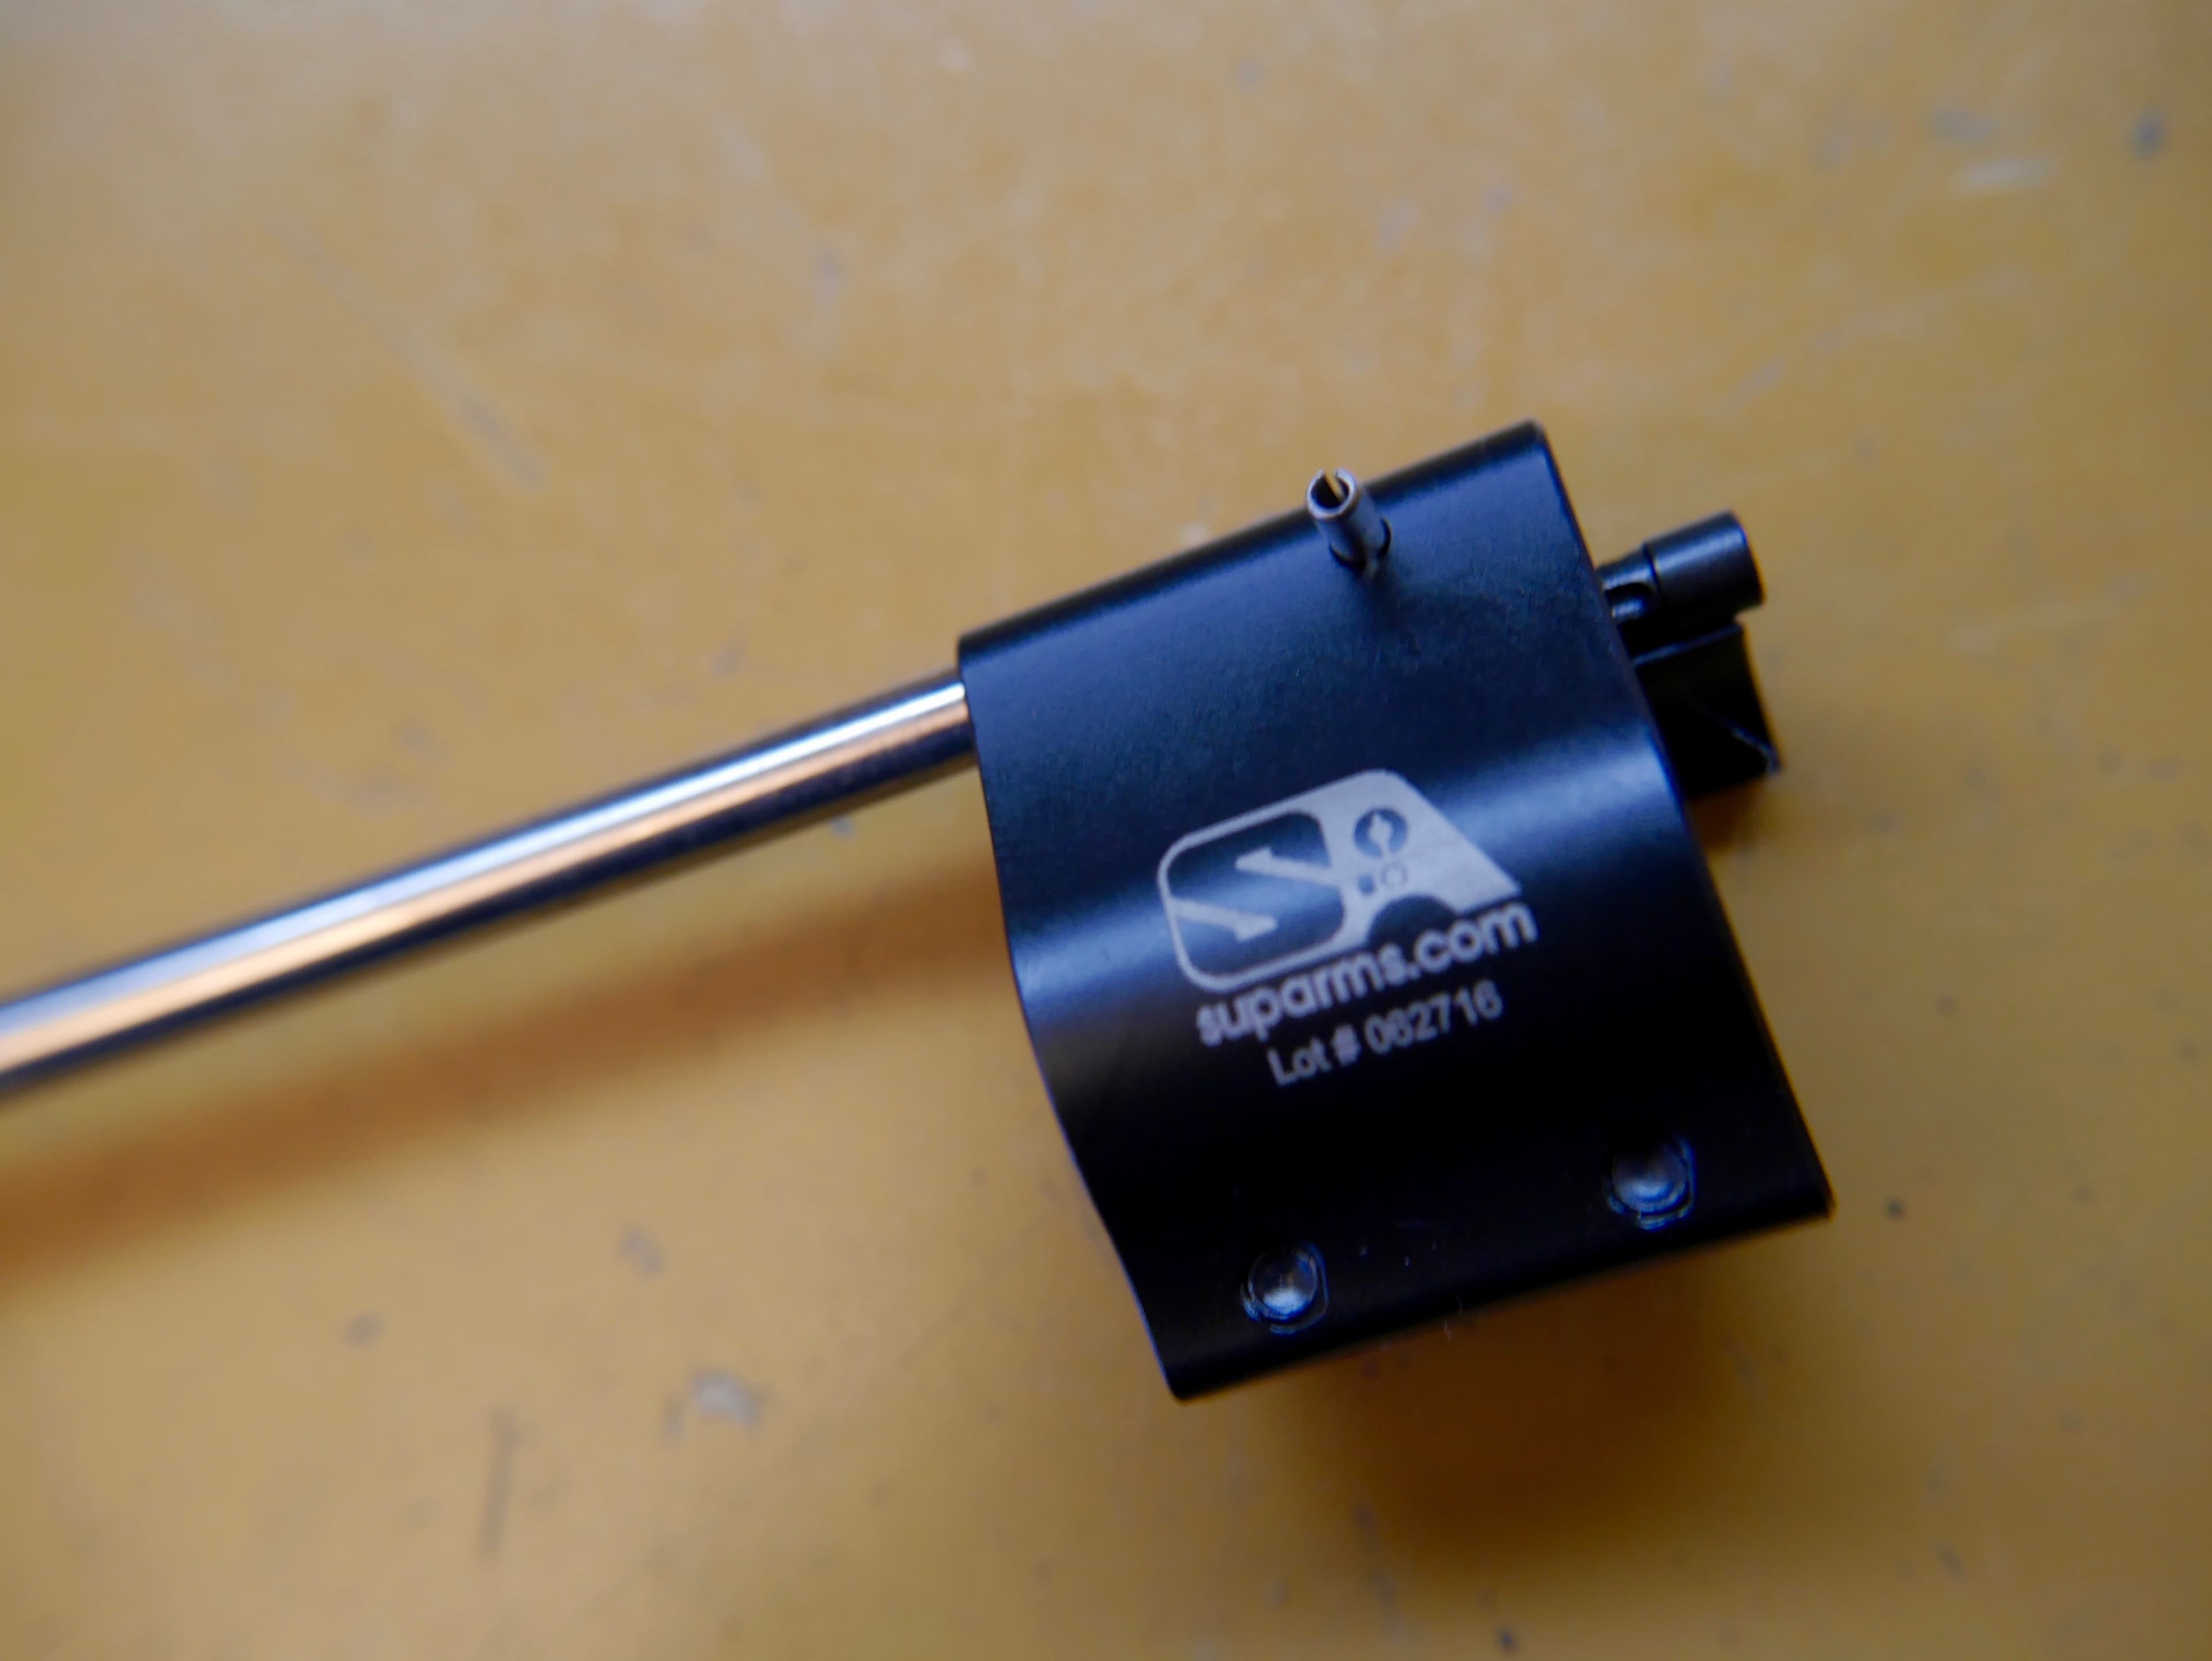
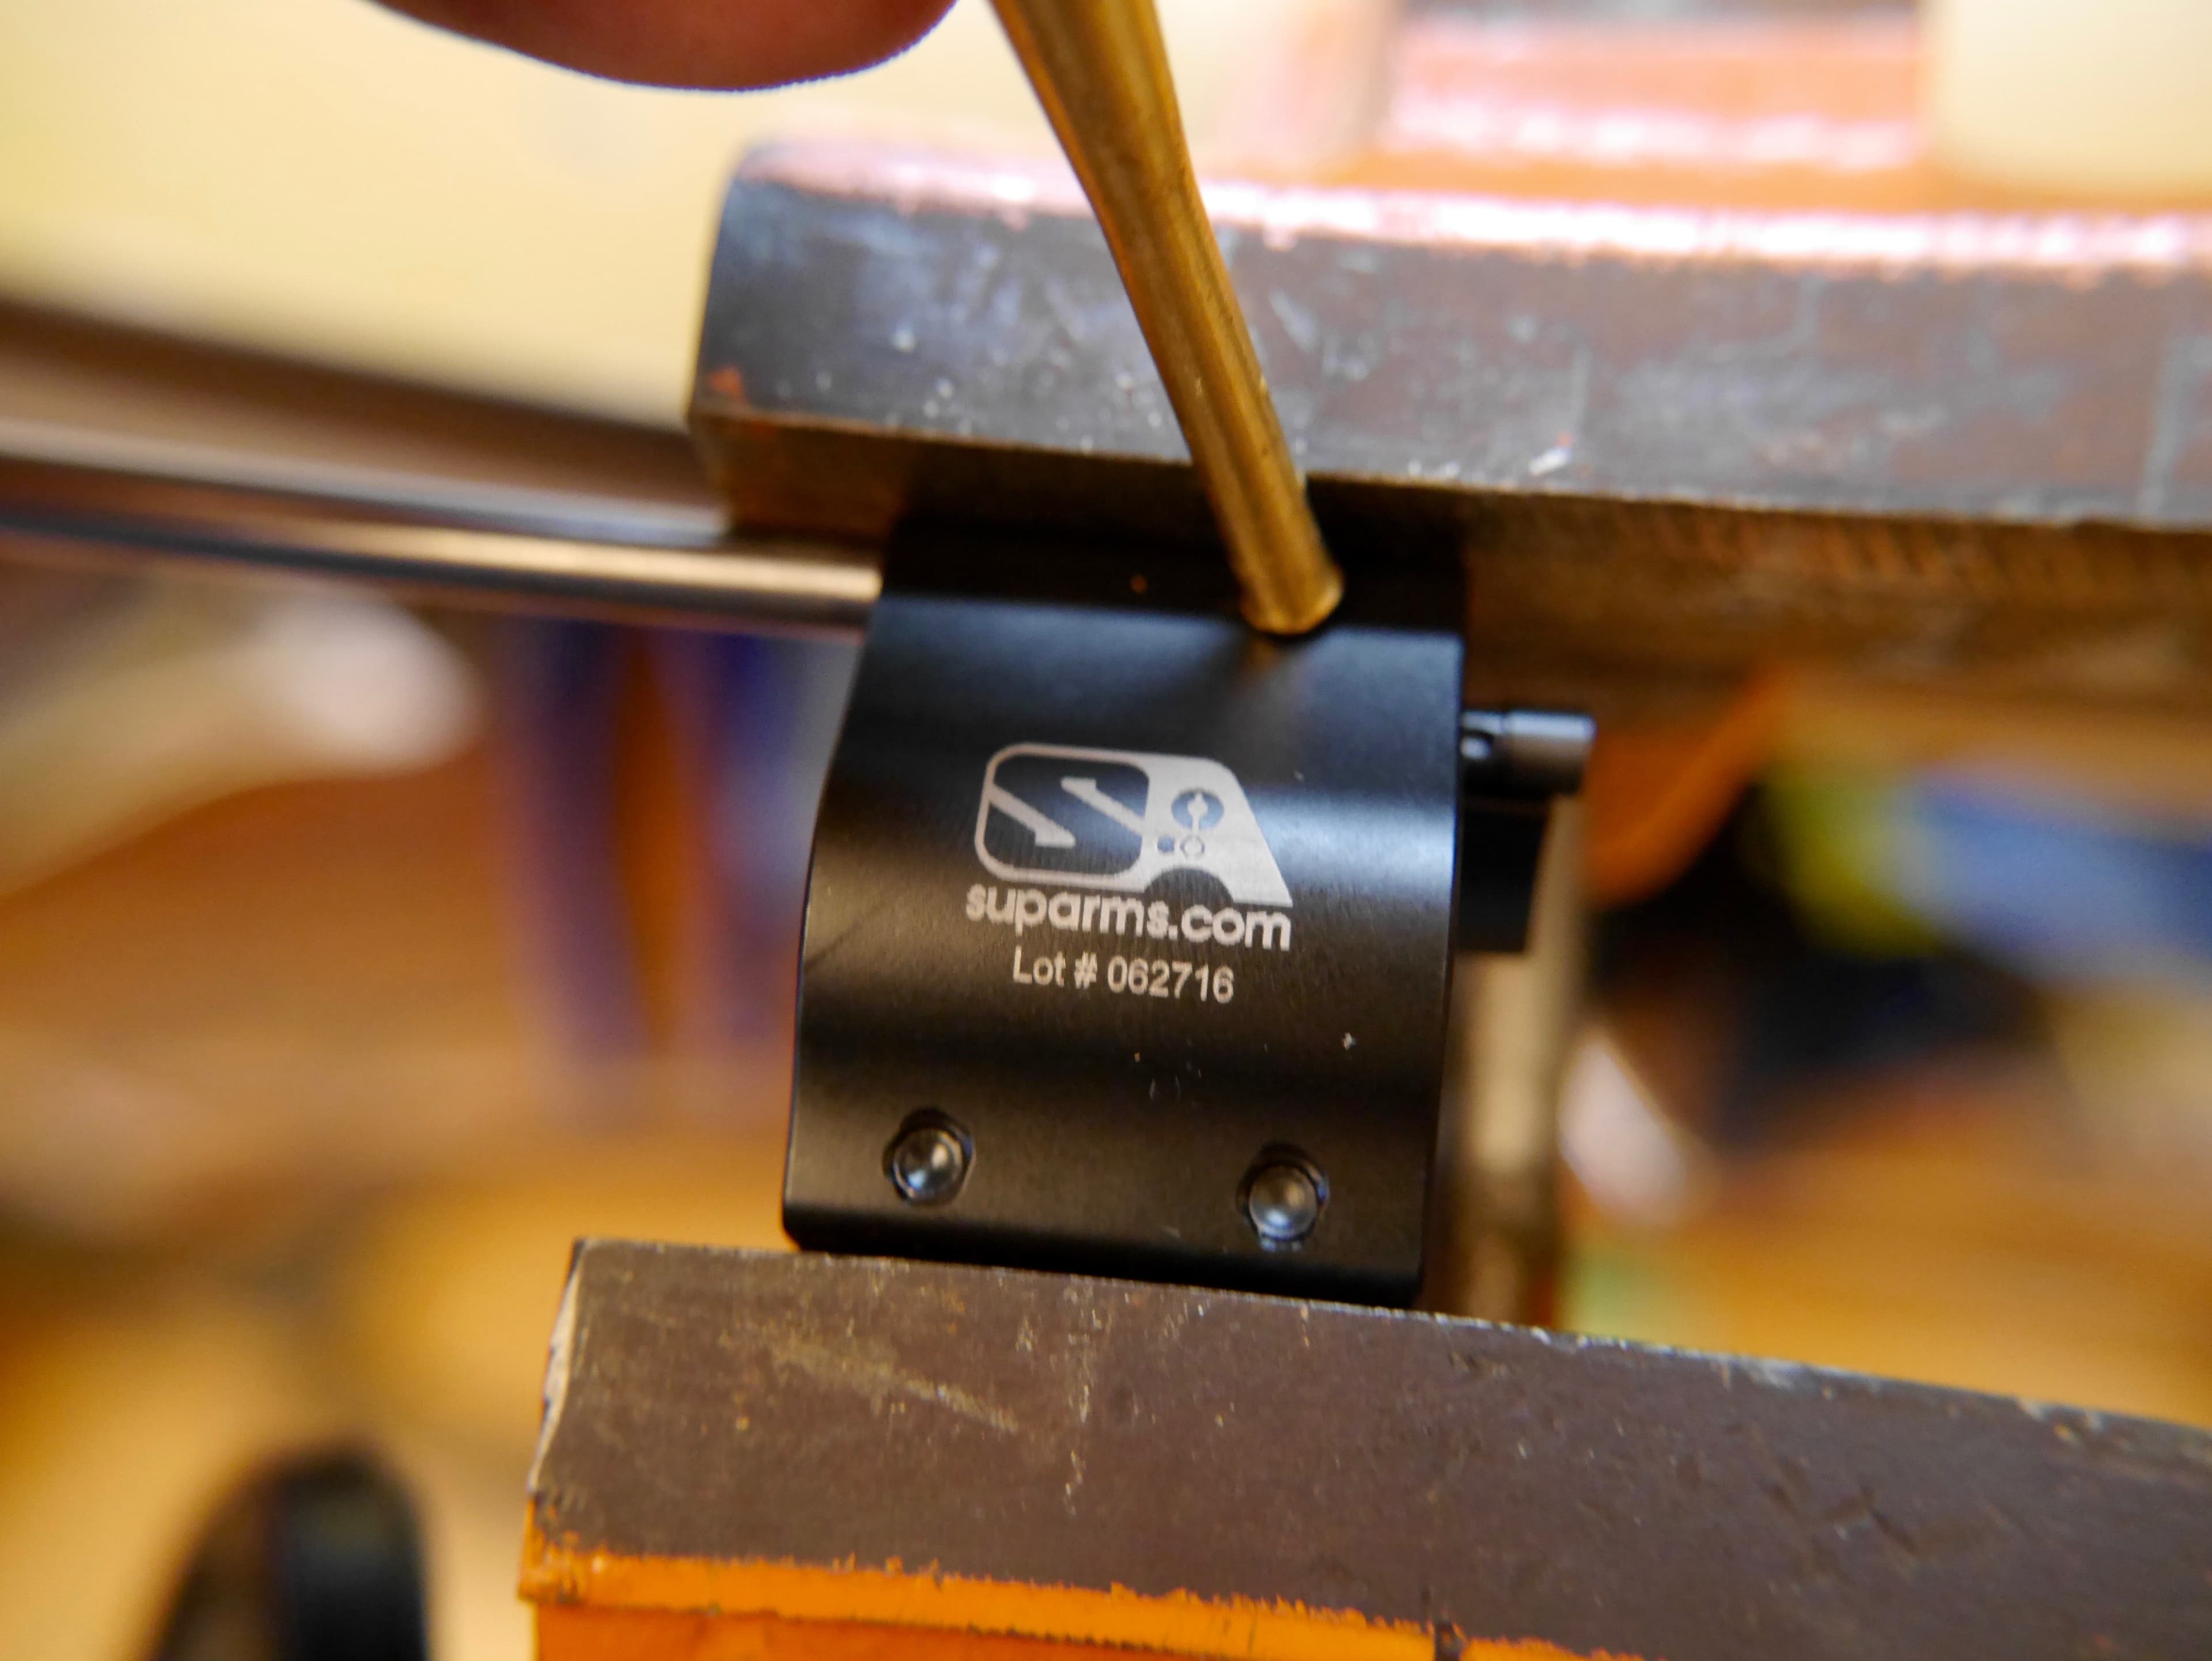
I put the whole thing into the vise (you can put some cloth or plastic on the jaws if you're afraid of marring) and then finish driving the pin through the gas block and gas tube pin using a punch.
Now it is time to slide the gas block and gas tube assembly over the barrel.
You will want to make sure the gas block and gas tube are perfectly aligned across the top of the barrel.
If your barrel has words on the top, you can use those to help align the gas tube.
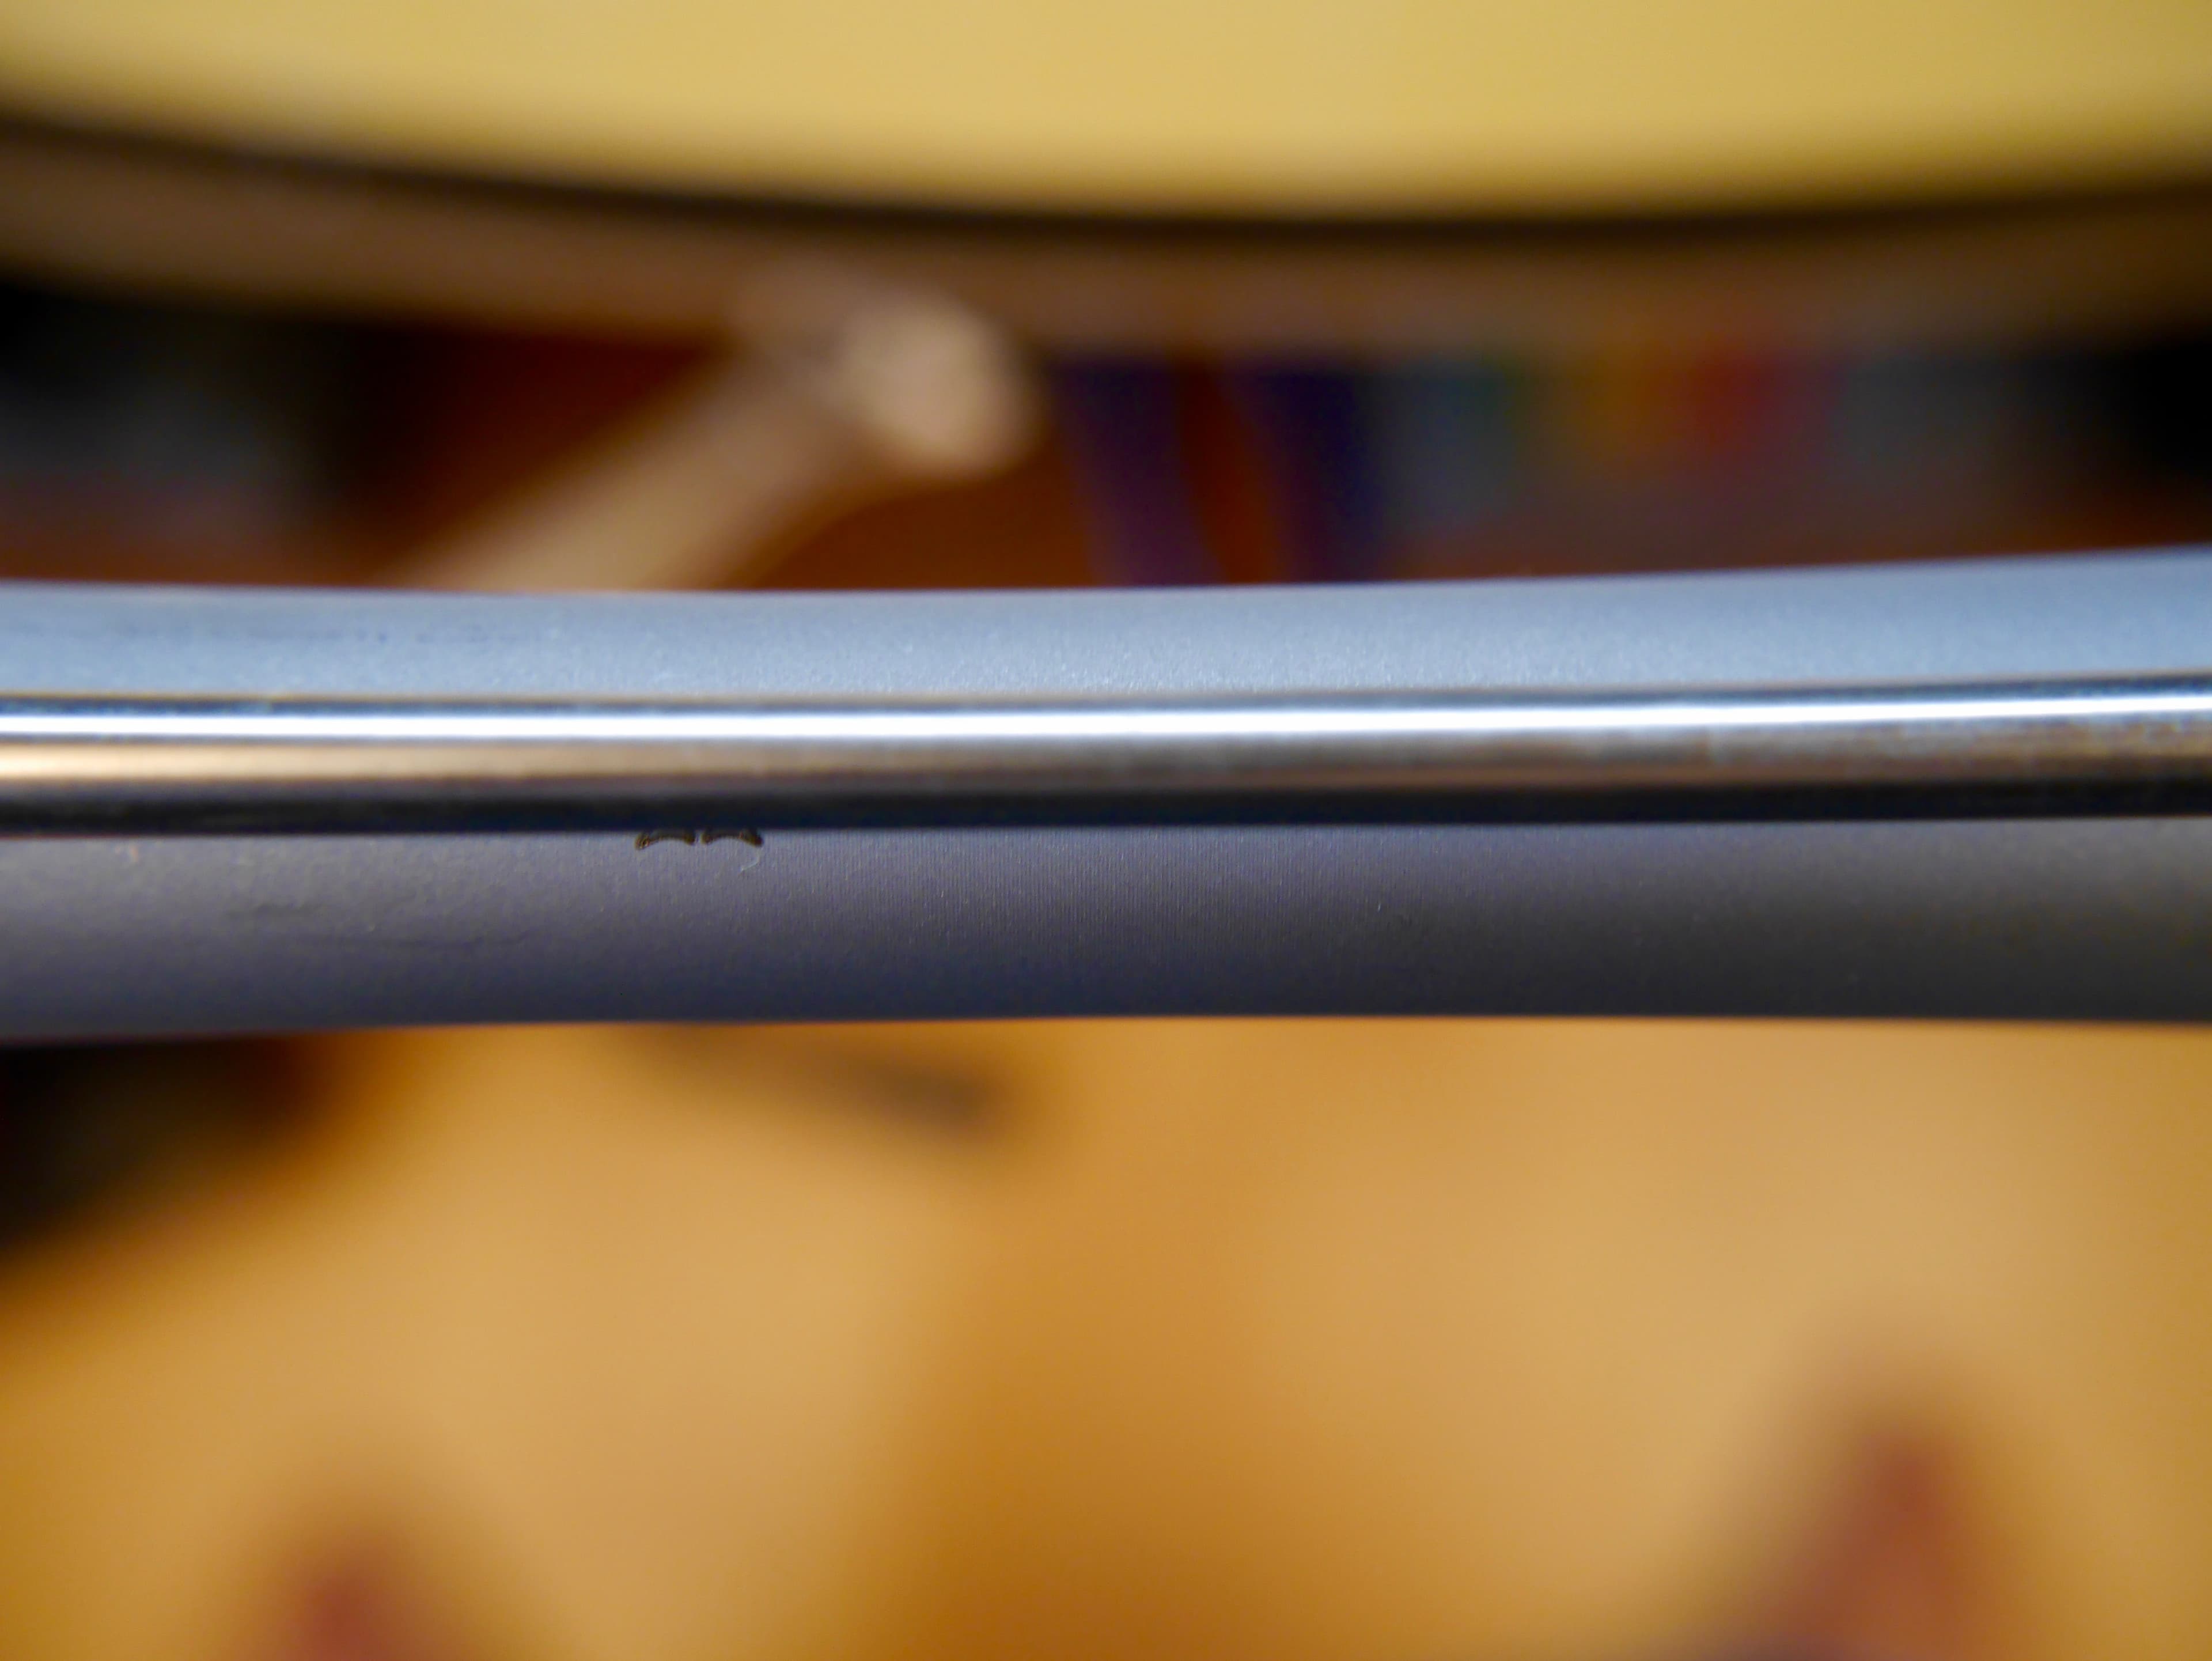
Make sure the gas tube slides neatly into the hole in the receiver above the barrel.
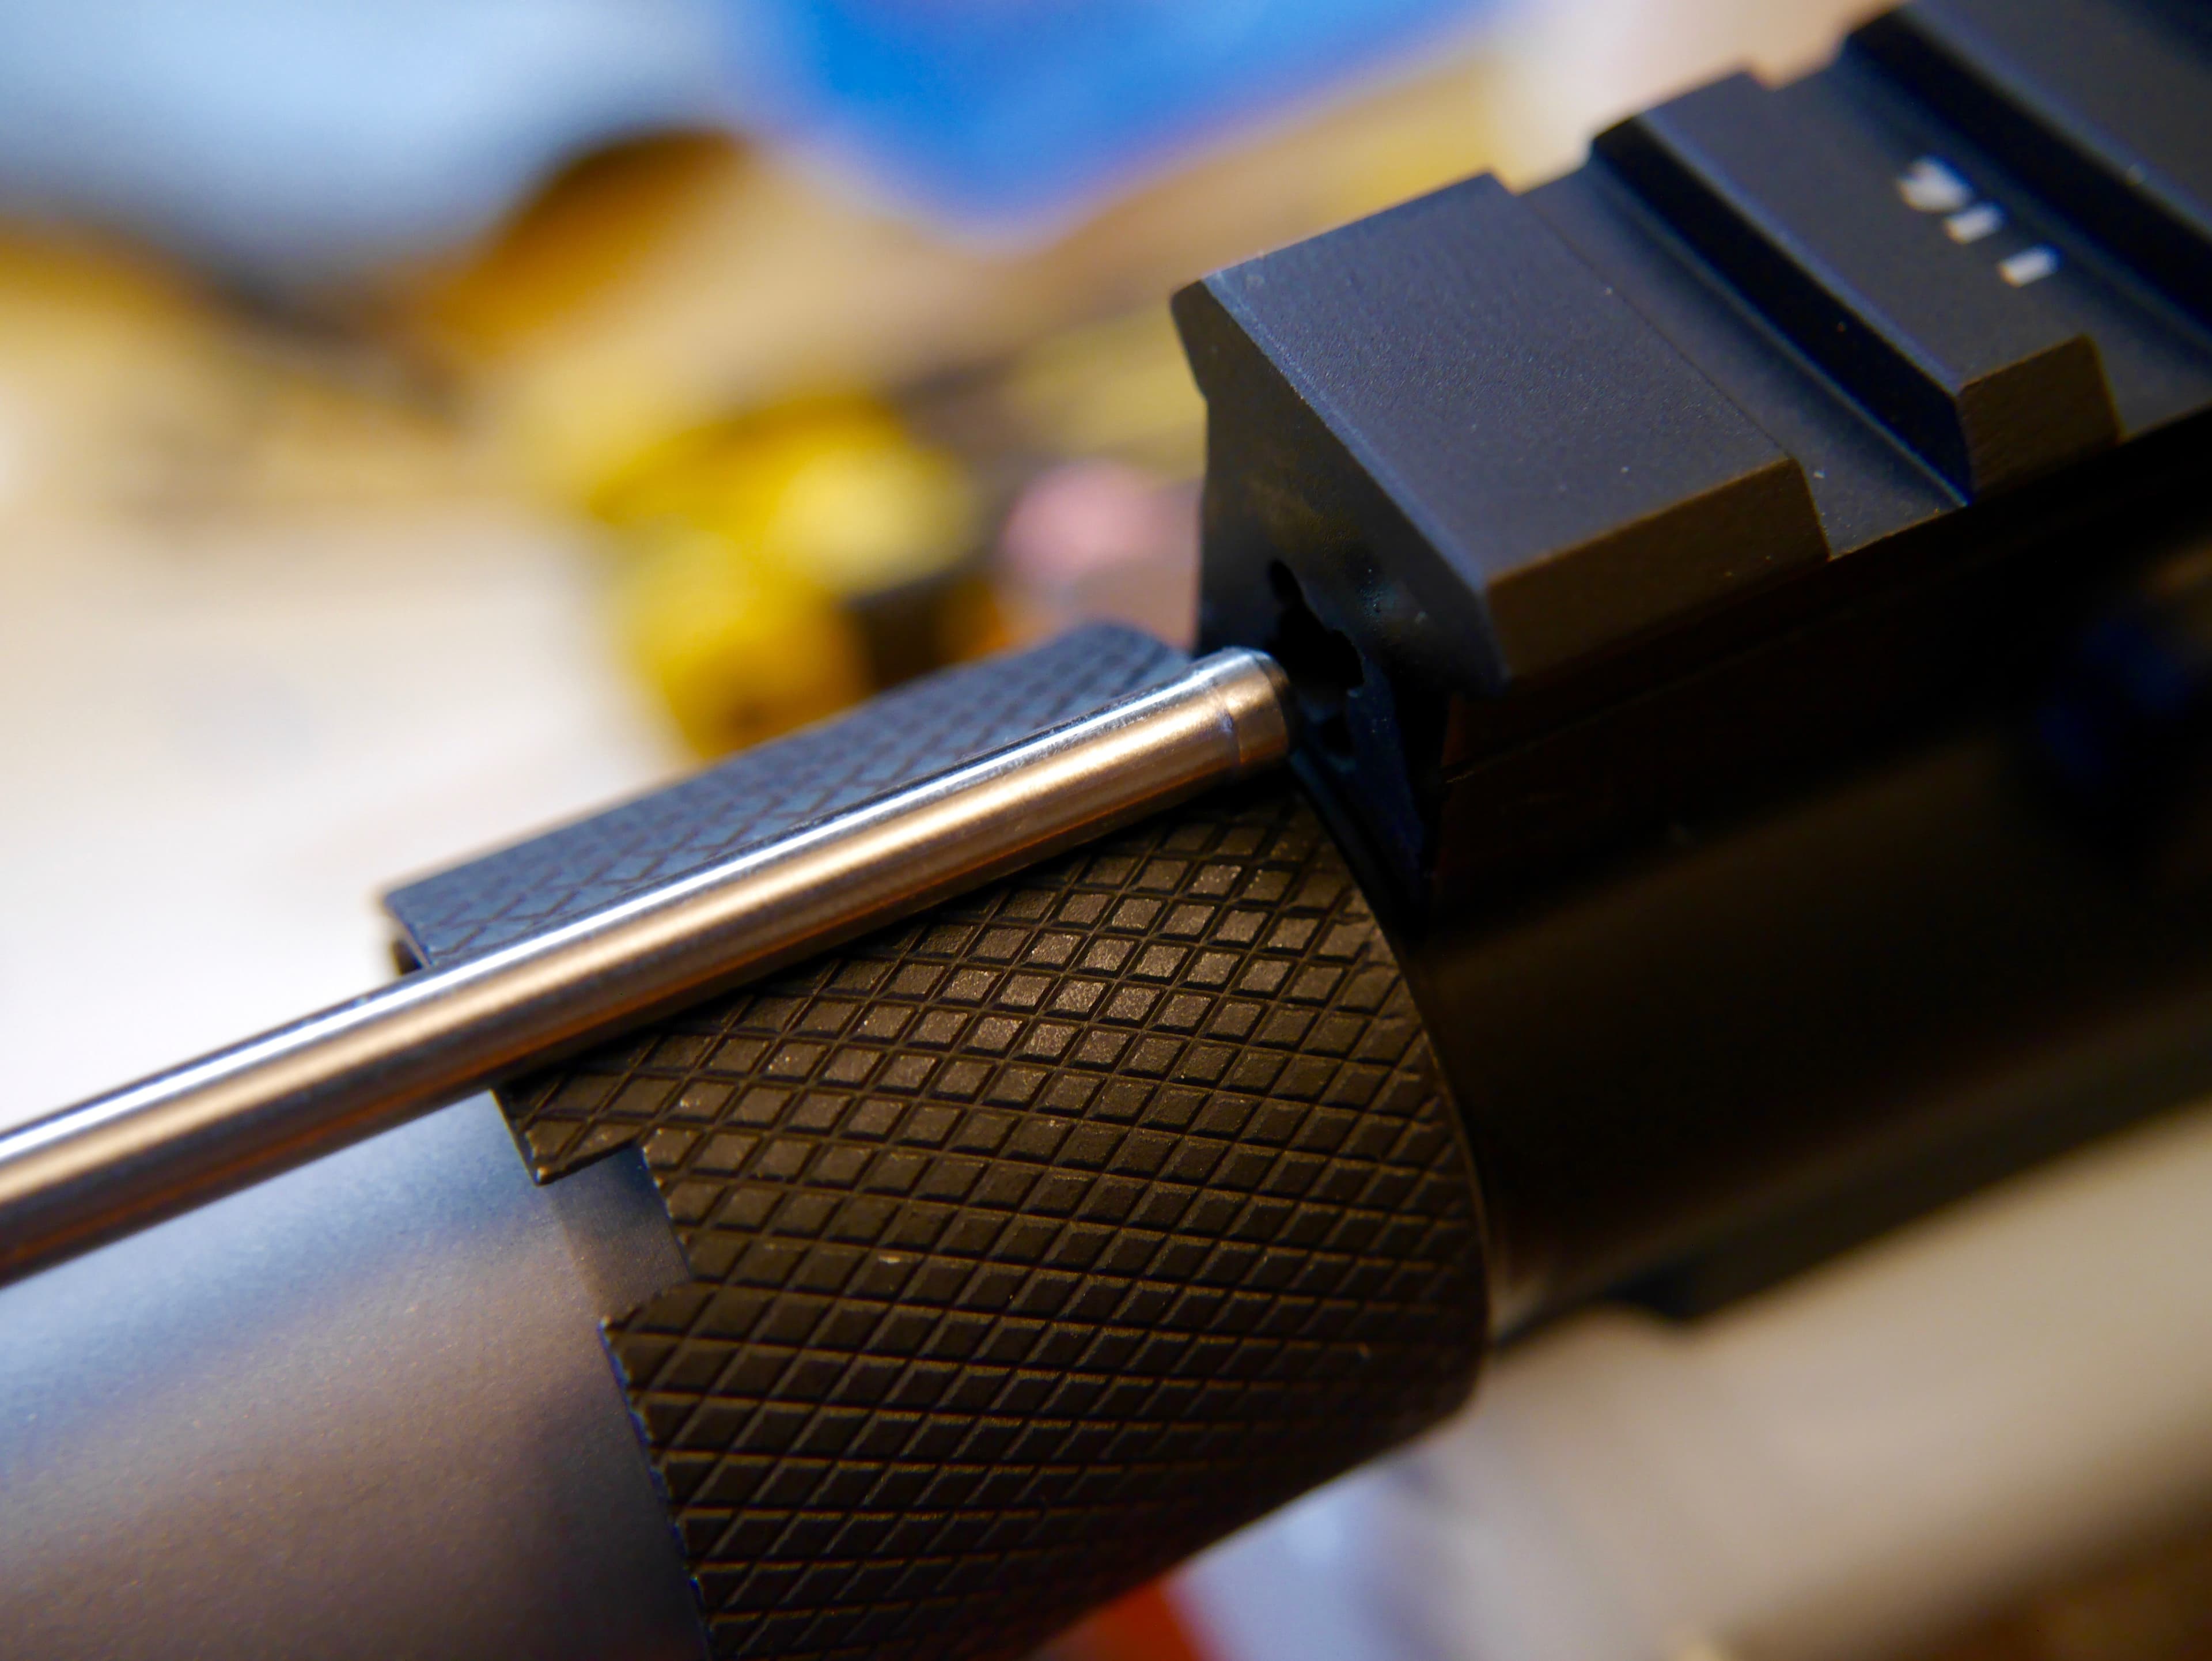
For those of you using barrels without words exactly in the middle, I suggest marking the middle of the barrel using the gas hole as a guide, and also marking the middle of the gas block.
Check out the YouTube video below to see how to easily mark your barrel and gas block for easy alignment.
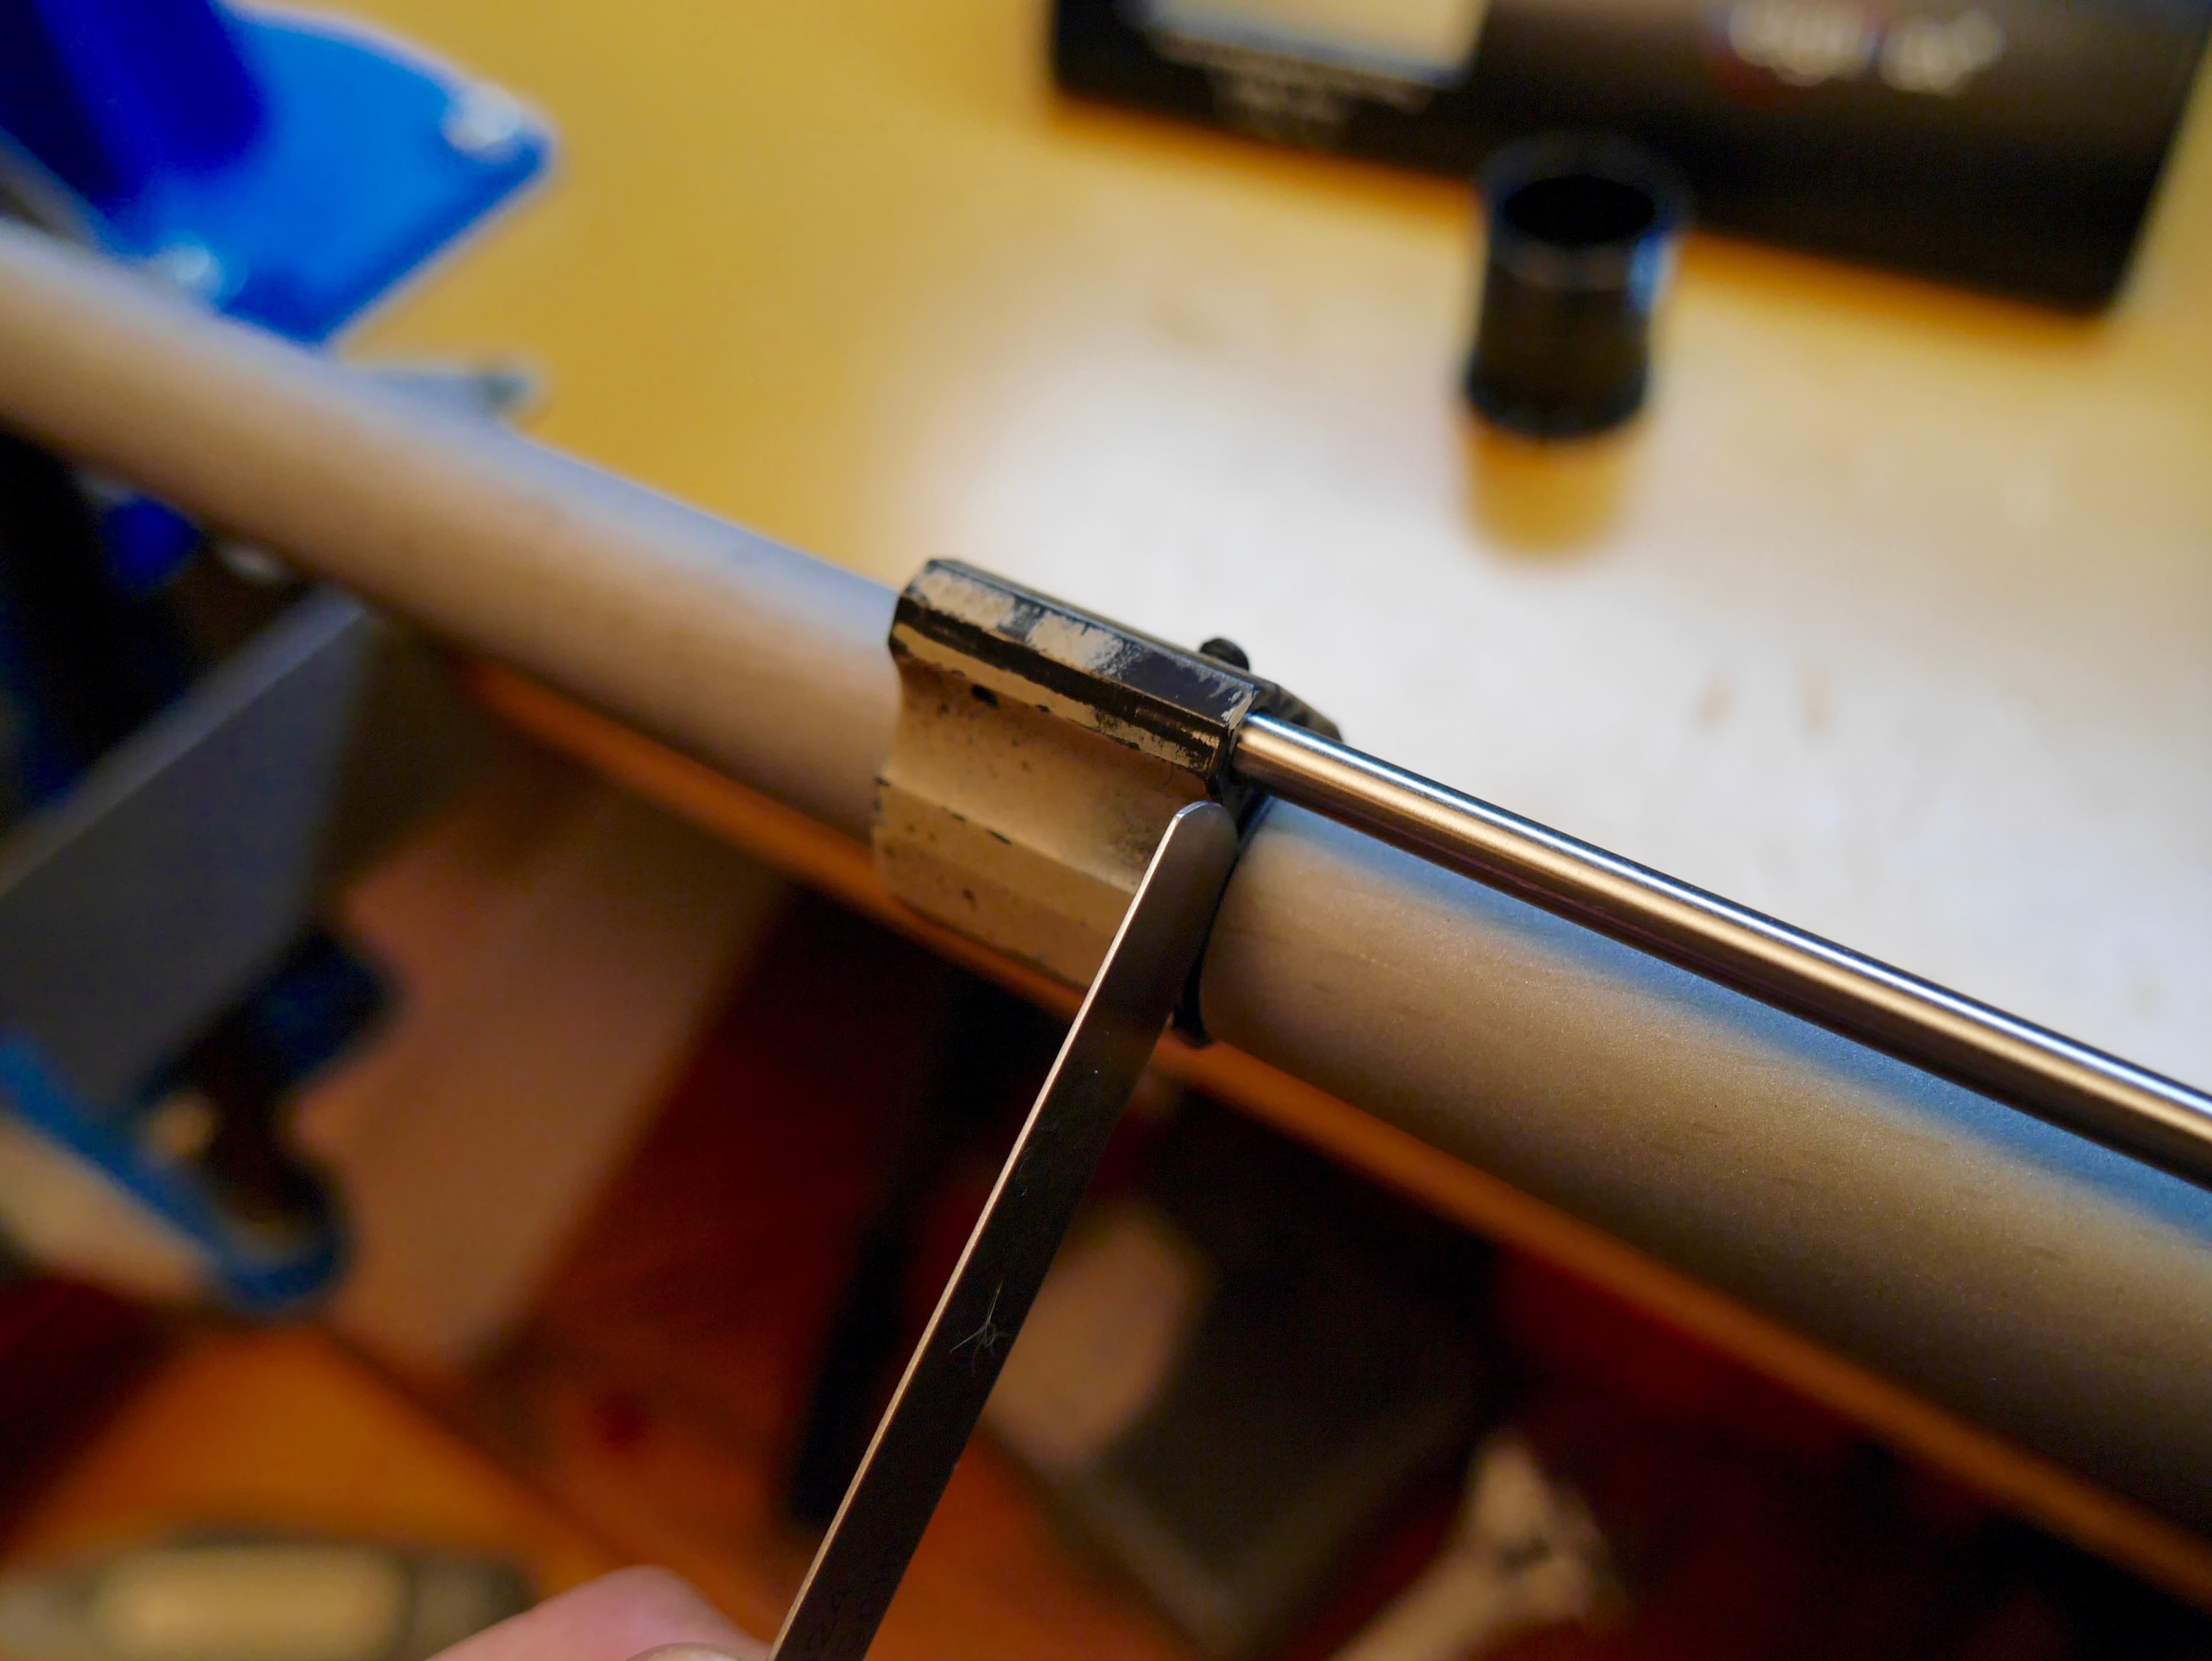
For the best fit, the gas block should be ever so slightly off the shoulder of the barrel, rather than butted completely against it.
I use a .025" feeler gauge to move the gas block to the proper distance. I did quite a few builds before I knew about gas block spacing, and everything still worked fine. However, now that I know it is recommended, I like doing it.
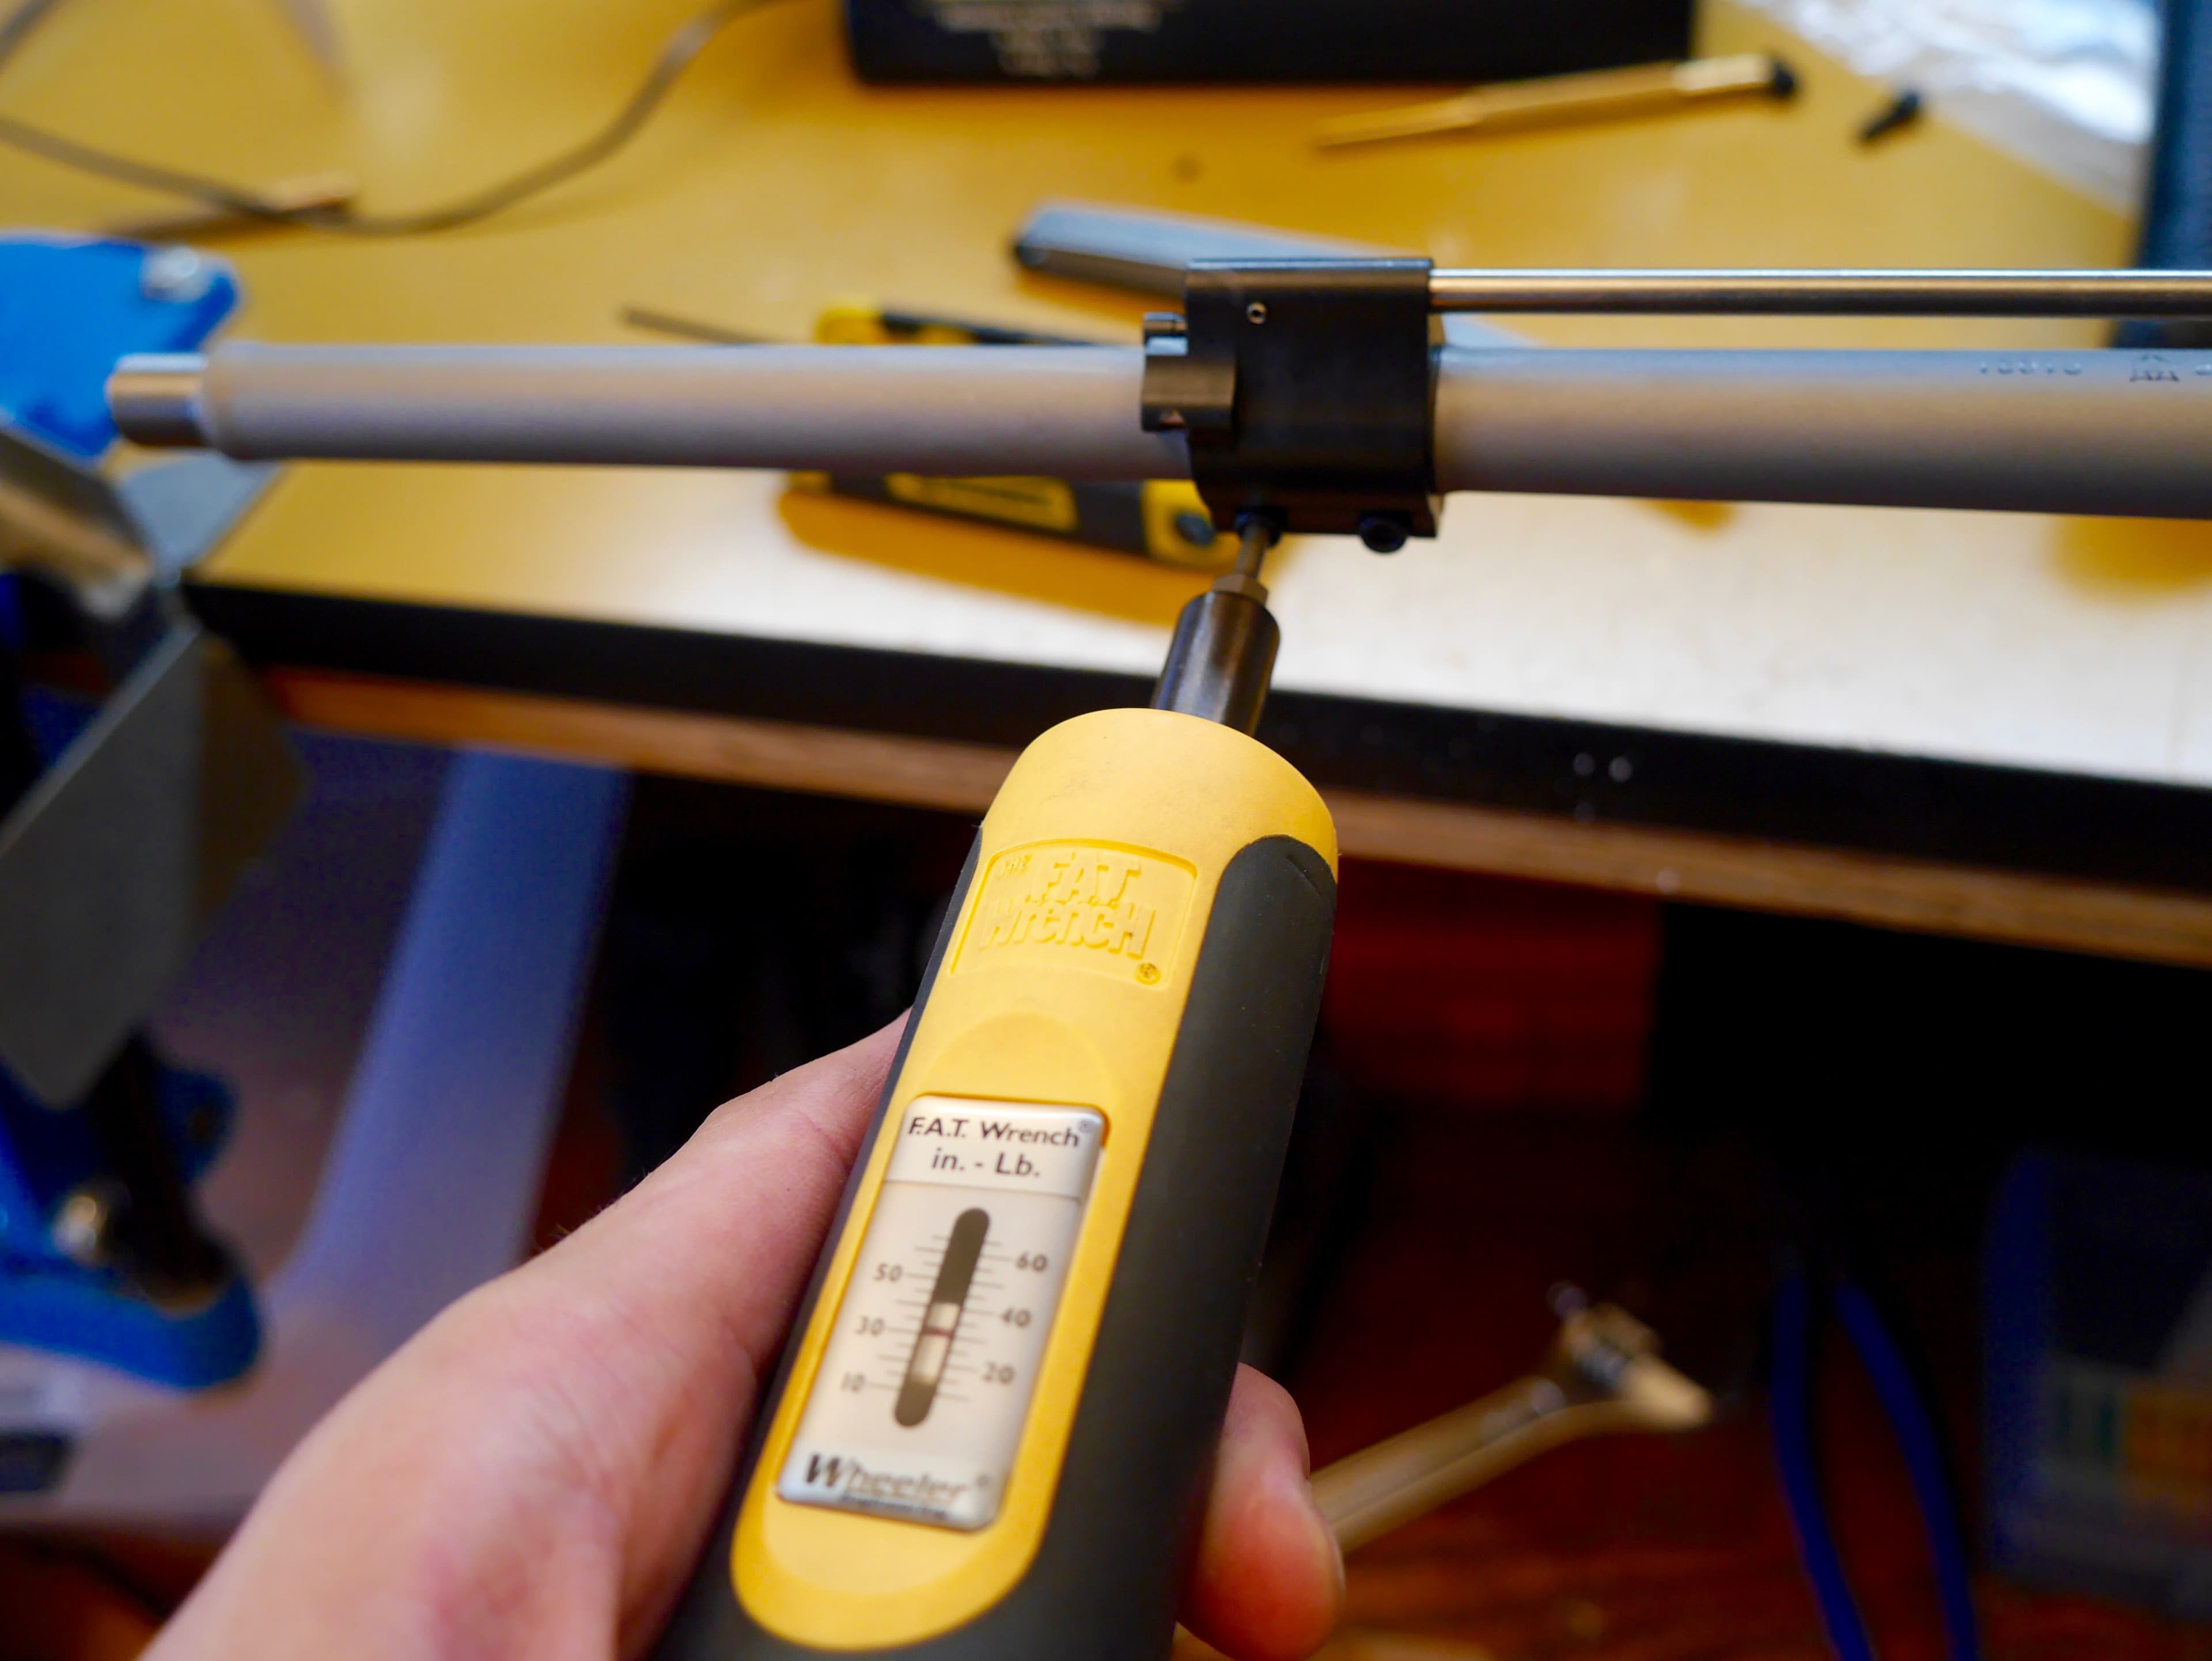
Take out your small torque wrench and set it to the manufacturer-specified torque for the gas block (35 ft. lbs for this Superlative Arms).
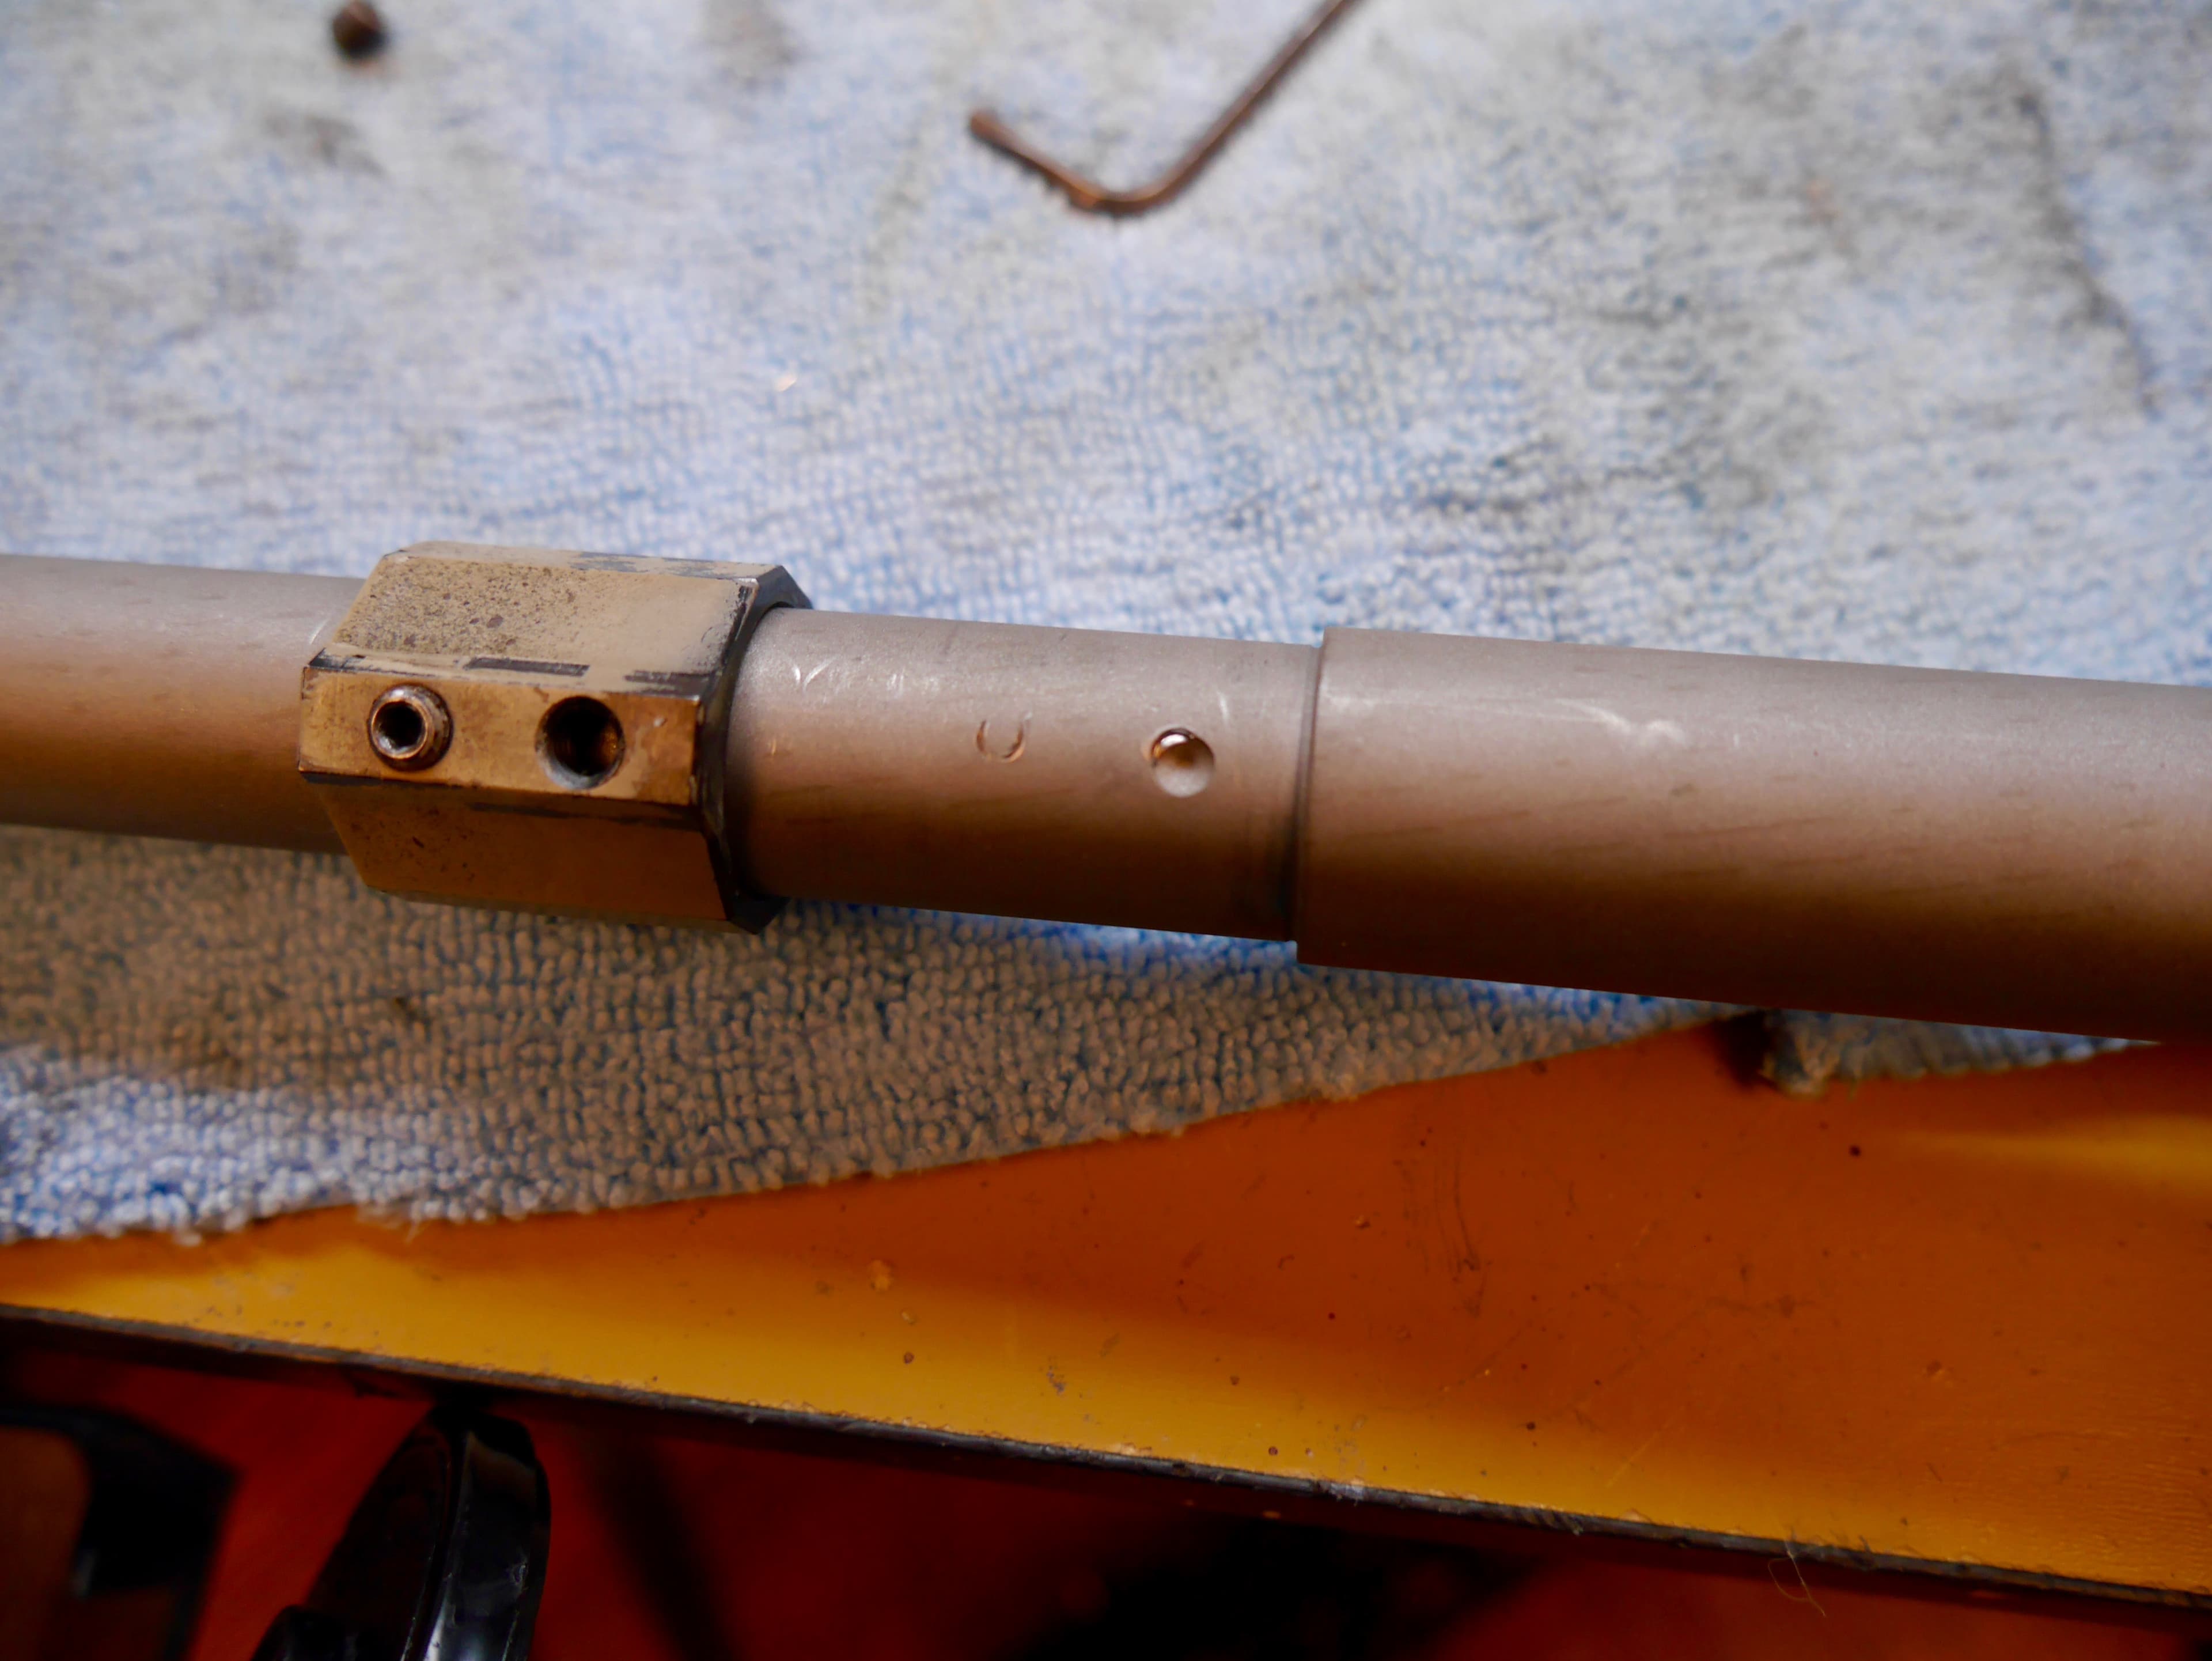
Some gas blocks use set screws instead of clamp-on screws. It is recommended that set-screw gas blocks be used with dimpled barrels.
Dimpled barrels have a small inset on the bottom of the barrel where the set screw can sit in and prevent the gas block from moving.
While you can use a set screw gas block without a dimpled barrel, you may eventually run the risk of the gas block becoming misaligned.
We get it, this step can be a bit daunting. For a more in-depth look, you can take a look at our dedicated article on How To Install a Gas Block.
Step 5: Install the Handguard
Now that your barrel, gas block, and gas tube are on, it is time to install your handguard.
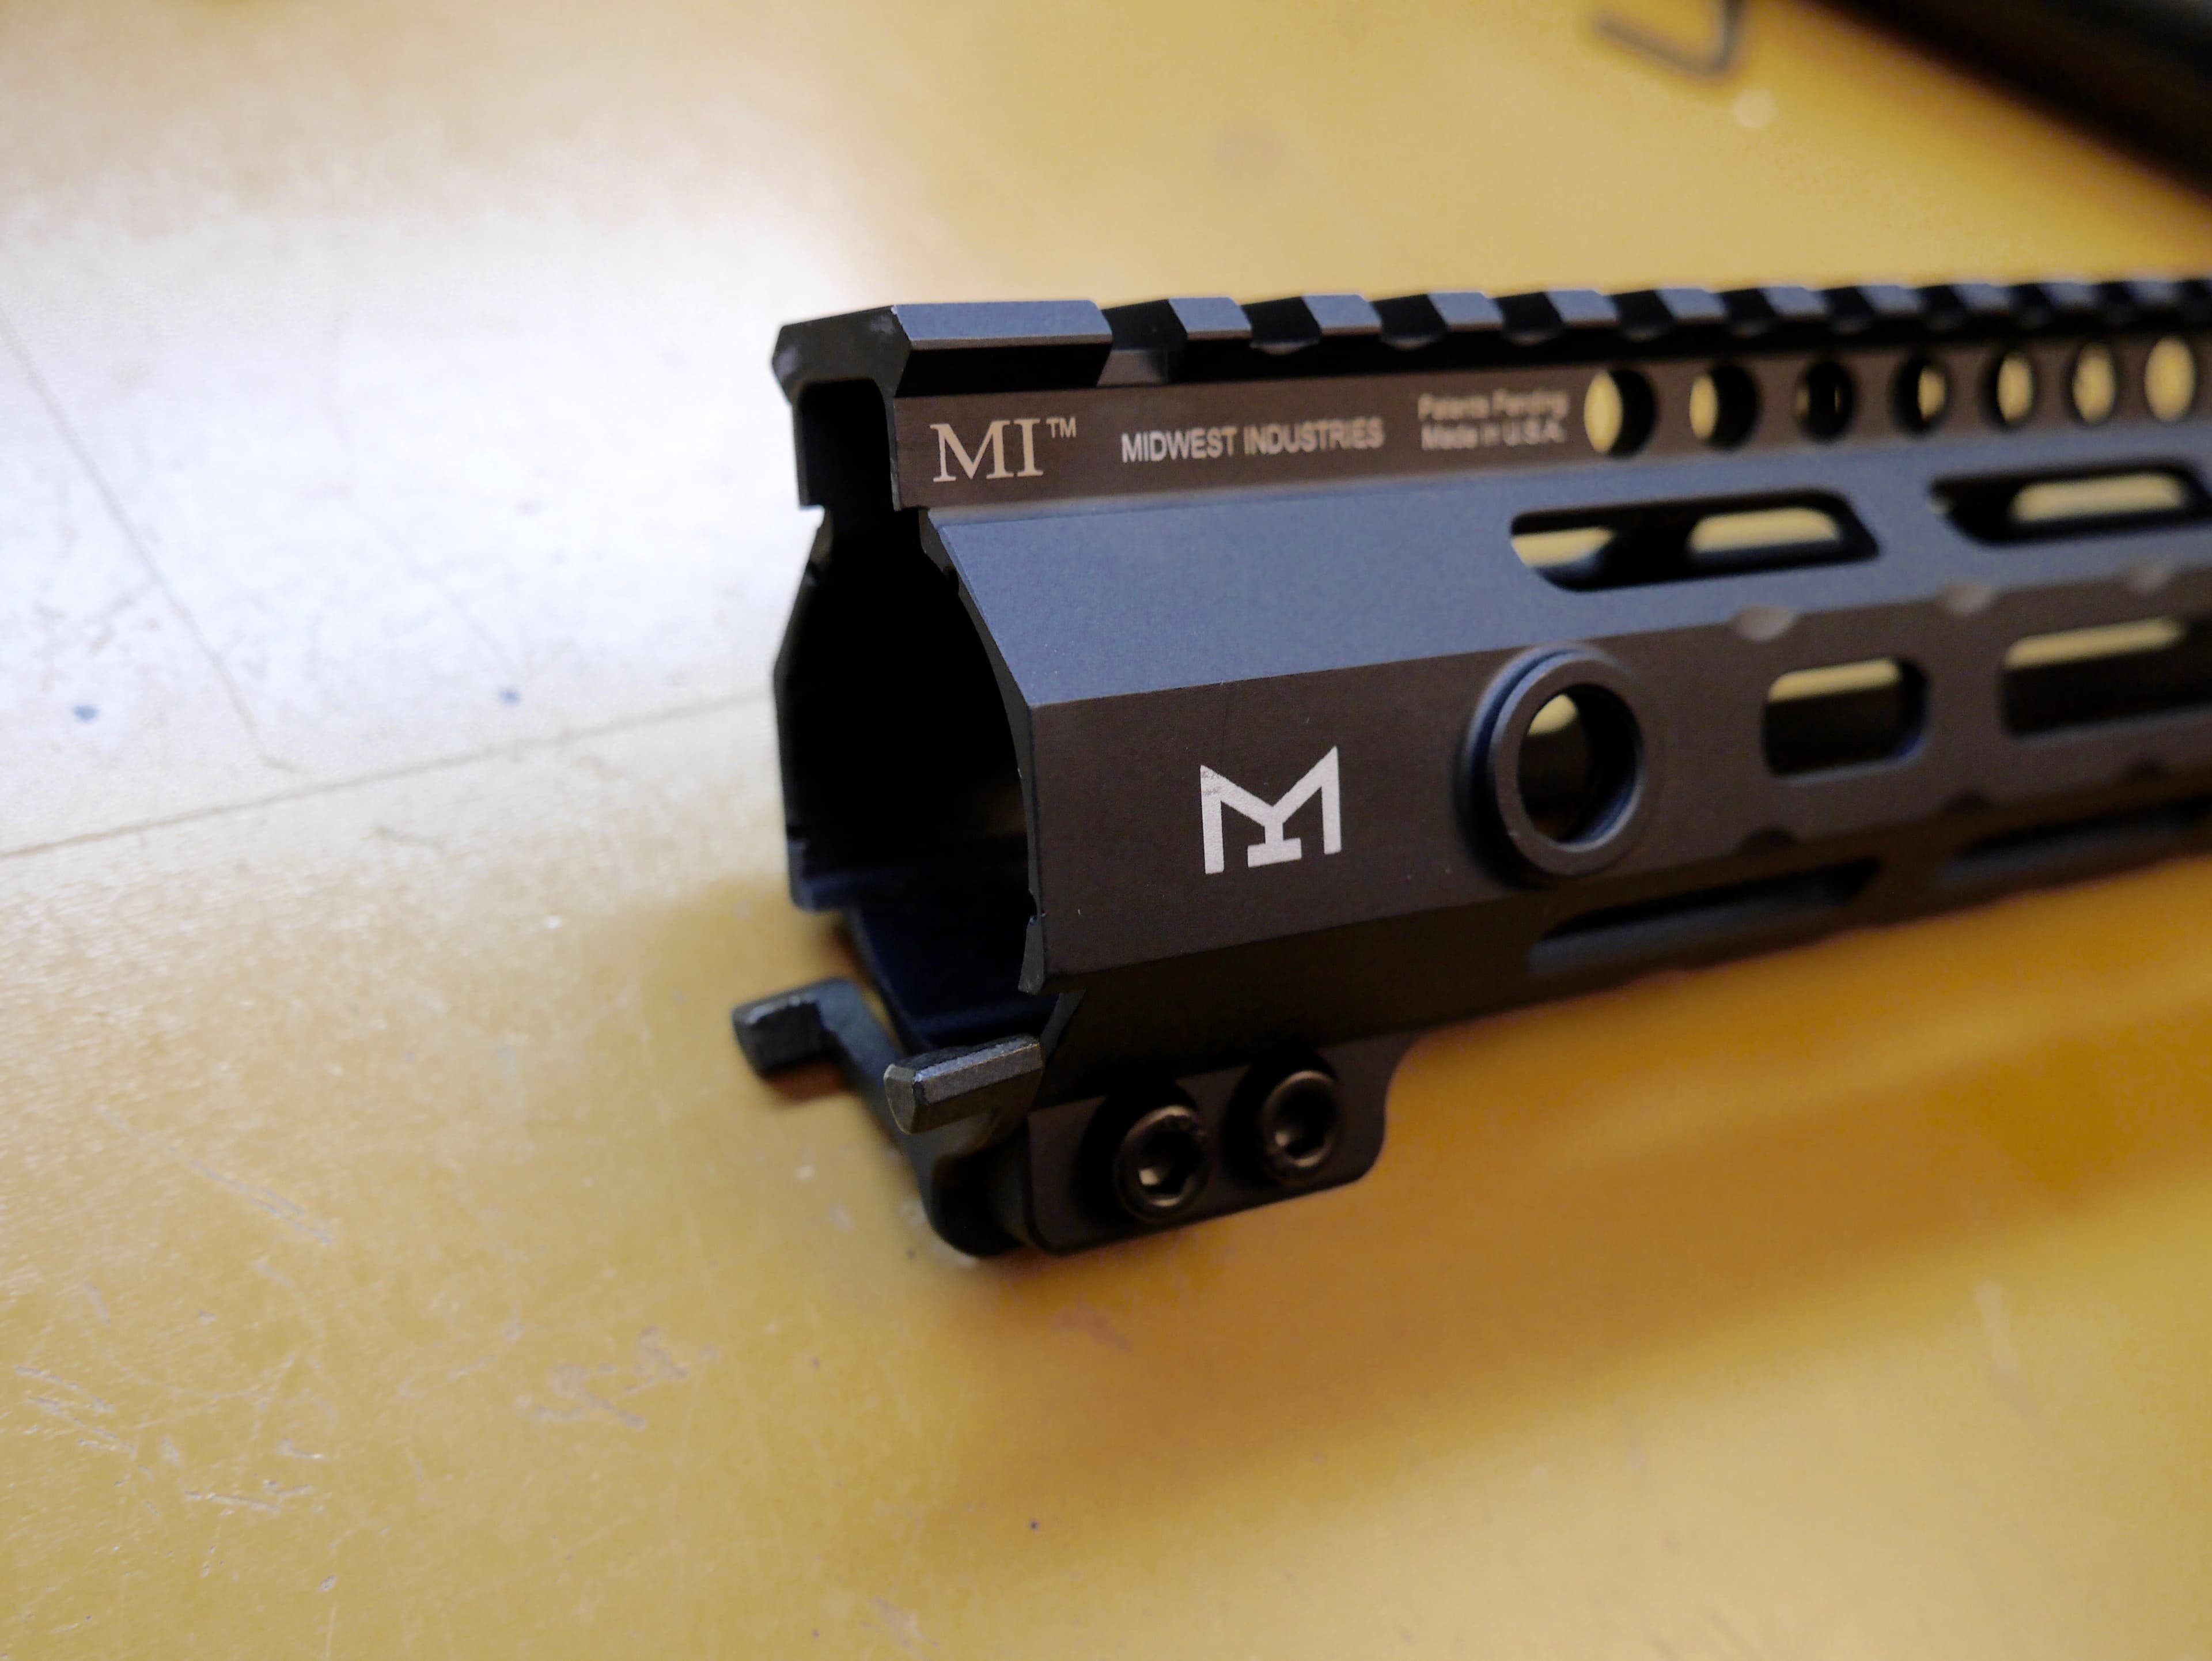
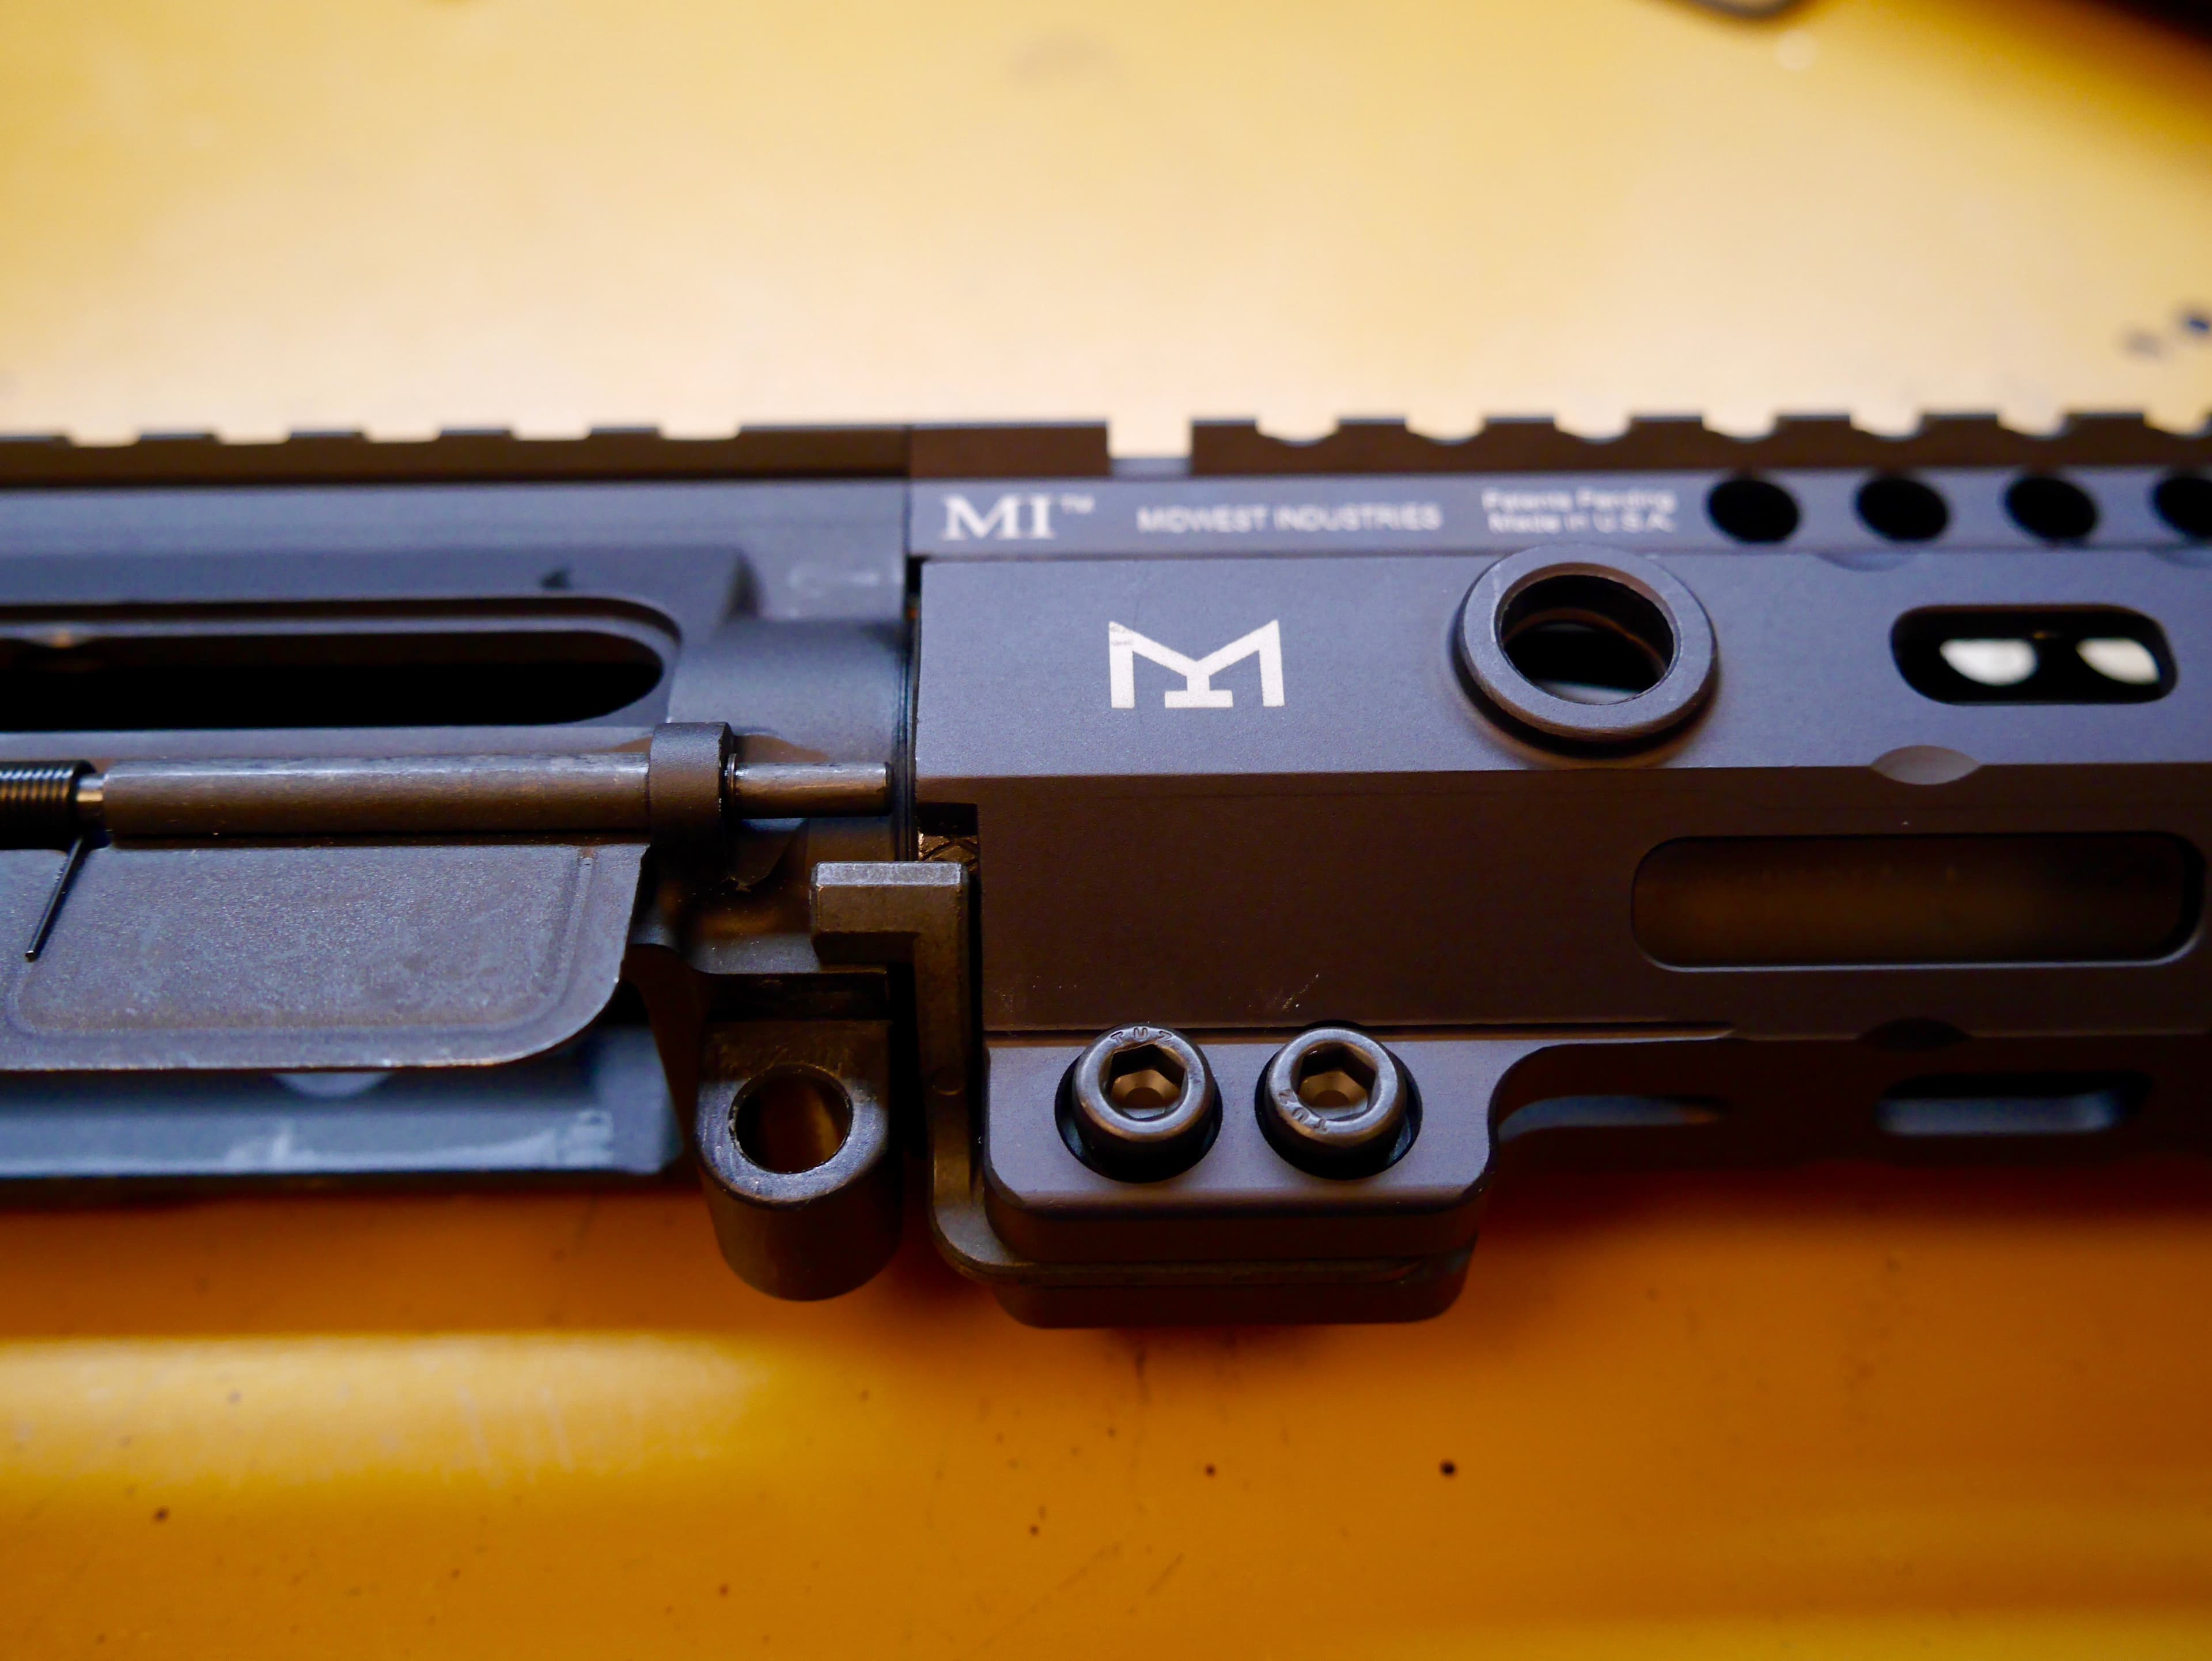
For this particular Midwest Industries handguard, I simply had to slip it over the barrel until it was flush with the receiver, and then tighten down the two hex screws at the bottom of the rail to the manufacturer-specified torque spec.
One thing I figured out the hard way was to make sure the indexing pin is completely flush at the bottom, near the screws.
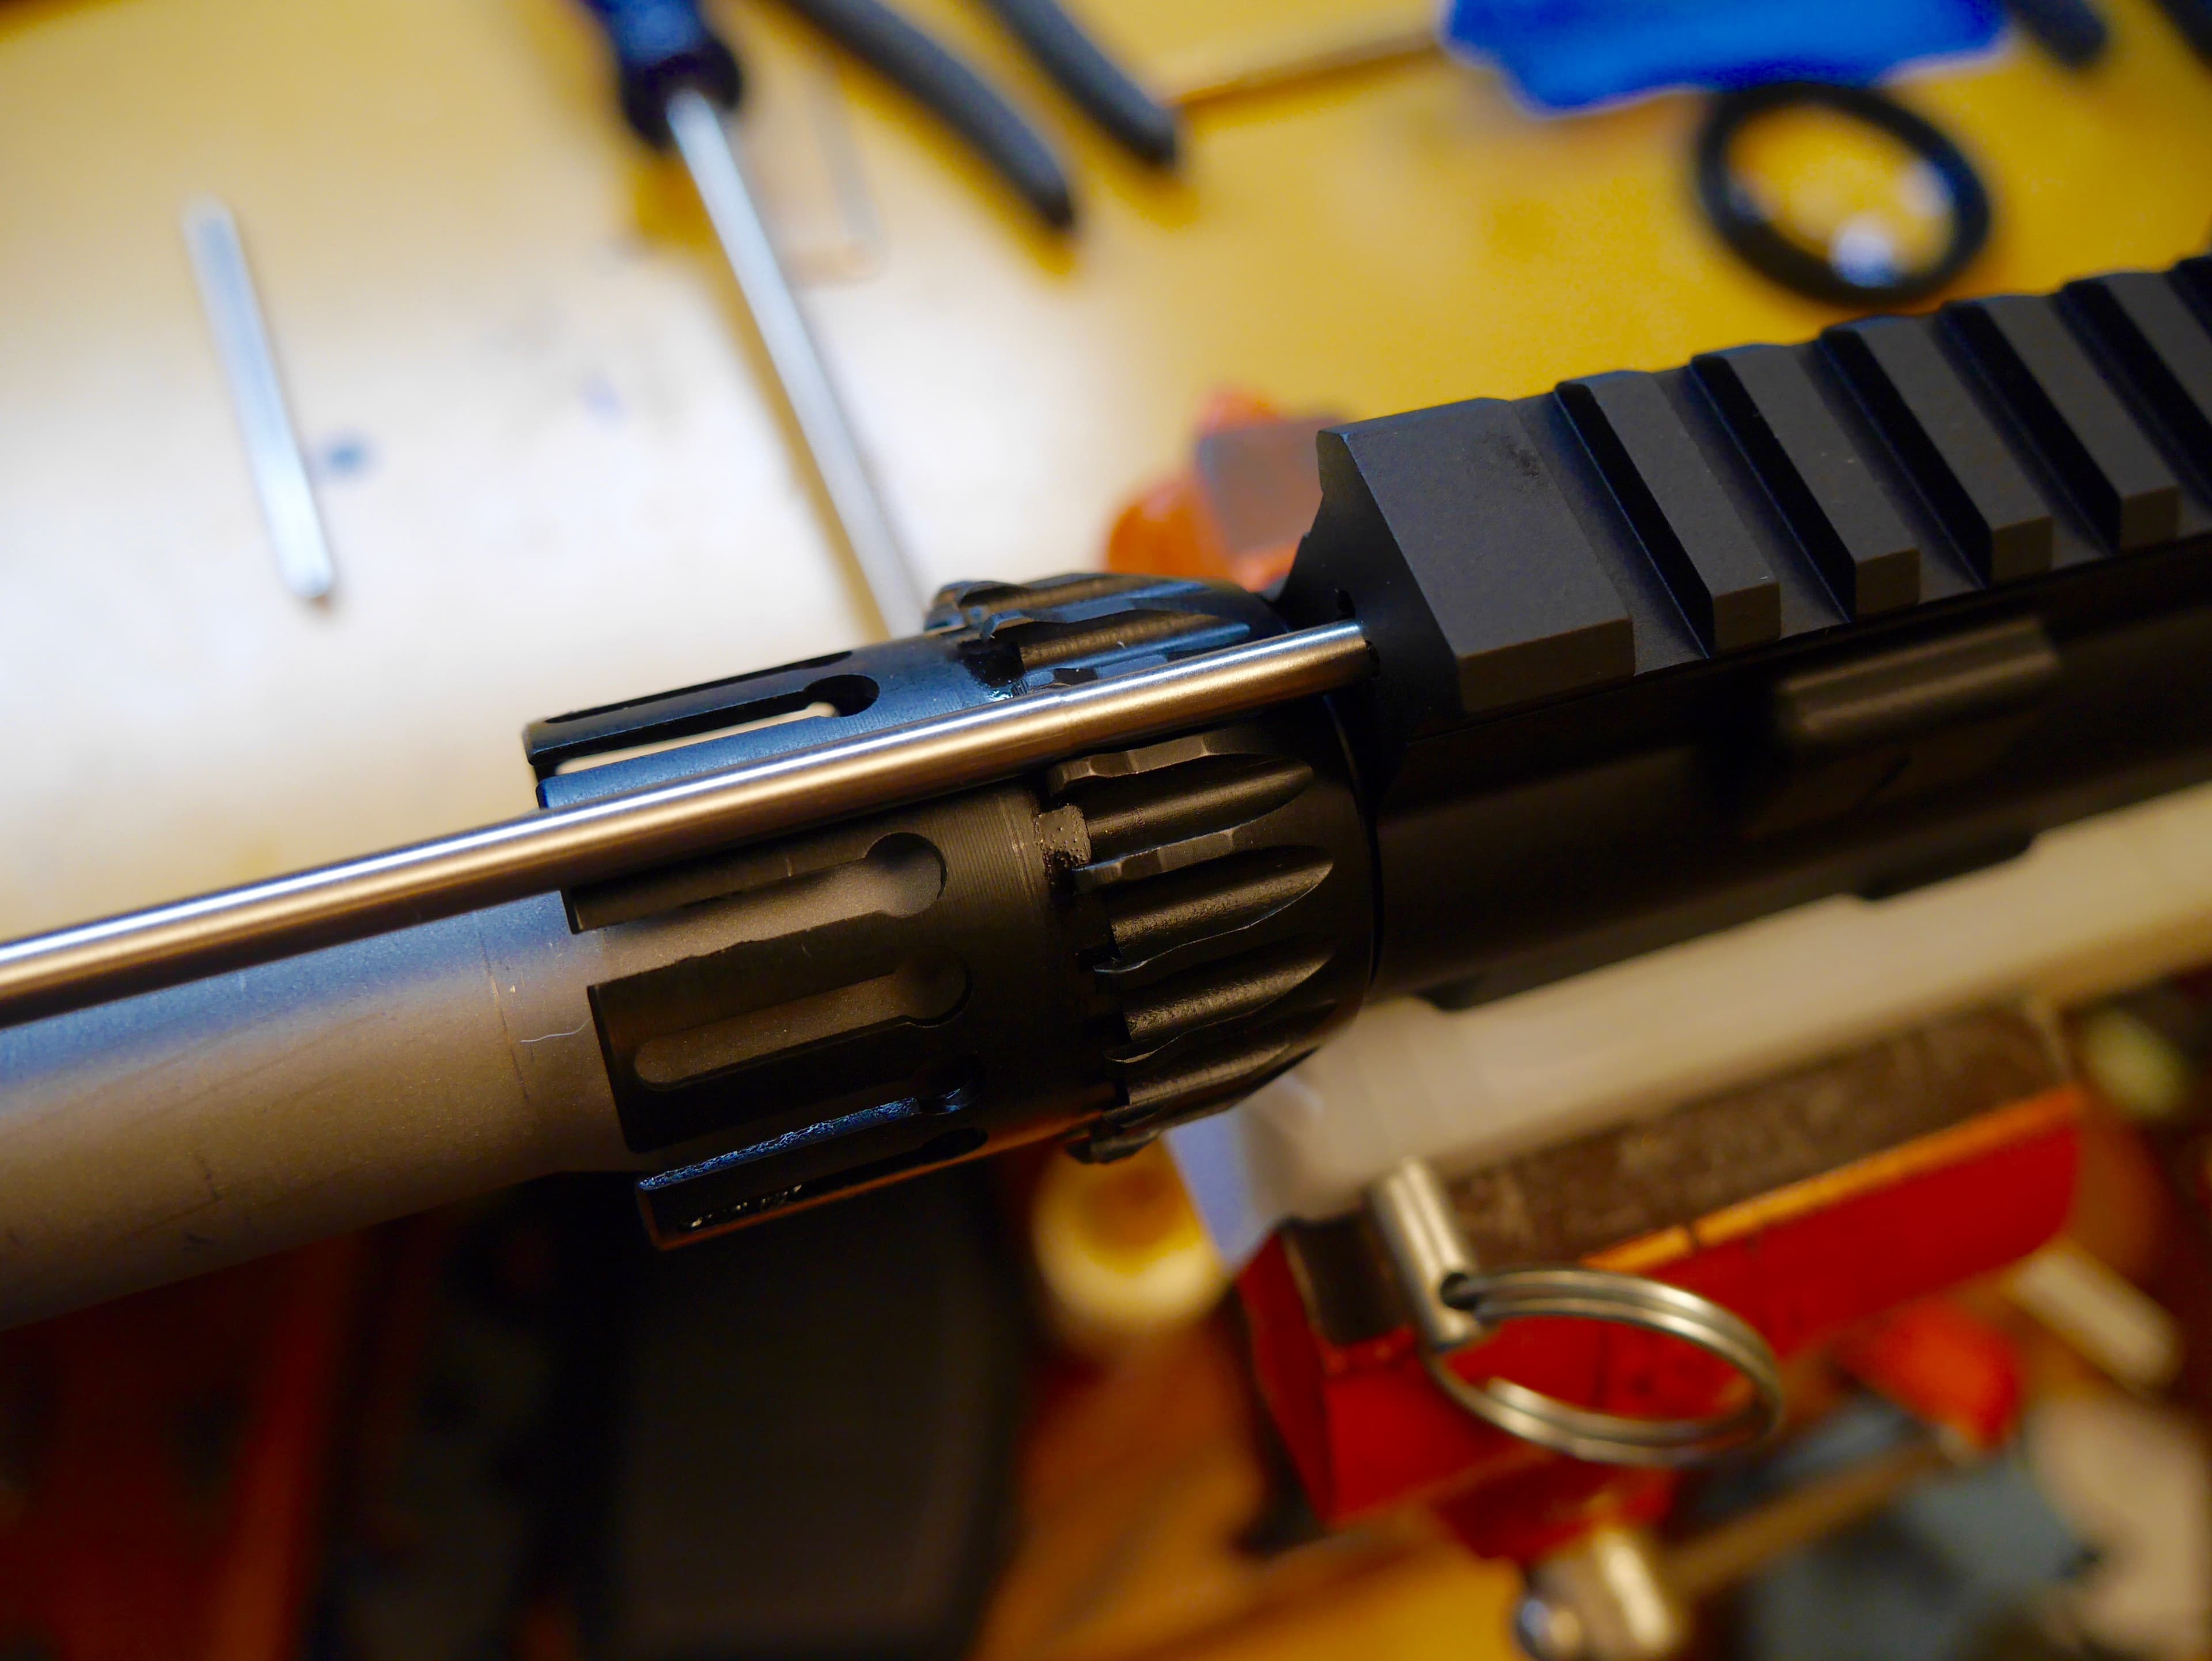
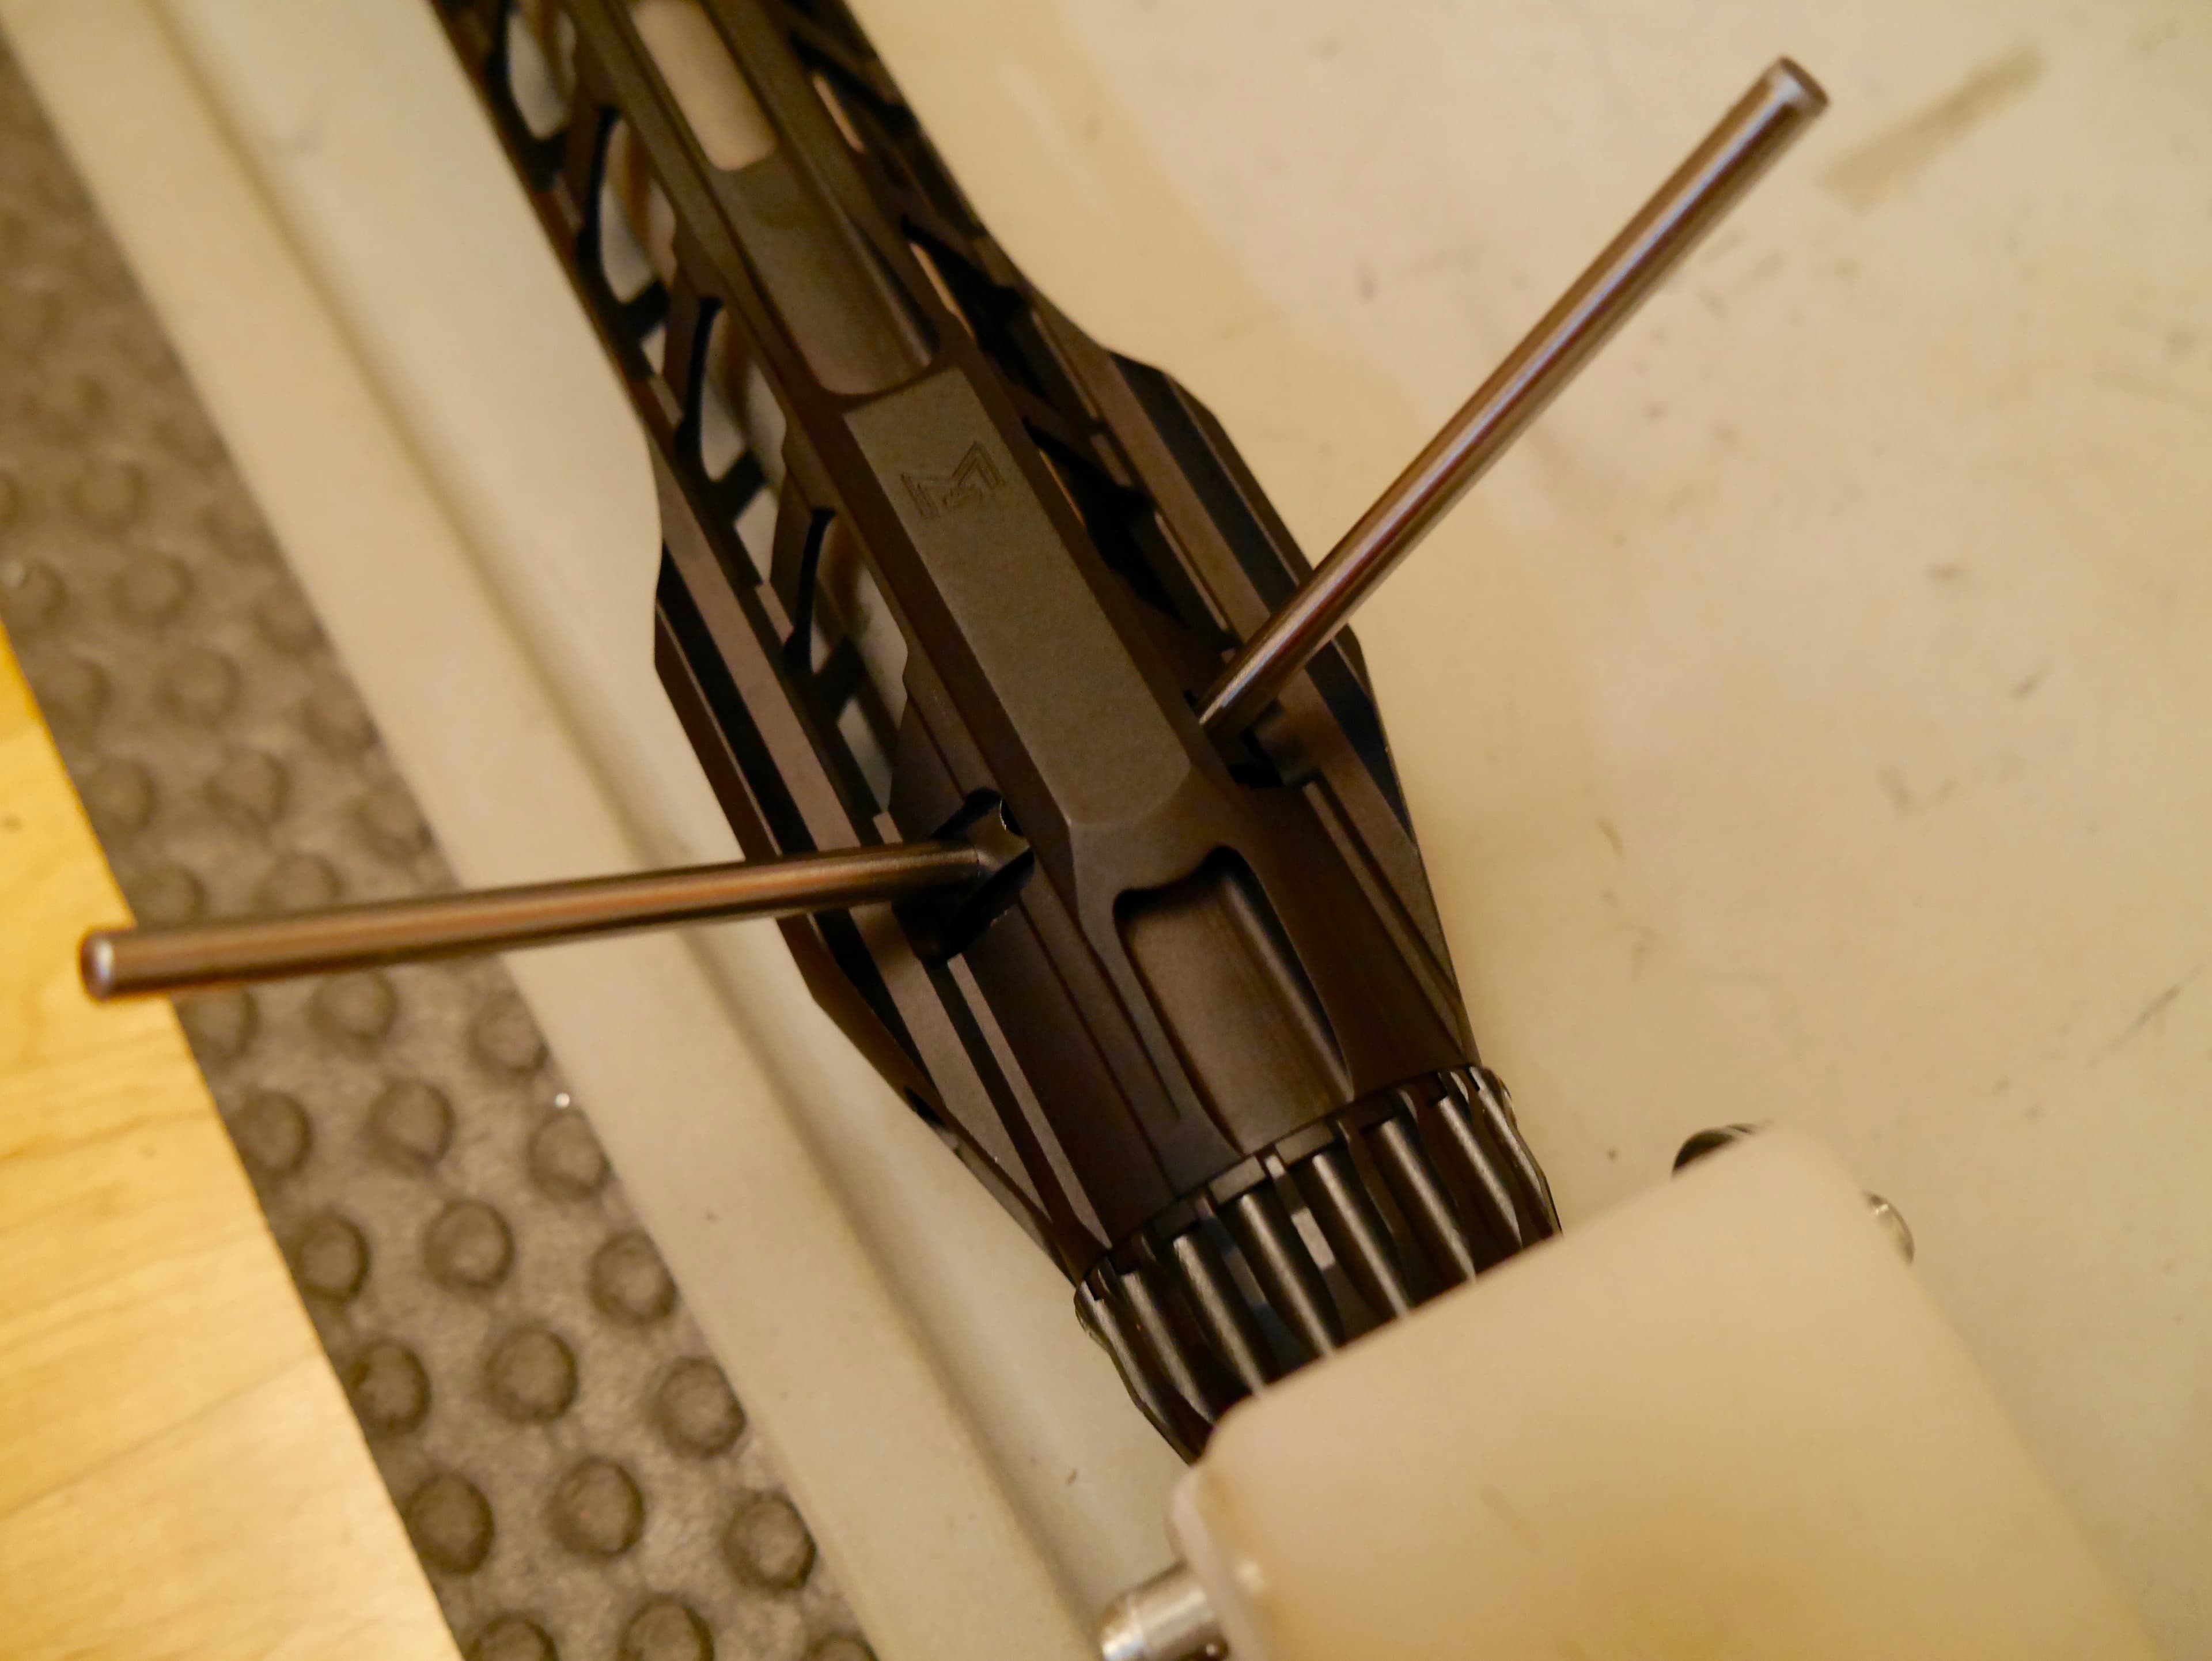
Different handguards will often have screws or attachment methods that vary. For example, the Rainier Arms handguard below requires two rods for installation.
For more detailed instructions, you can check out our article on How To Install a Handguard.
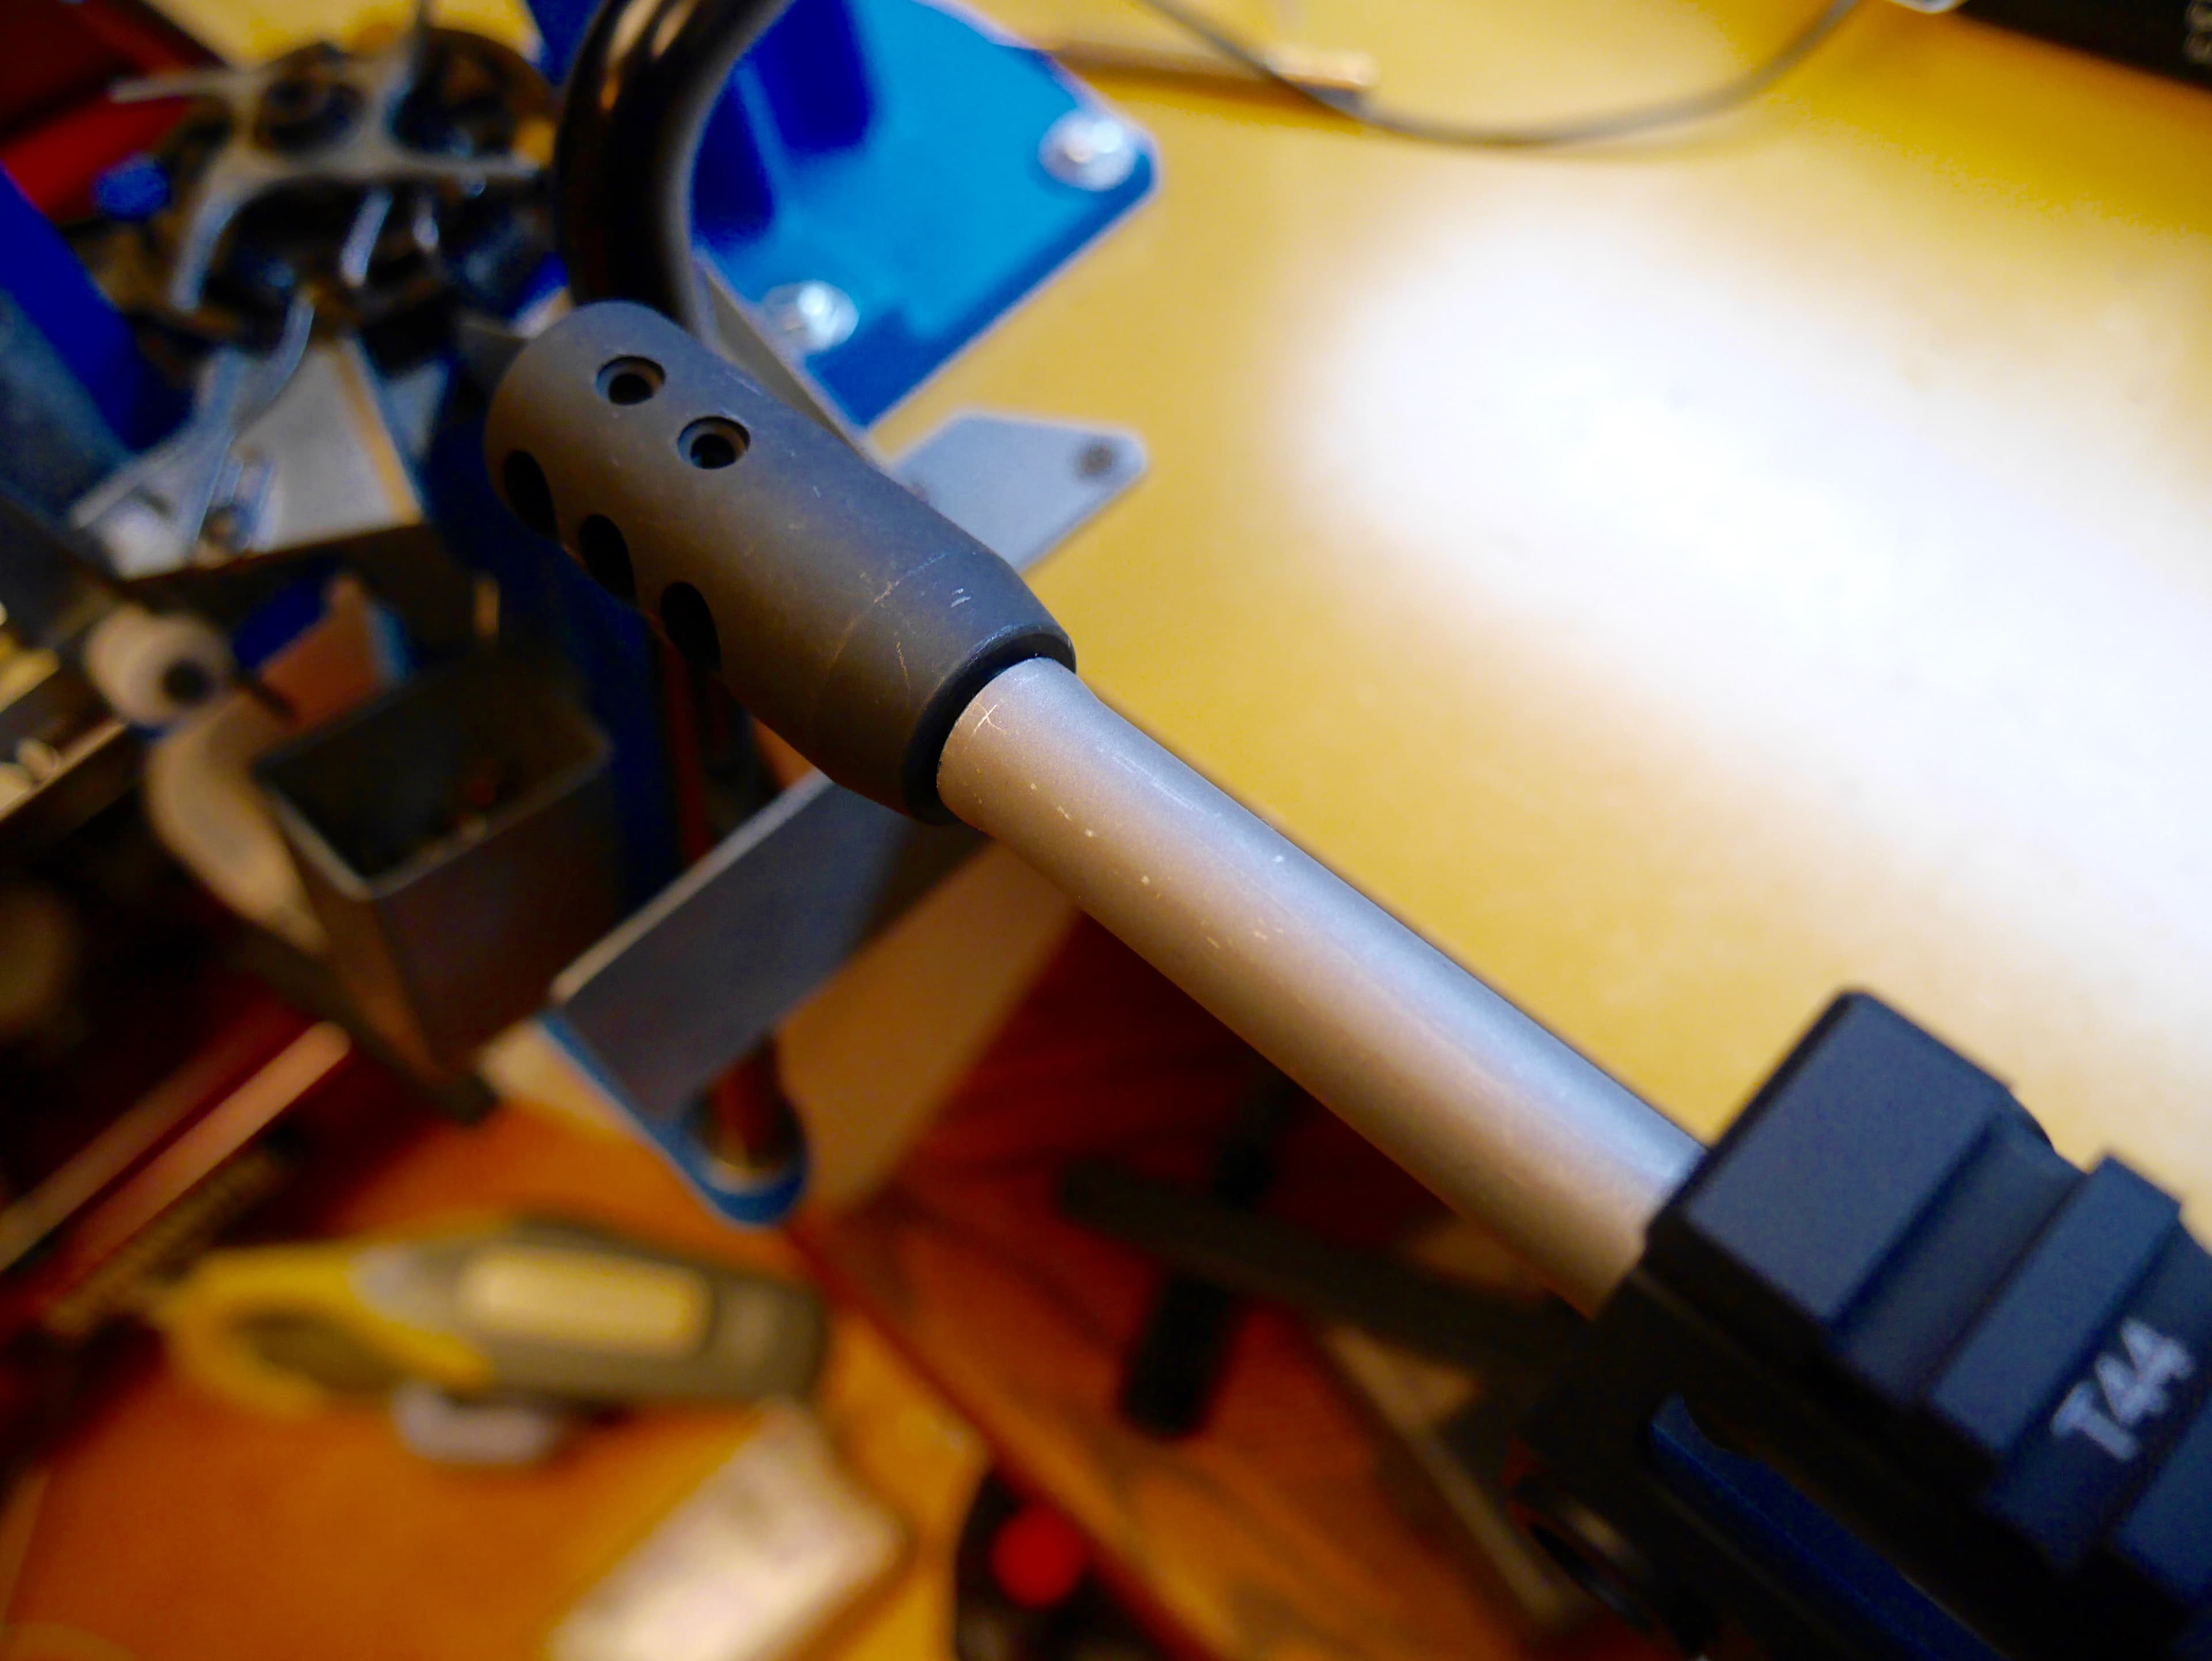
Step 6: Install the Muzzle Device
If your muzzle device comes with a crush washer, you must absolutely use it. The correct orientation for crush washers is with the smaller side facing the barrel.
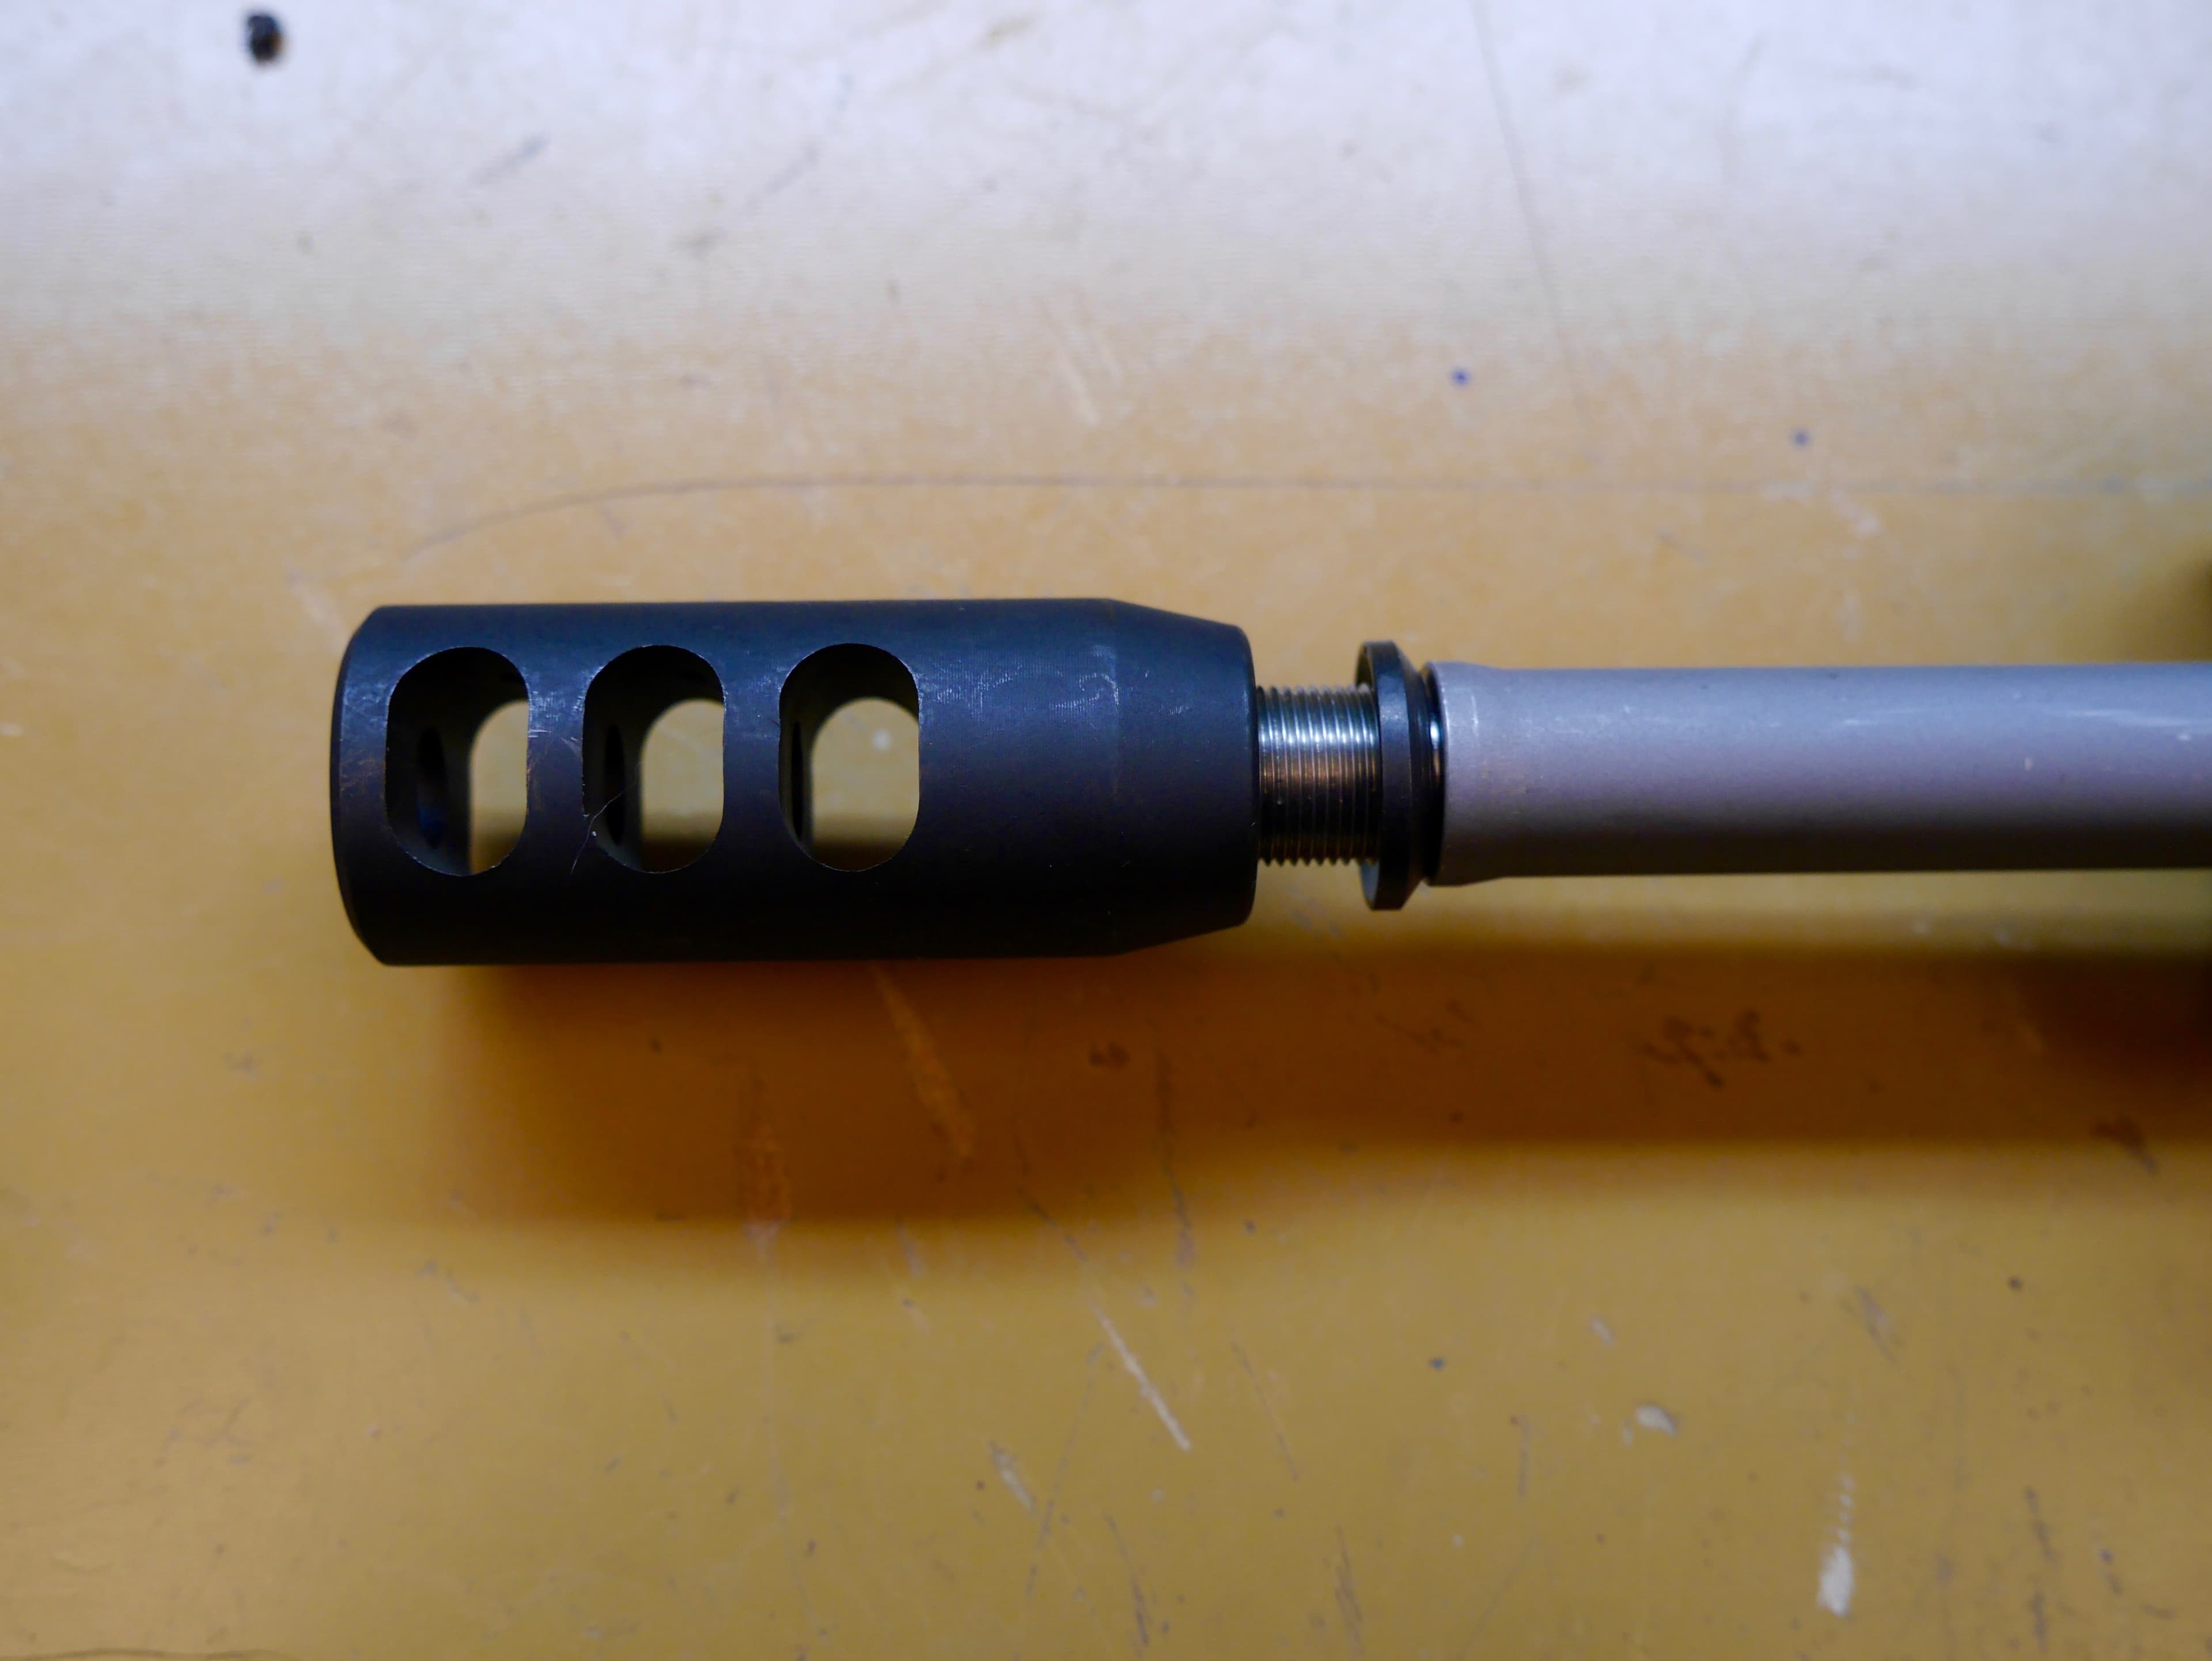
Once your crush washer is on (if necessary), you can begin to thread your muzzle device onto the barrel.
Some muzzle devices require them to be oriented a certain way. This is achieved by applying enough torque until the muzzle device is properly oriented. You may hear this step also referred to as indexing or timing the muzzle device.
If the muzzle still isn't lining up, you may need to use shims between the crush washer and muzzle to get it timed.
Step 7: Install your Bolt Carrier Group and Charging Handle
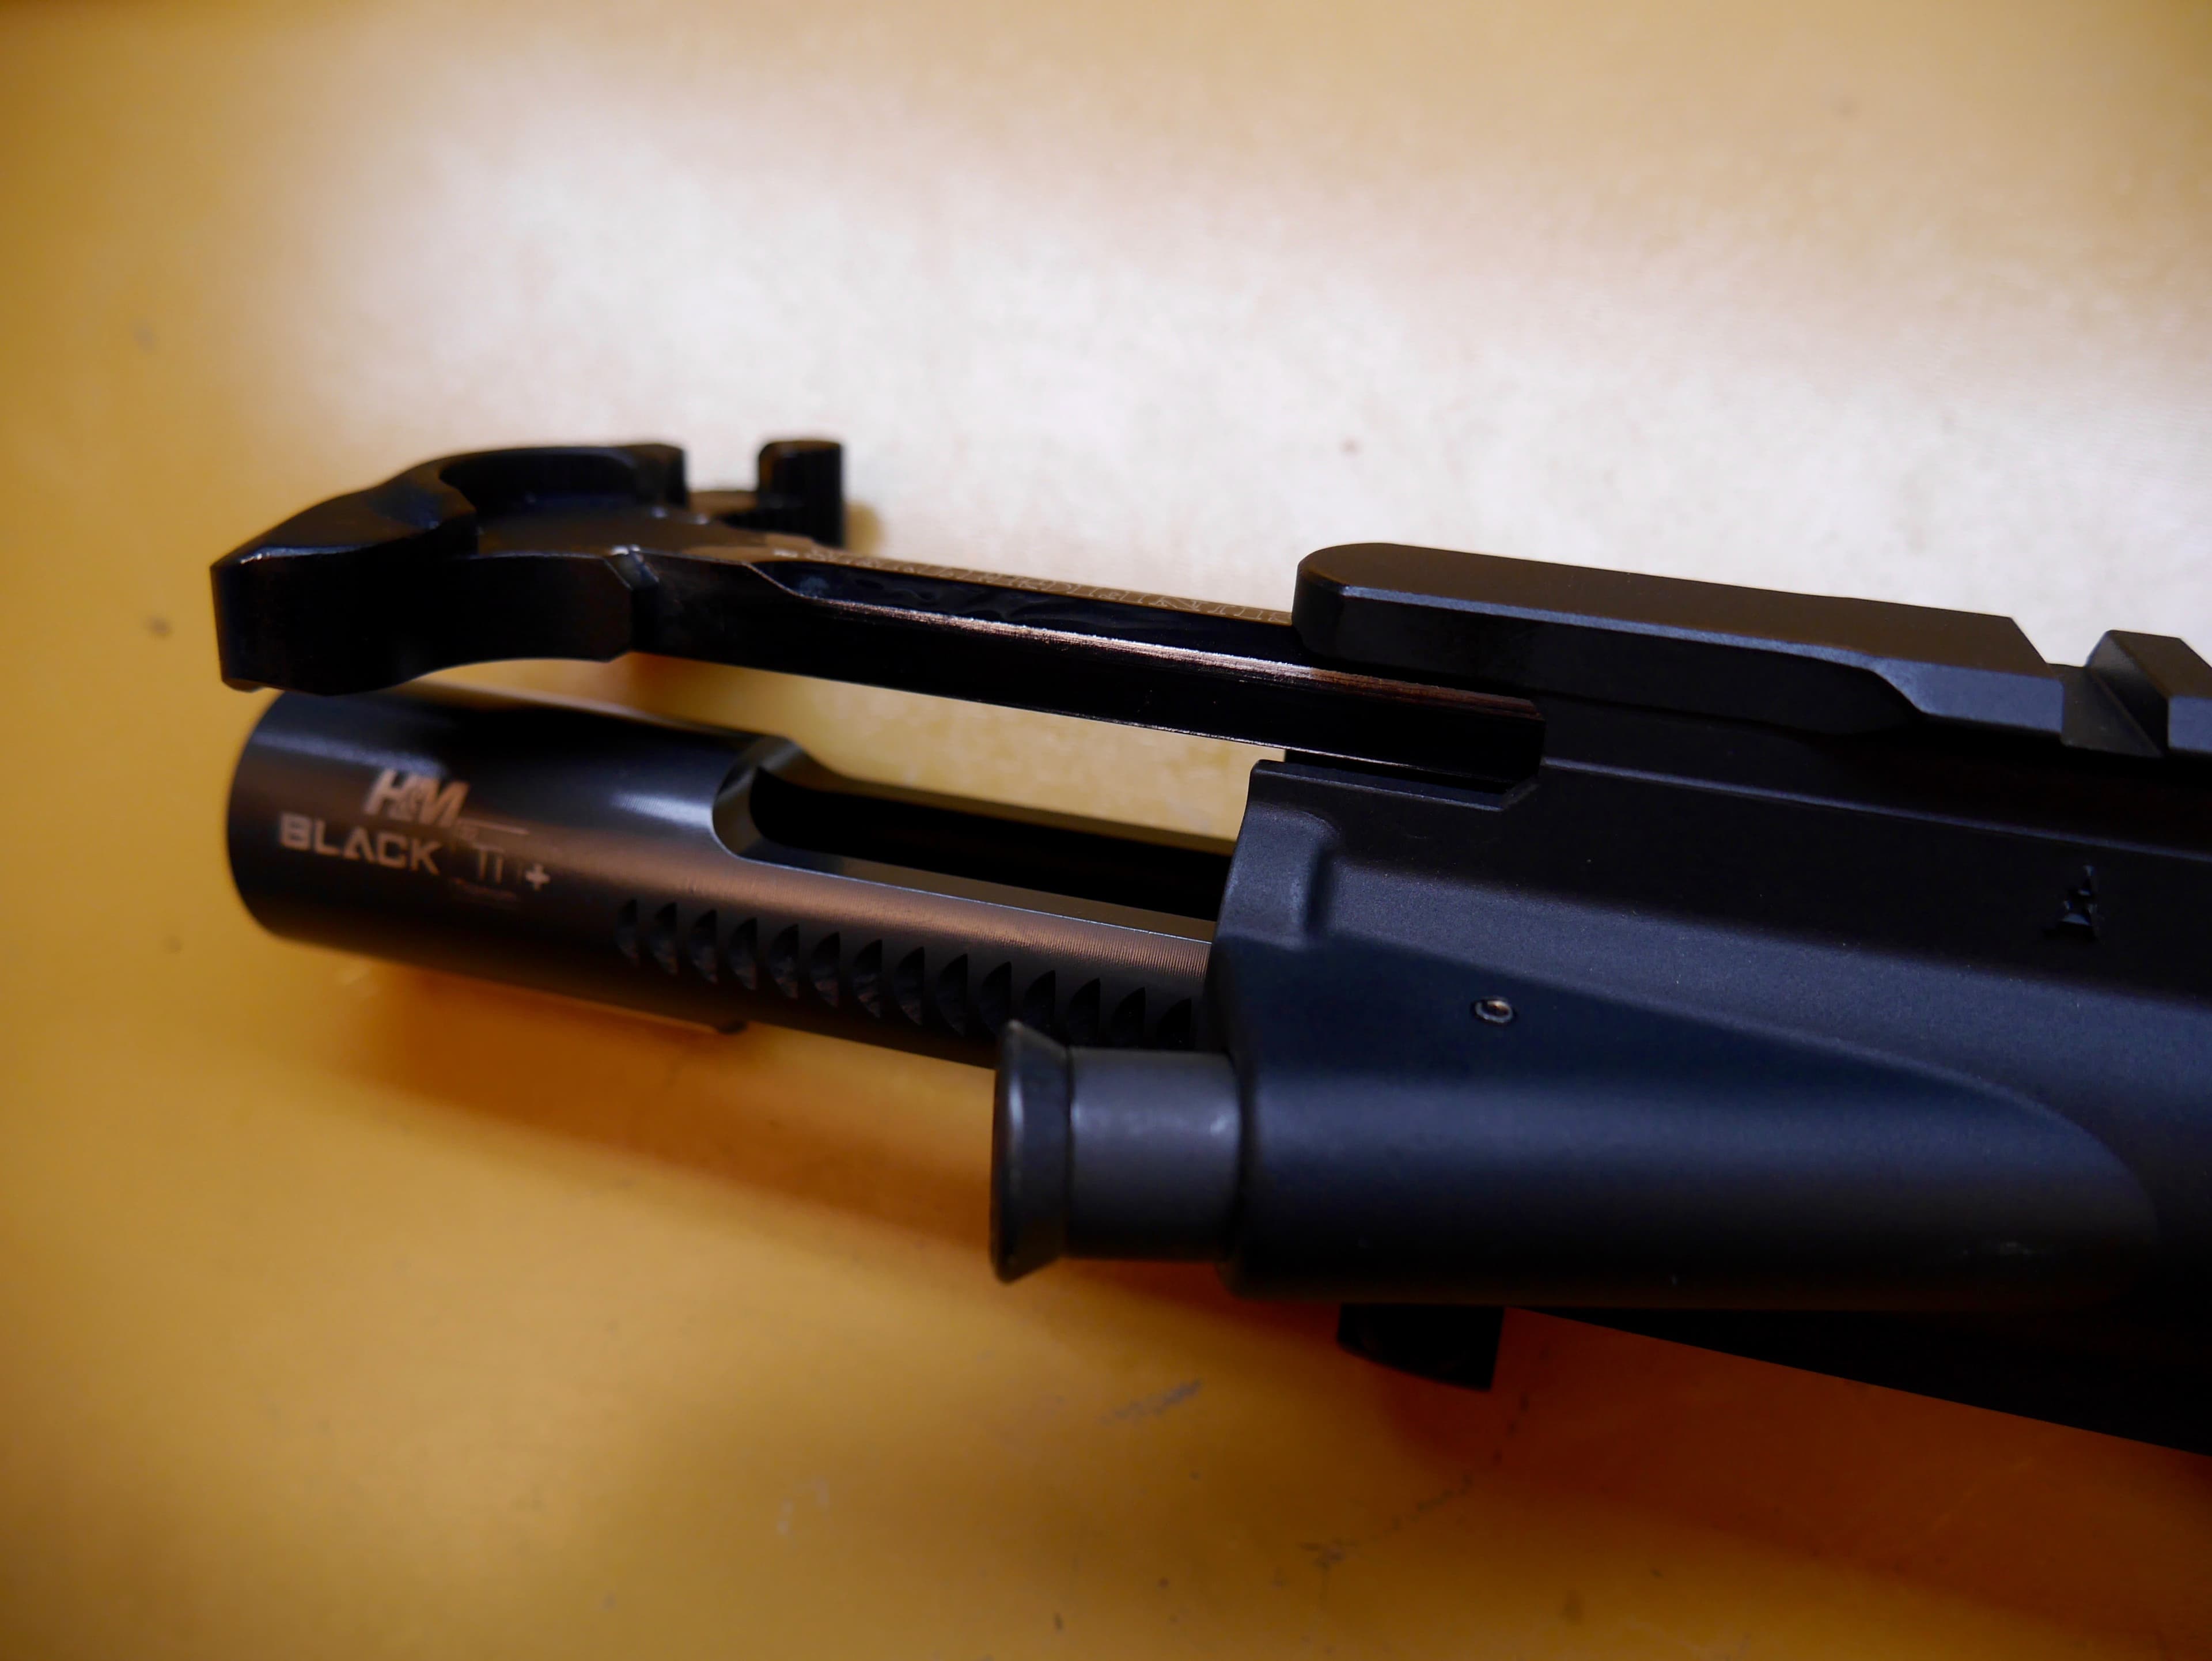
The last step is an easy one! Simply slip your bolt carrier group and charging handle in, just as you would when reassembling the gun after cleaning it.
Voila! You're done!
Common Mistakes to Avoid
- Over or undertorquing parts: While torque wrenches aren't required, unless you are familiar with how tight certain torque specs are supposed to be, we recommend using one. Parts being too loose or too tight can cause both minor and major issues.
- Misaligned gas block: If your gun isn't running properly, there is a high likelihood that your gas block is misaligned. Remove your handguard and double-check the gas block and gas tube.
- Marring the finish: It is highly recommended that you use a shop rag or cloth any time you have to clamp bare metal on the receiver into a vise. This will add a protective layer to help avoid or minimize scratches.
Final Thoughts
That wasn't so hard, right?
If you learn How to Build an AR-15 Lower, you can easily build an entire AR-15 from the ground up by yourself!

If you're ready to choose all the parts to make your AR-15 perfectly suited to you and your objective, check out the rest of our AR-15 Definitive Resource guide!
Resources
- https://www.pewpewtactical.com/best-ar-15-build-tools/
- https://www.pewpewtactical.com/how-to-install-a-gas-block/
- https://www.pewpewtactical.com/ar-15-handguard-install/
- https://www.pewpewtactical.com/difference-between-flash-suppressors-compensators-muzzle-brakes/
Latest Updates
July 2026: Full rewrite with updated information.