
[Visual Guide] How to Install a Glock 3.5 lb Trigger Connector
Want to quickly install a new trigger connector into your Glock? We go through it step by step with both pictures and video.

PPT Founder. NRA Pistol Instructor. USPSA/3-Gun/NRL22 Competitor. 250+ articles
We review products independently. When you buy through links on our site, we may earn a commission to help support our testing. Learn more.
Learn how to take apart your Glock to swap out the stock 5.5 lb trigger connector for an upgraded 3.5 lb connector.
You’ll be done in 5 minutes with minimal tools!
We have both a video and picture tutorial to get you through it.
If that helped, please subscribe to our YouTube channel since we’re adding new videos every week!
Why 3.5 lb Glock Trigger Connector
One of my essential Glock mods that lowers the trigger pull about 1 lb and makes it so much easier to shoot accurately. I have them in all my Glocks and trust this upgrade with my life.
Things You Need
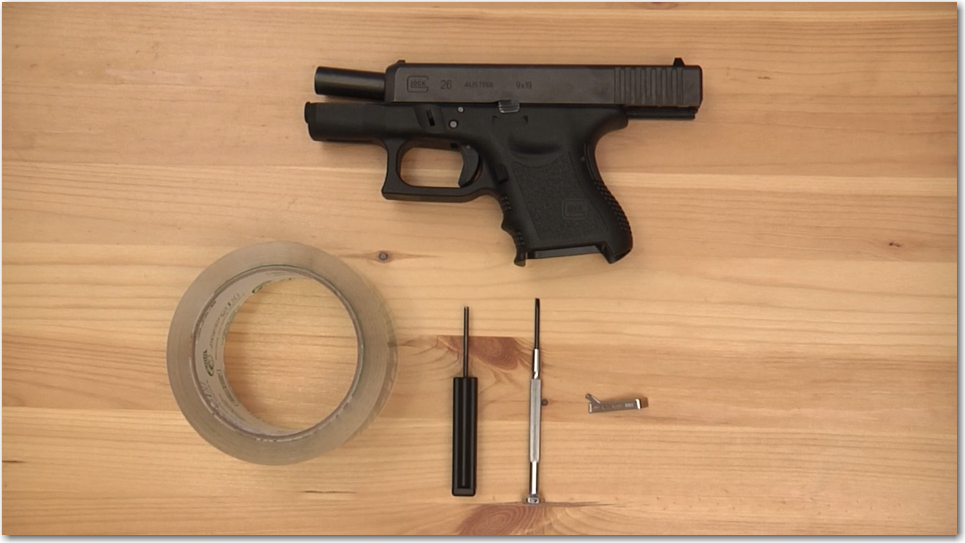
- Glock (duh)
- Ghost Ultimate 3.5 lb Trigger Connector (~$25): What I have in my other Glocks. I like how the slits supposedly self clean the connector, although I never had a problem with it getting dirty. Another well-reviewed option is Glock OEM ($22) version which is now described as a 4.5 lb connector. However at the same price points and higher weight, I would stick with Ghost.
- Glock Tool (~$8): Useful to take out and put back pins, disassemble magazines, and some other things.
- Small Flathead Screwdriver: Used to push out the stock trigger connector
- Roll of (tactical) tape: Makes it easier to punch out pins.
Installing a 3.5 lb Glock Trigger Connector
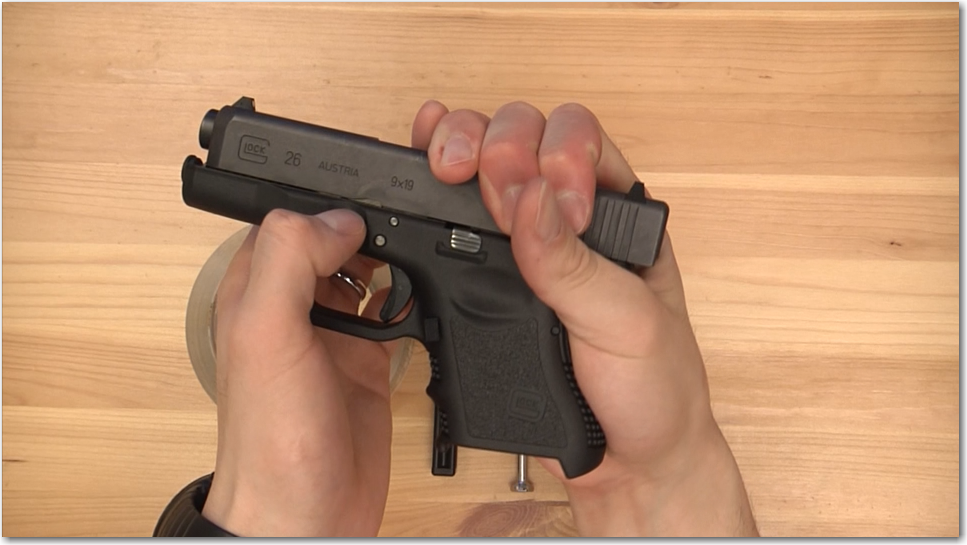
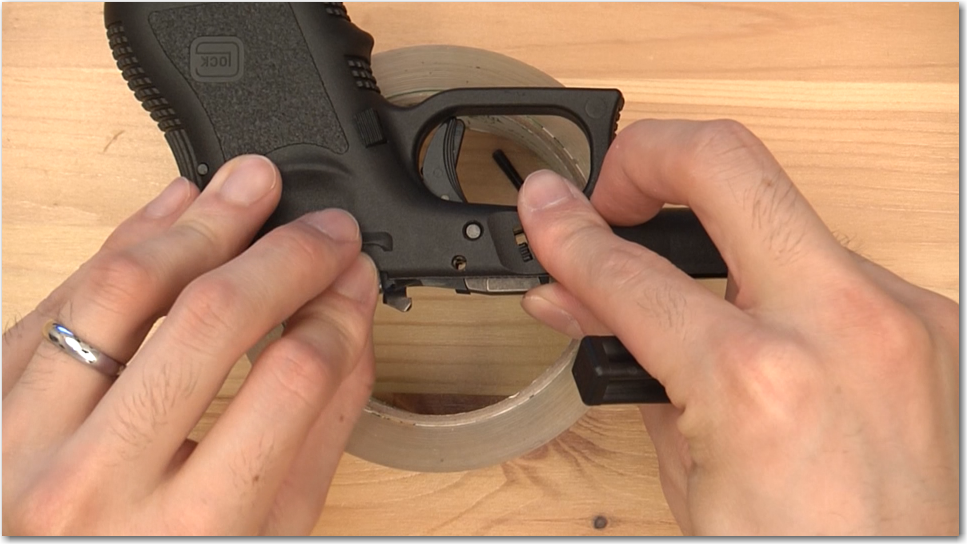
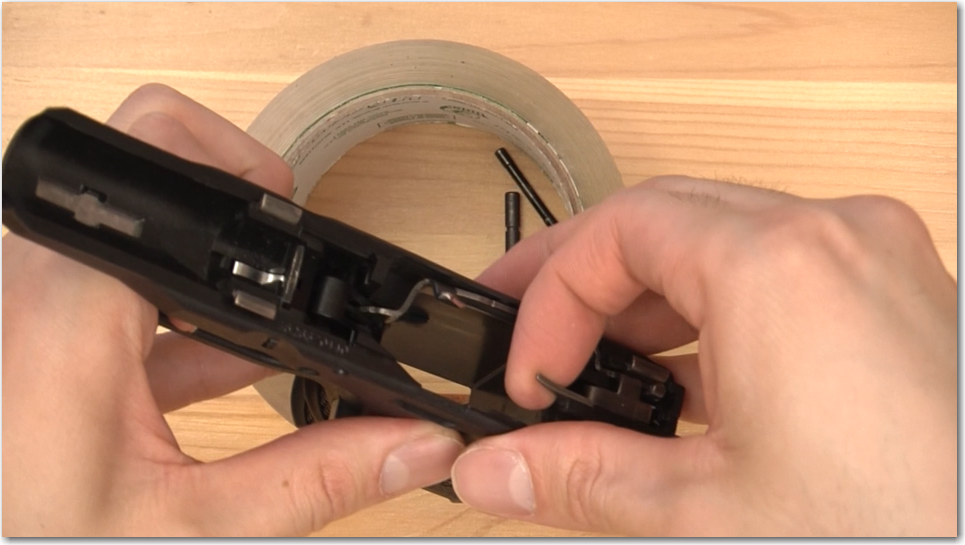
Safety check your Glock and use the takedown lever to reach the frame. If you’ve never done this before, check out the video above.
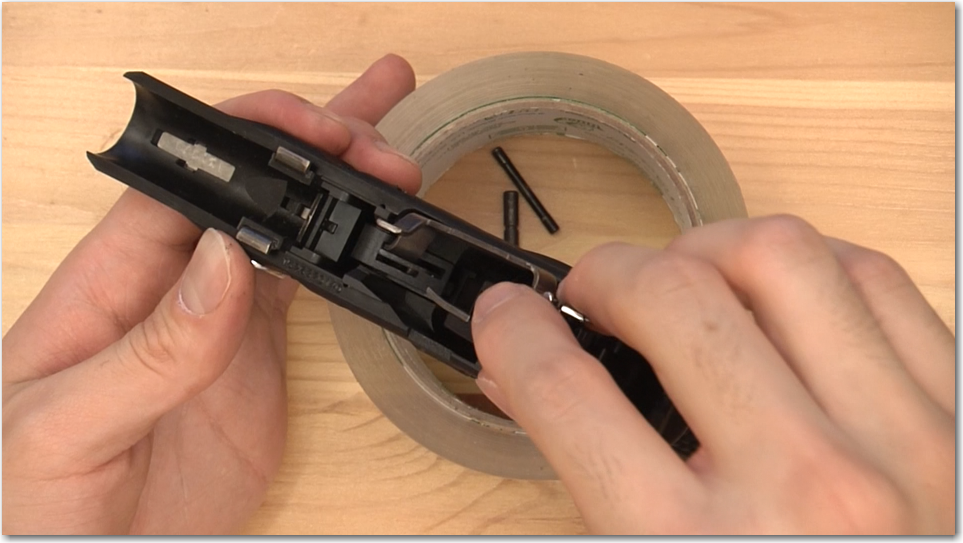
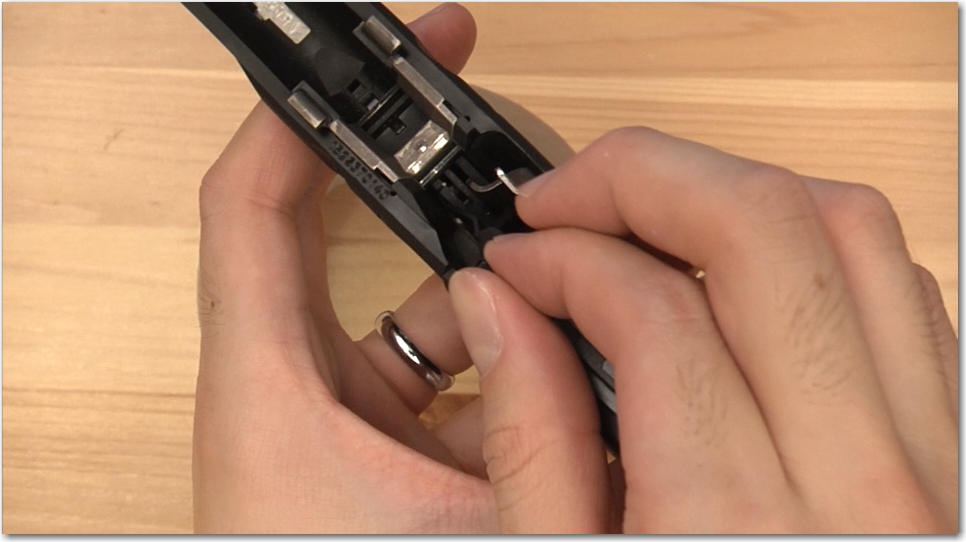
Then you will remove the two pins using the Glock tool. Order matters and an easy way to remember is to look at the small pin on top and remember FIFO (first in, first out). Punch it out first with the tool with the frame on top of the roll of tape. This gives a nice place for the pins to drop.
The larger pin is a little harder to remove without using a special trick. And that special trick is…jiggle the slide stop lever up and down while maintaining pressure on the pin.
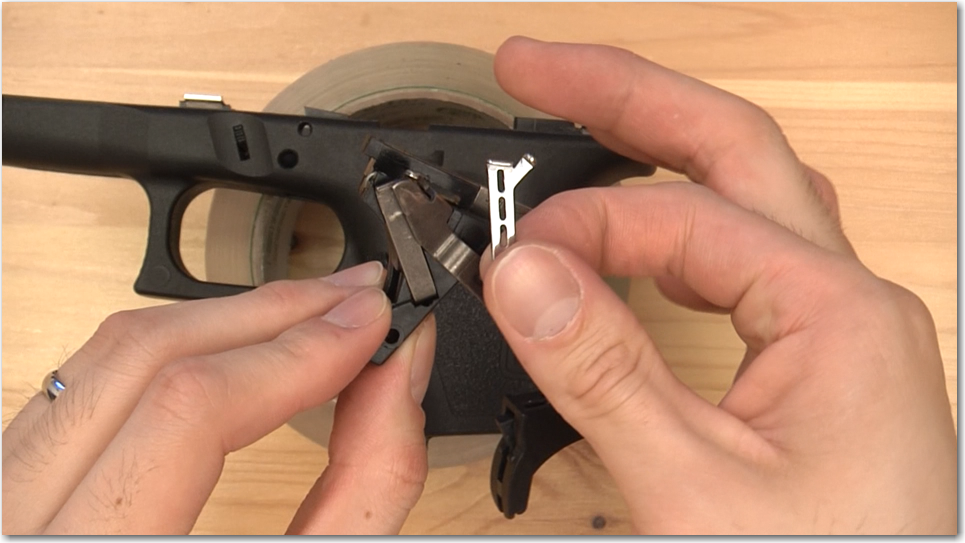
Take out the slide stop lever which was initially held in with the two pins. Also remove the locking block.
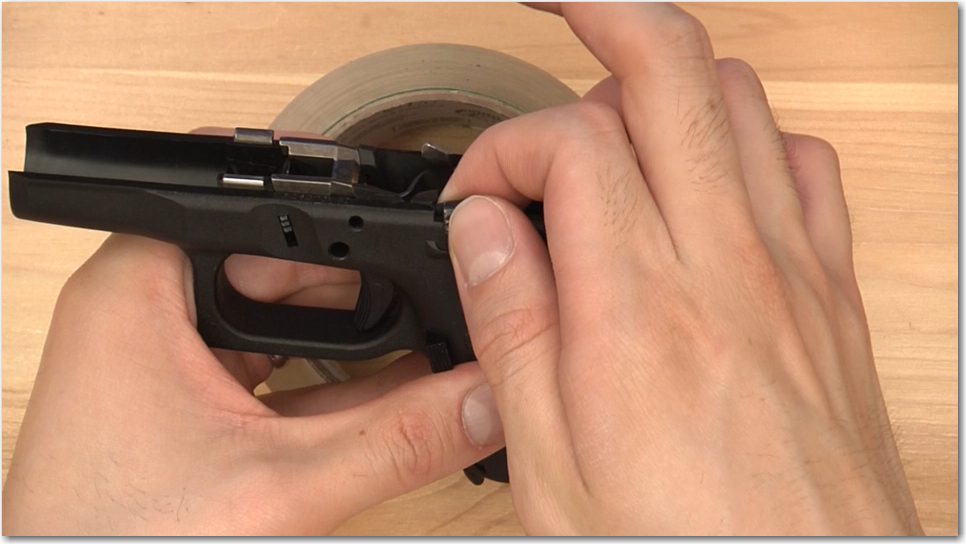
There’s a third pin in the grip area which is made of plastic so you can differentiate it later. Just pop it out with your tool.
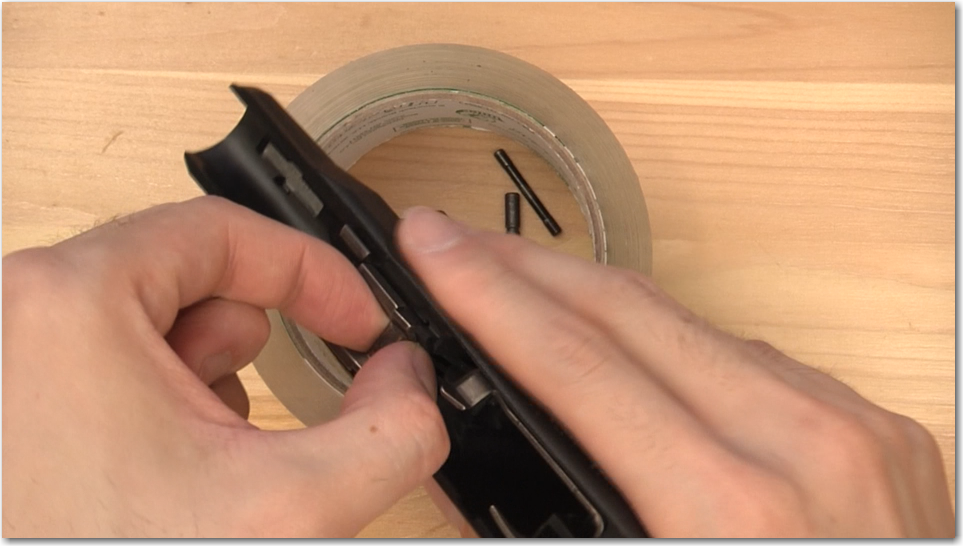
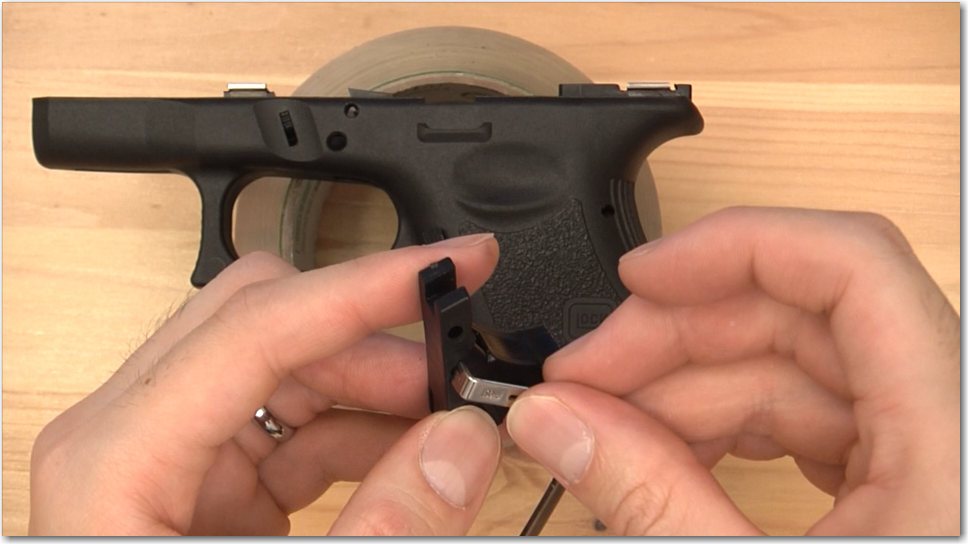
Lift out the trigger bar assembly.
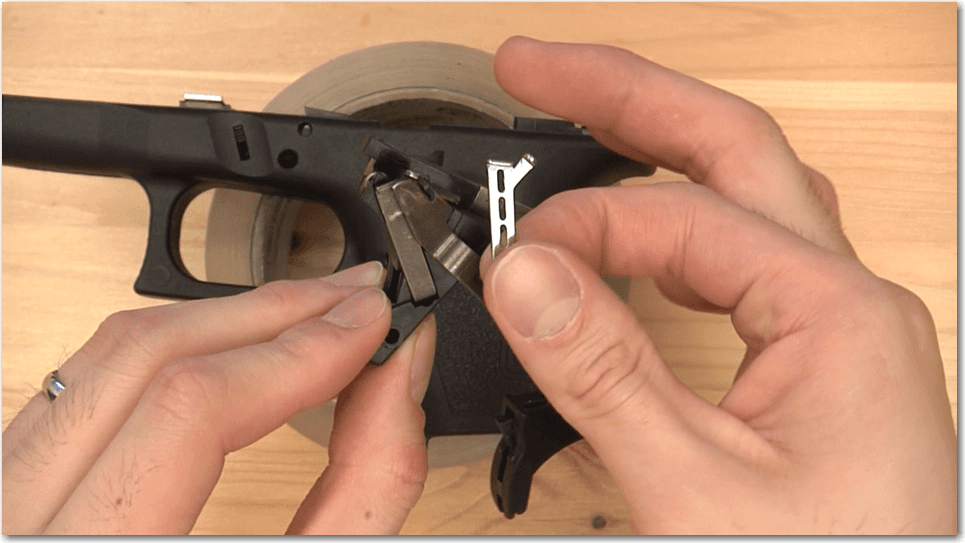
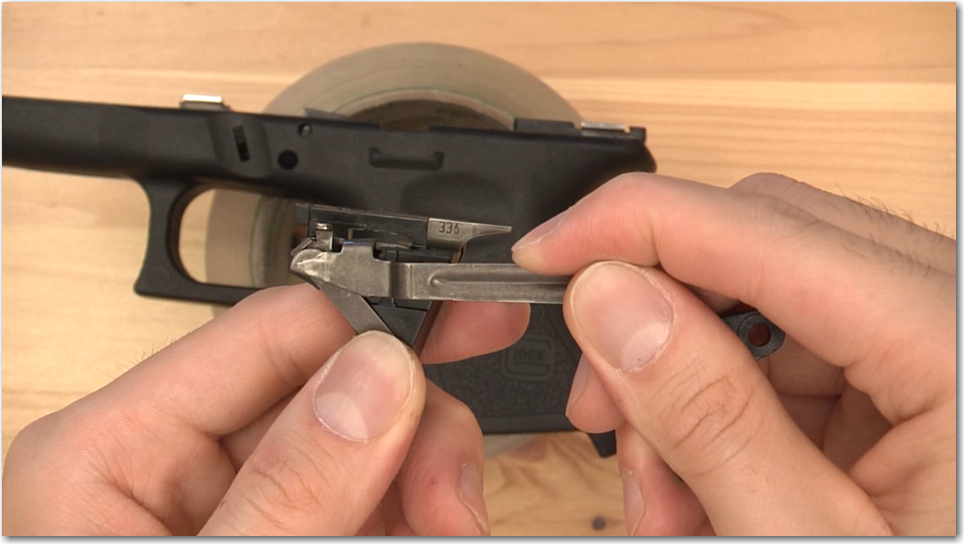
Check out the stock version trigger connector versus the new Ghost 3.5 lb connector. Mmm…shiny…
Match up the cross-shaped section of the trigger bar with the slit in the plastic block. This is one area where it might be easier to watch the video. Then rotate to the left.
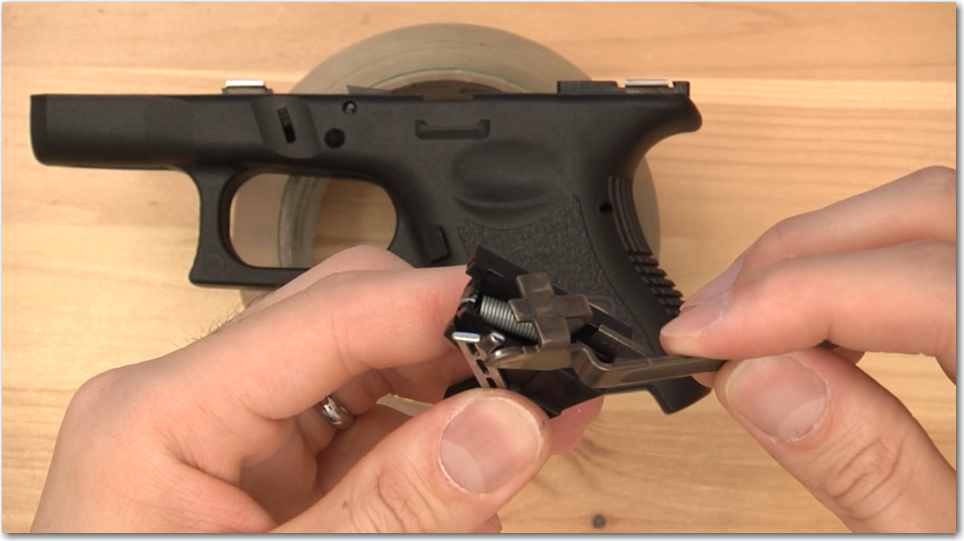
Flip the plastic block over and use a small flathead screwdriver to push out the trigger bar.
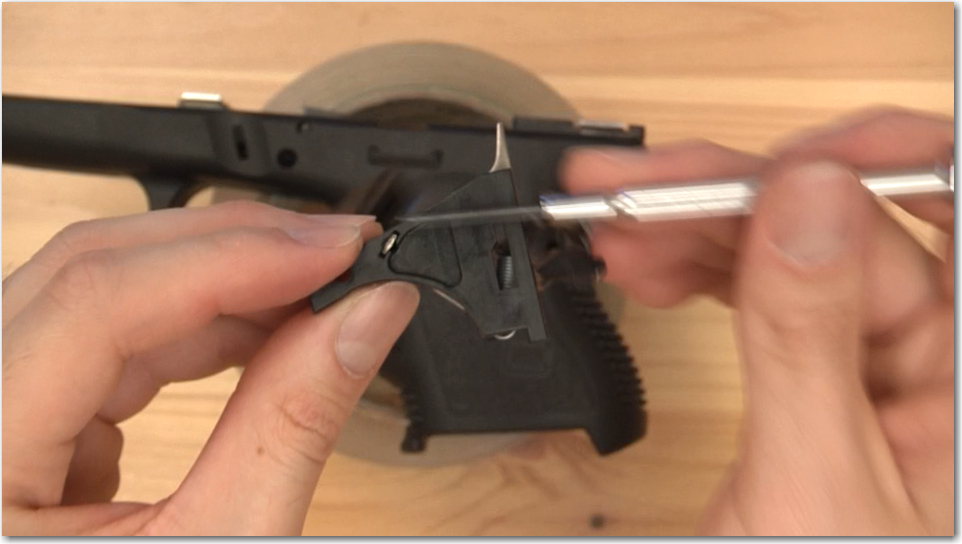
Swap in the new one.
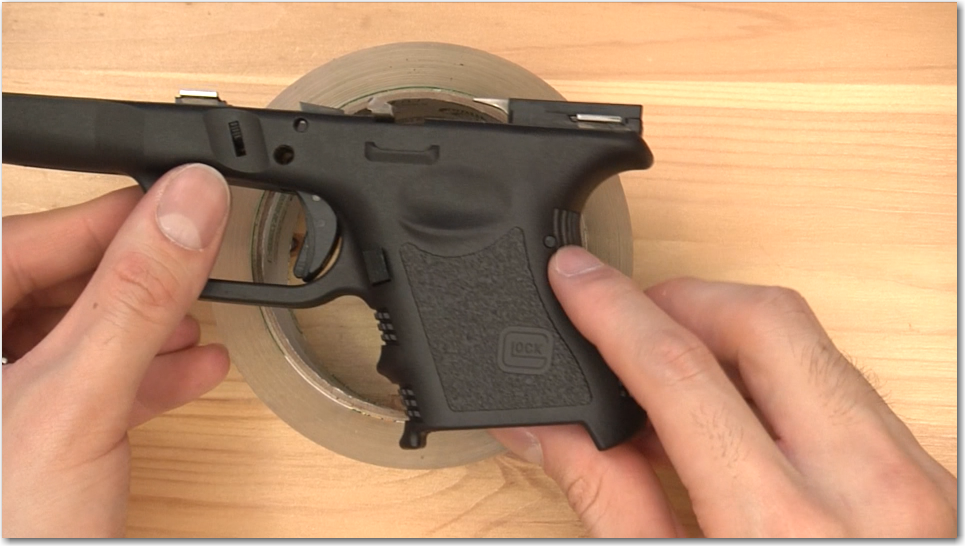
And…you’re done! Now just reassembly which is pretty much the opposite of what you did before. Put the cross back into the slit on the plastic block.
Put the entire trigger assembly back into the frame with the trigger section going in first.
Find the plastic pin and put that back using your finger and Glock tool. Then we’ll move onto the two metal pins. Remember that the smaller of the two is FIFO? So let’s put it back in first. The reason is that the slide lock lever’s spring has to ride underneath it.
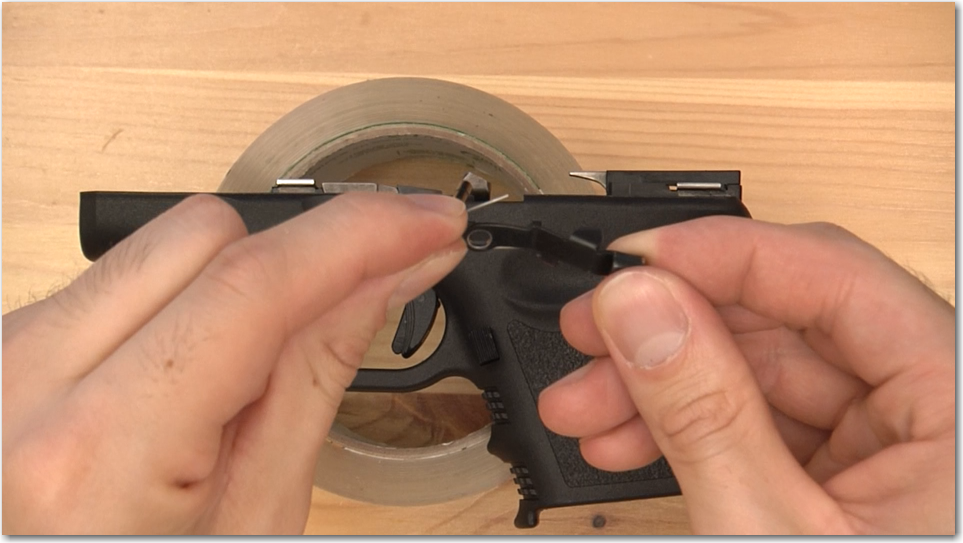
Then place the slide stop lever to the left-most area with the spring running under the small pin.
Again, the large pin is a little hard to put back in without wiggling the slide stop lever.

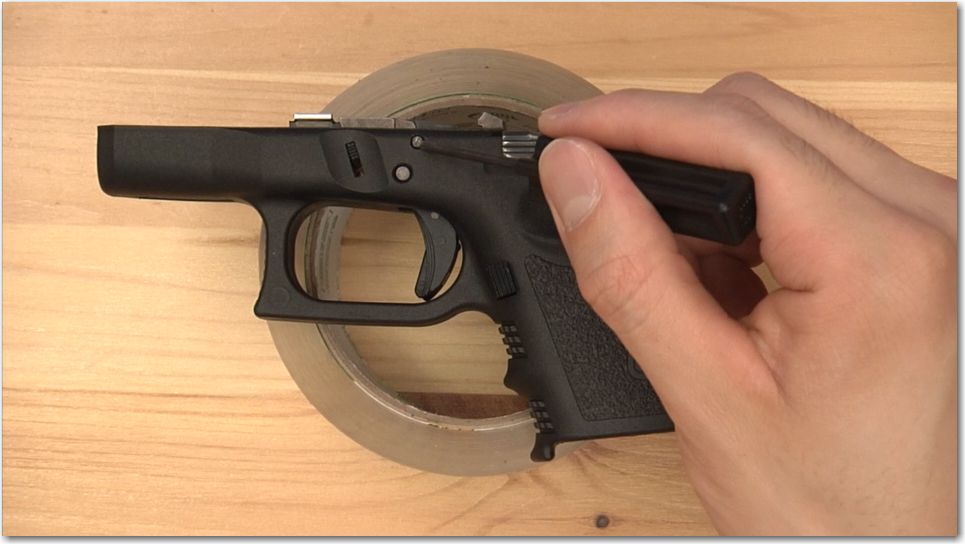
And the frame is done! Put the slide back on and you are ready to rock and roll.
Let me know how your install went and do you feel a difference in the trigger?

Make sure to grab a trigger pull gauge to get the Glock trigger where you want it. See our list of recommendations here!